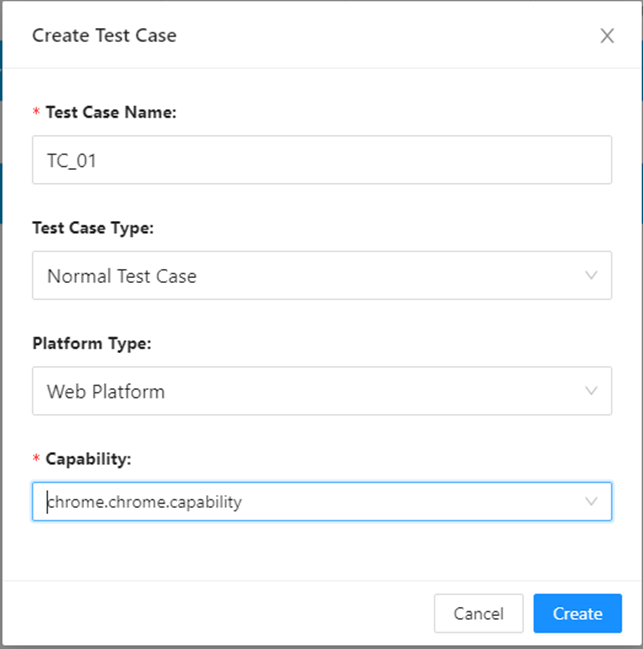
Create new test case
2.5.1. Web App testing
This sample is to demonstrate very fundamental web testing in akaAT Studio.
The application under test (AUT) is the http://google.com and the test scenario as below:
- Open Chrome browser and navigate to the URL: http://google.com
- Input search keyword text: “akaAT Studio – Automation Test Tool”
- Submit form search.
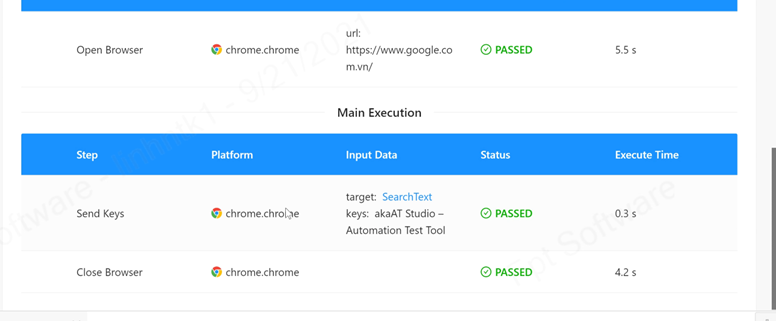
- Verify google searched result pages should be displayed
- Close Chrome browser.
Note:* Before creating an automation test for the web, please update a WebDriver. From the main toolbar, select Tools > Update WebDriver.***
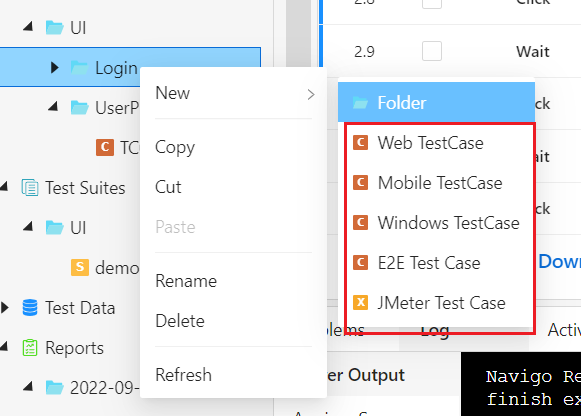
- Step 1: Right click on Test Cases > New > Web Test Case. The textbox under Test Cases section will be displayed. Provide the name for the new test case, then click Enter.
After that, the newly created test case will display under Test Cases section.

- Step 2: Search “Open Browser” step to add to the test case
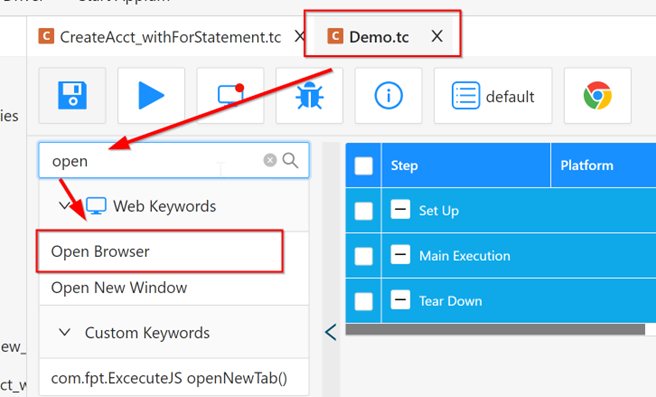
- Drag and drop “Open Browser” step to the test case
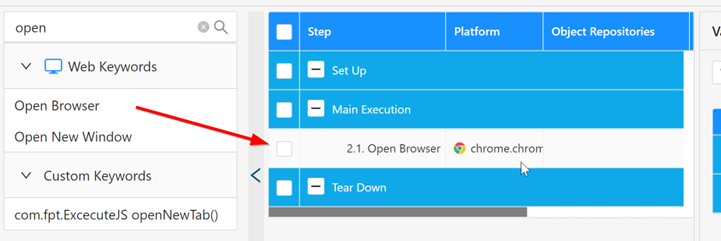
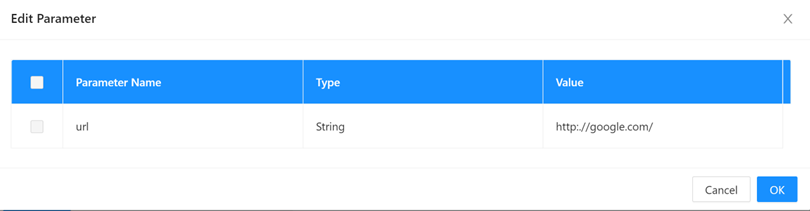
- Step 3: Click on [Input], the Data Input pop-up will be displayed, then input value for URL parameter of Open Browser step.
- Step 4: Search “Send Keys” step to add to the test case
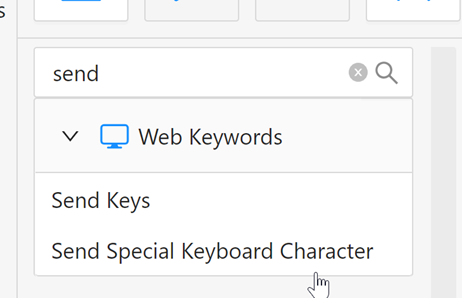
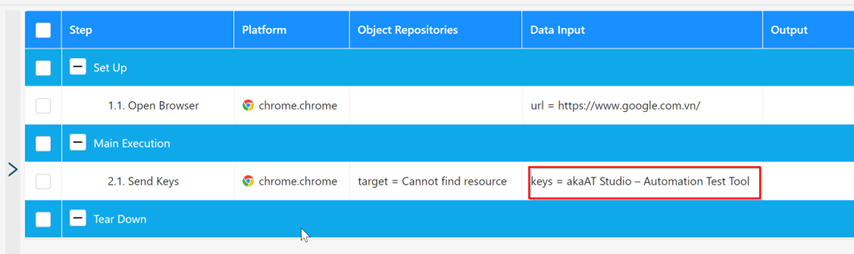
- Drag and drop the “Send Keys” step to the test case. This action enters akaAT Studio – Automation Test Tool in the Search text box.
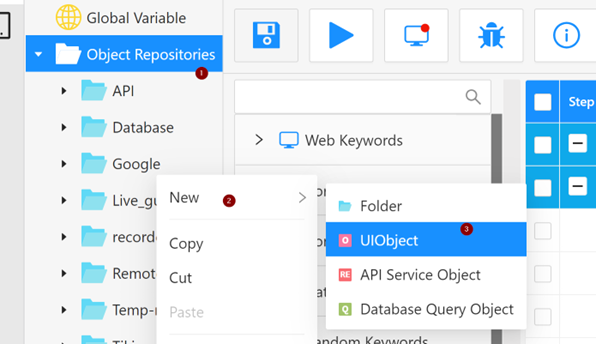
- Step 5: Create Object Repository for Send Keys step
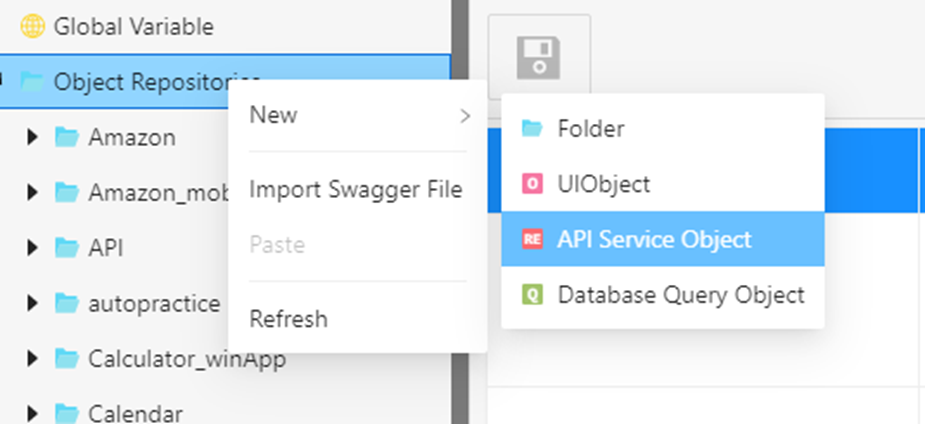
- Create Object Repository
- Select Object Repository from menu. Click the right mouse on “New”. User can create Folder inside Repository or create Object directly
- After Creating a new Object, the Object detail screen displays 9 available locators.
- Input Locator Value is q for the Name locator strategy
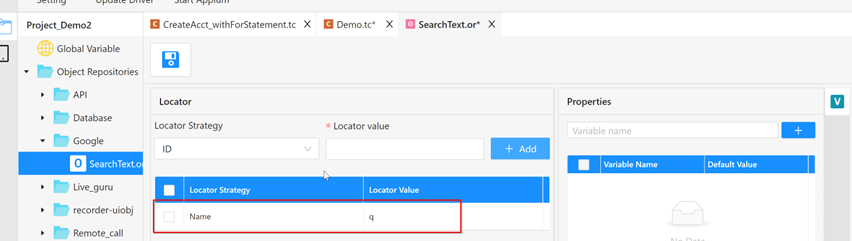
- After input corresponding Locator Value, click on [Save] button to save this newly created Object
- Add Object Repository to the Set Text step
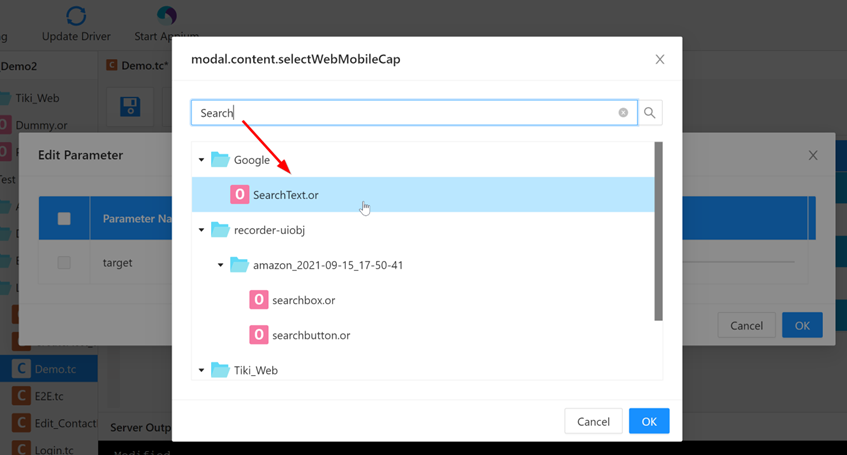
- Click on the Object Repository cell
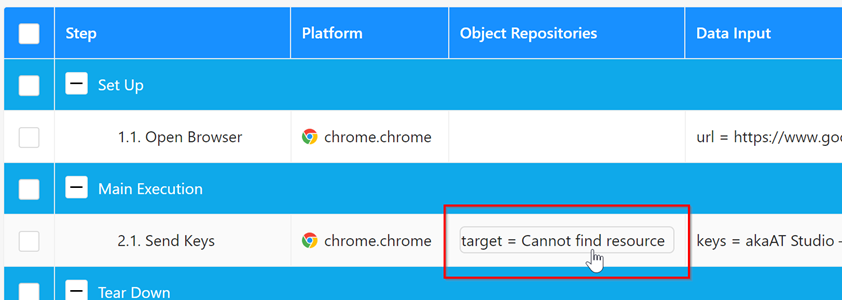
- The UI Object screen will display a list of available locators. Click to the corresponding Object Repository which you want to input text, after that click on the [OK] button.

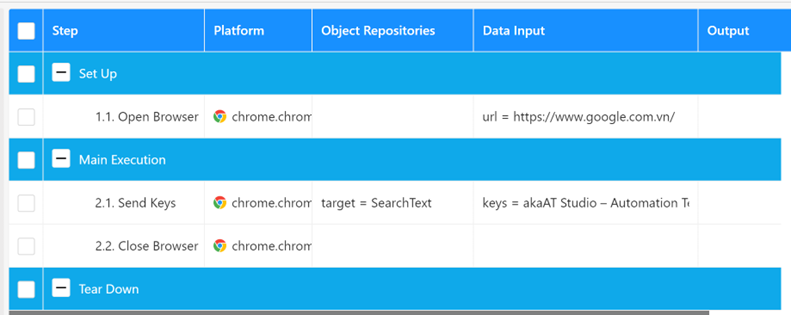
- Step 6: Click on the “Input” cell to input text
- Step 7: Search “Quit Browser” step to add to the test case
- Drag and drop “Quit Browser” step to the test case. This action will close the current browser.
- Step 8: Click on the
 icon to execute the test case
2.5.2. Mobile Testing
2.5.2.1. Android Mobile Testing
Configuration
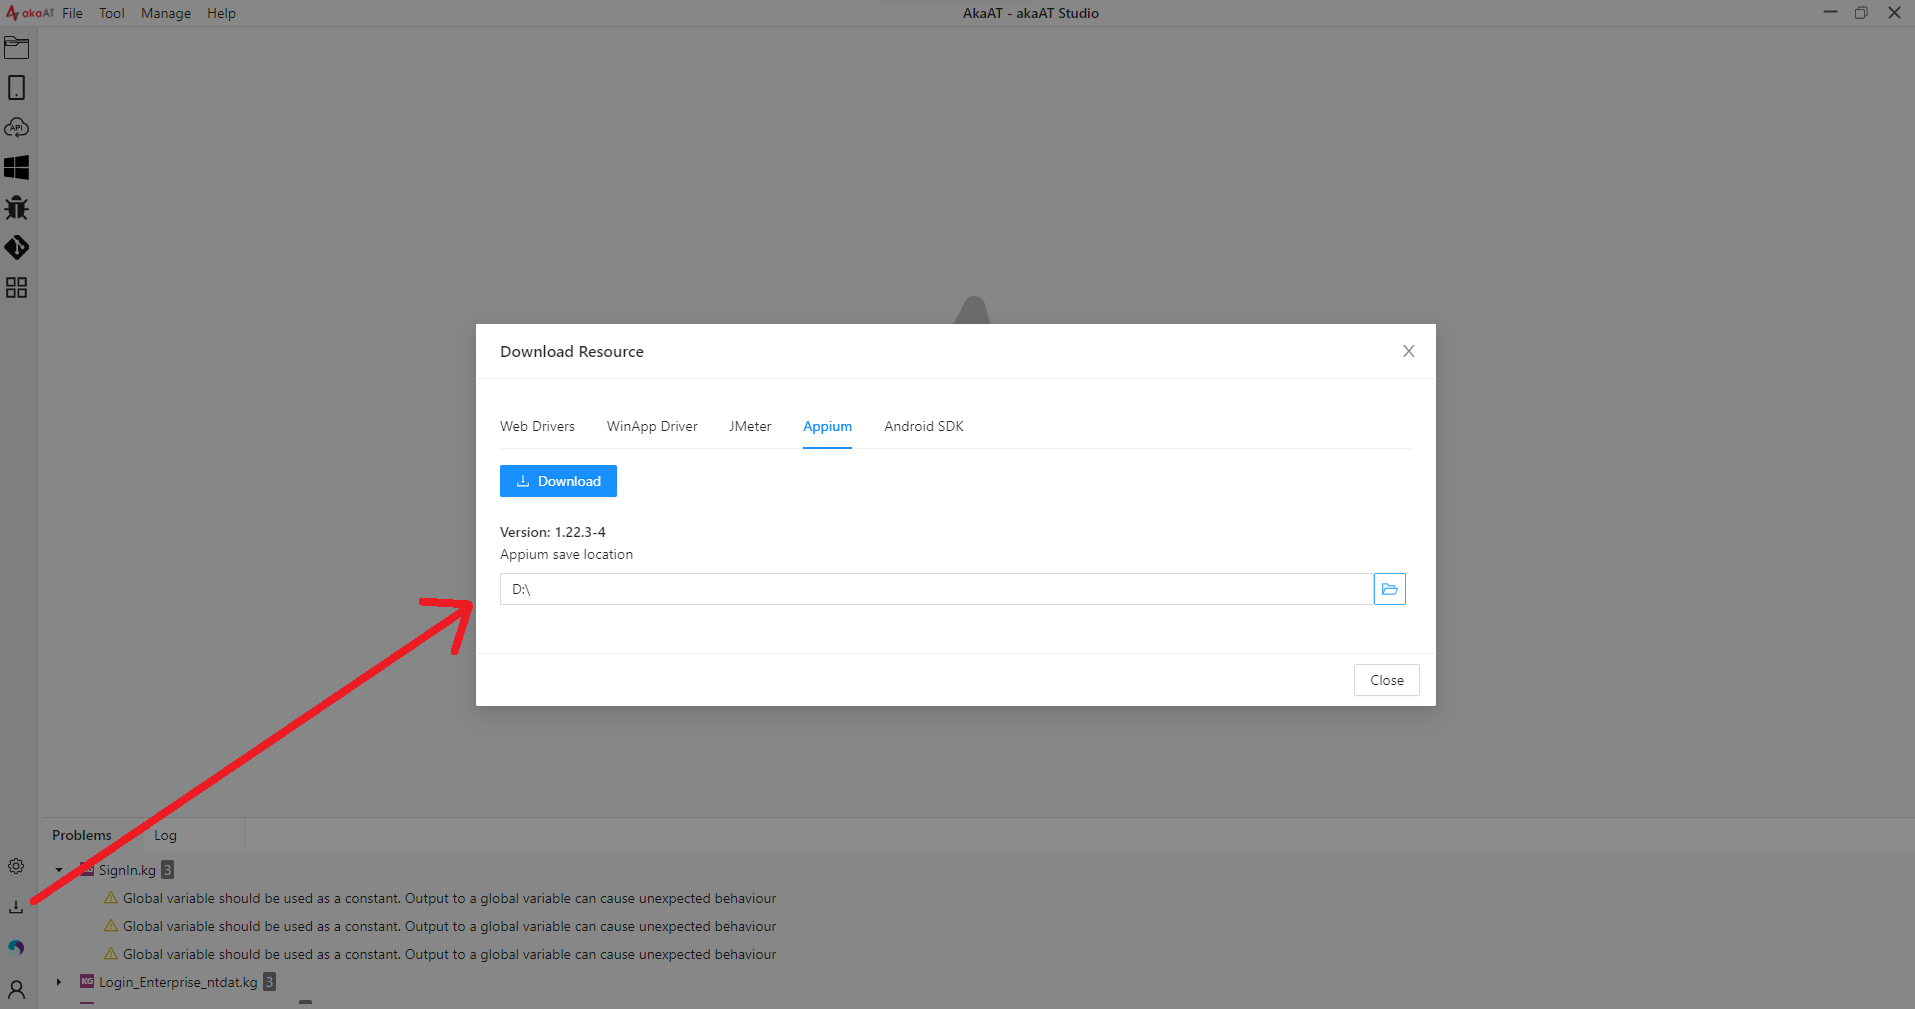
- Step 1: Install Appium
Click to icon [Update] then click tab [Appium] to download Appium
-
Step 2: Please see section 2.23 Connect Android Virtual Device for further guideline for:
-
Install Android SDK
-
Create and connect a virtual device
-
-
Note: If you are using Real Android device => Set up your device
- Go to Settings > Developer options
- Connect your Android phone to your computer via a USB cable. Confirm if prompted dialog to accept/trust the device.
- In the Developer Options on your mobile user interface, enable:
+ USB debugging – Debug mode when USB is connected
+ Install via USB – Allow installing apps via USB
+ USB debugging (Security Setting) – Allow granting permissions and simulating input via USB debugging
Create manual test case
- Step 1: Open application on device

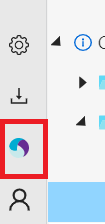
- Step 2: Click “Appium” on taskbar to Start Appium
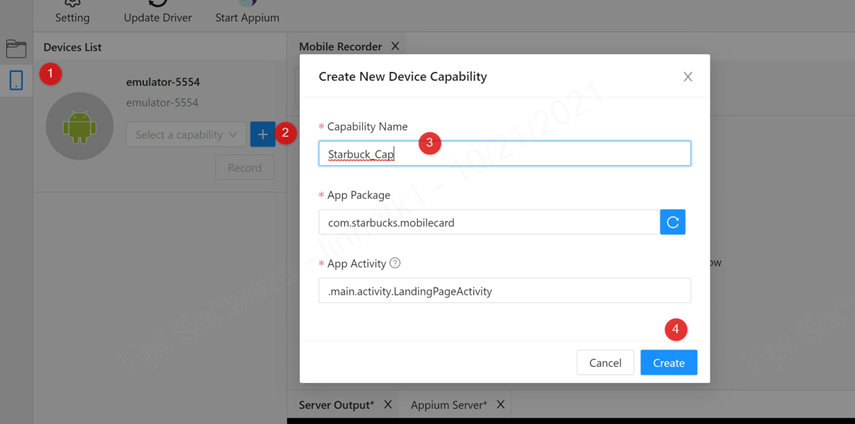
- Step 3: Create Mobile Capability for Testing application
- Step 4: Click Test Case > New.
- Input Test case information
- Step 5: Create new UI Object
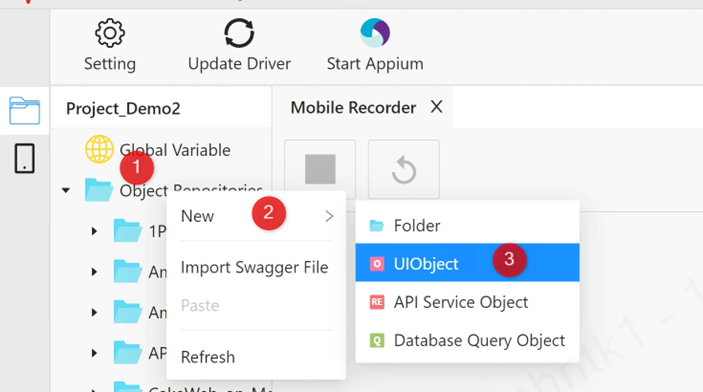
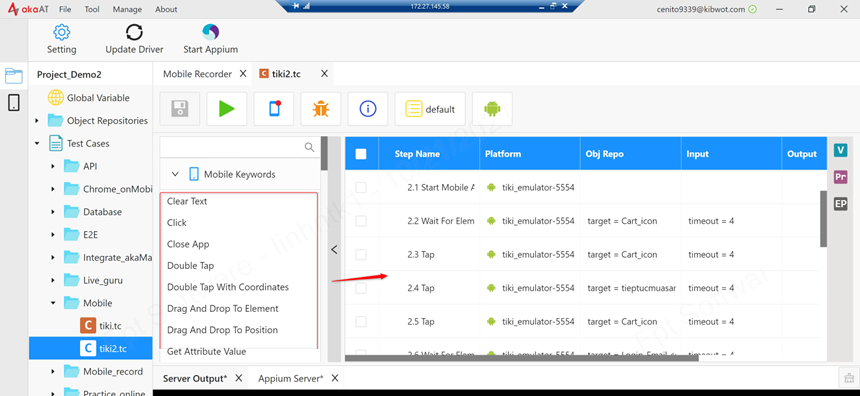
- Step 6: Back to Test case screen, select Mobile keywords from Keyword List.
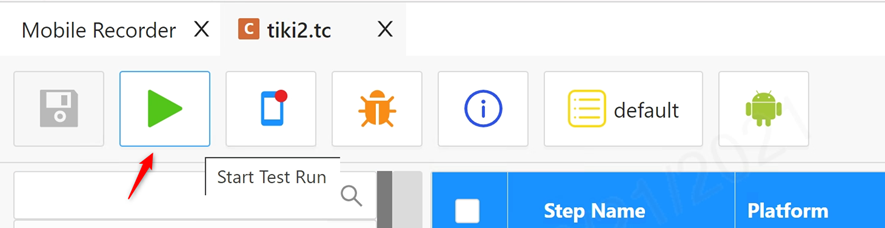
- Step 7: Click on Run icon
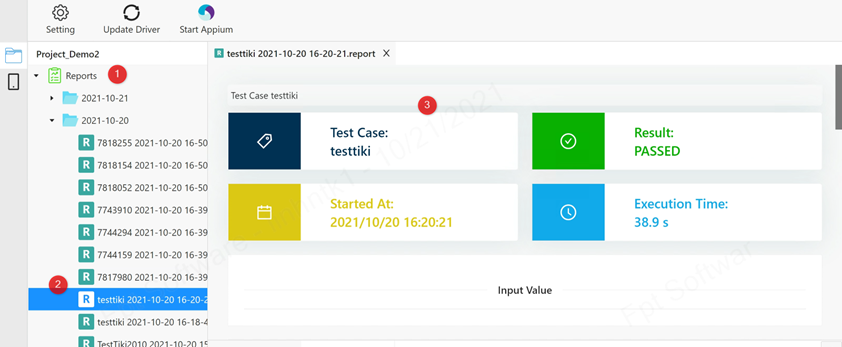
- Step 8: Review report in Report section.
2.5.2.2. IOS Mobile Testing
Install Xcode
- Step 1: Install Xcode Desktop latest version.
- Step 2: Install Xcode command line (download .dmg or use Command: xcode-select --install)
- Step 3: Check xcode command line version: gcc –version.
Install Appium
- Step 1: Install Homebrew by command line: /bin/bash -c "$(curl -fsSL https://raw.githubusercontent.com/Homebrew/install/HEAD/install.sh)"
- Step 2: Install Node: brew install npm
- Step 3: Install Carthage: npm install carthage
- Step 4: Install Appium: npm install –g Appium
- Step 5: Install Appium Command line: brew install -g Appium
- Step 6: Install Appium Doctor: npm install -g appium-doctor
- Step 7: Install lib: brew install libimobiledevice –HEAD
- Step 8: Install iOS deploy lib: npm install -g ios-deploy
- Step 9: Download Appium latest desktop version
You should click and download the “.dgm” file.
For example, “Appium-mac-1.20.2.dmg“. When the download finishes, double click the .dgm file and drag and drop the Appium into Applications.
Set WebDriverAgentRunner
- Step 1: Open terminal and go to folder location:
cd/Applications/Appium.app/Contents/Resources/app/node_modules/appium/node_modules/appiumxcuitestdriver/WebDriverAgent
- Step 2: Run command in terminal to download missing dependency:
+ mkdir -p Resources/WebDriverAgent.bundle
+ sh ./Scripts/bootstrap.sh
- Step 3: Open WebDriverAgent Runner project present in Appium installation using Xcode:
/Applications/Appium.app/Contents/Resources/app/node_modules/appium/node_modules/appiumxcuitestdriver/WebDriverAgent.
- Step 4: Select IntegrationApp > choose Device

- Step 5: Go to Signing & Capabilities:
+ Select checkbox “Automatically manage signing”
+ On Team: Sign in your Cloud username/Password.
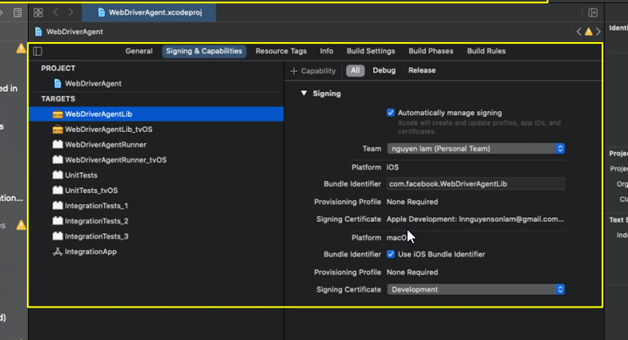
- Step 6: Click on [Run] button to start Simulate device

2.5.2.3. Tips
Auto start emulator Android
Config cap for expected device you want to start when running testcase
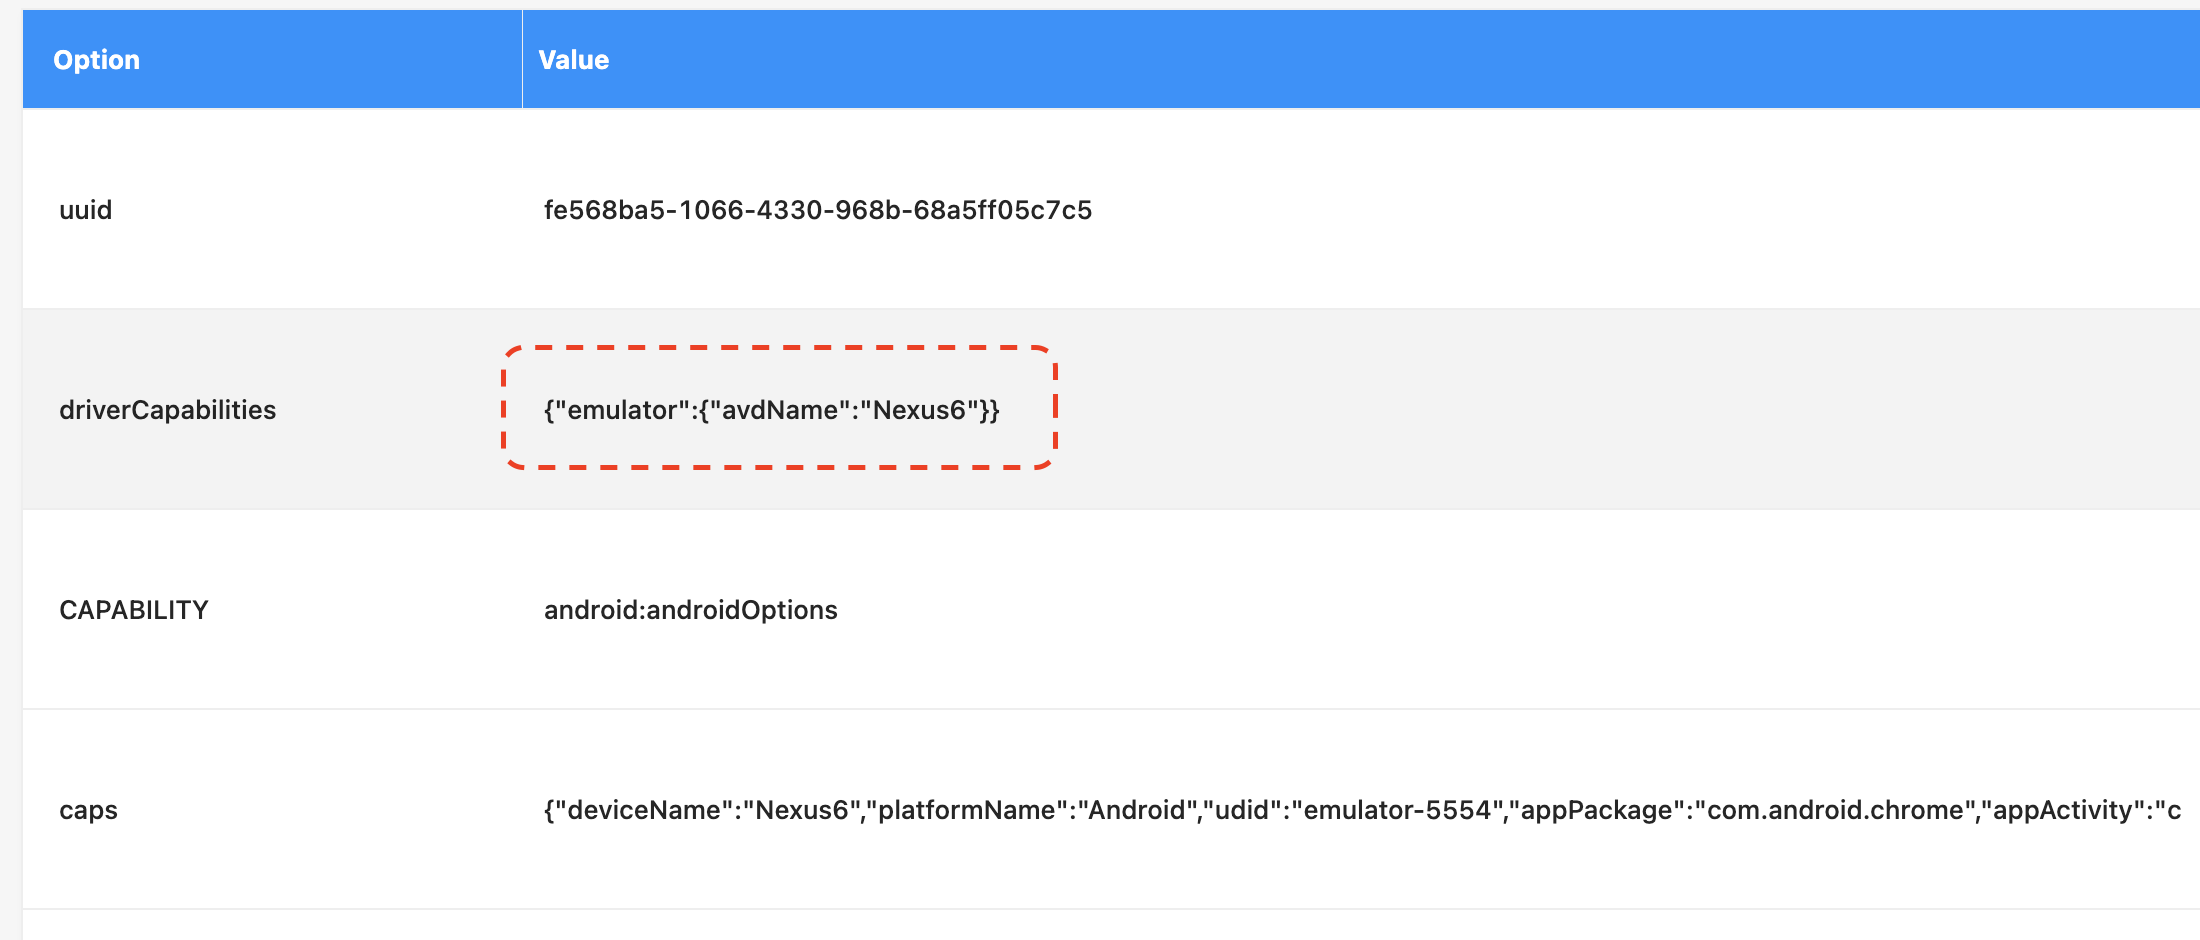
In result, when you start a testcase using above cap, a new device (which defined in cap above) would be started automatically.
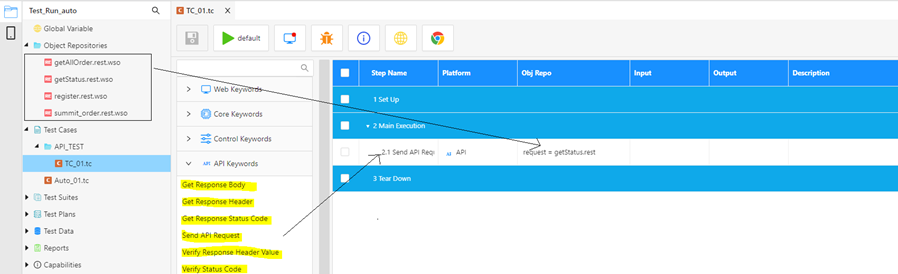
2.5.3. API Testing
- Step 1: Create Object for API requests
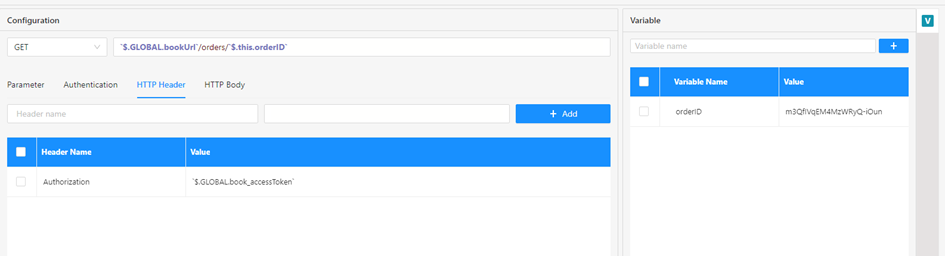
- Step 2: Input information for request
- Select the request method
- Input request URL
- Input Parameter, Authentication, HTTP Header, HTTP Body (if any)
- Click on [Run] button to send the request (This step will help you to check the request’s response first before calling it to the test case).
Note: Please refer to 2.6.4 to know more about elements on API Object.
- Step 3: Create an API test case
Note: You can choose any type of platform for API testing.
- Step 4: Add keyword in API Keywords Catalog and choose keyword to use.
2.5.4. Window App Testing
Step 1: Download WinApp Driver
-
Click
 icon then Download source popup display.
 -
Click WinApp Driver tab then click Download button
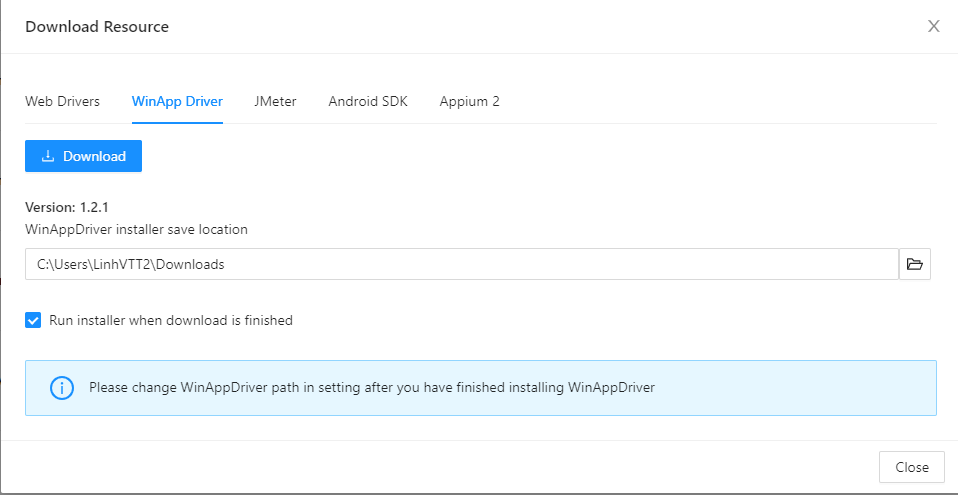
- After download successfully, the Windows Application Driver Setup popup show be displayed and required installed.
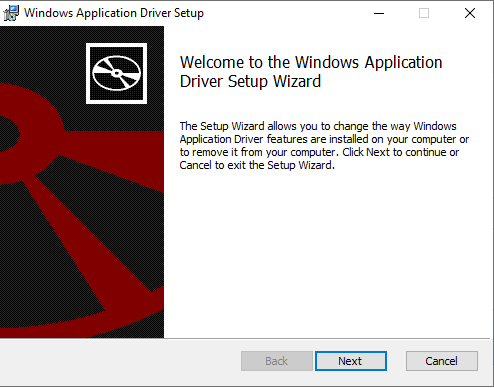
- Run Installer to install WinApp Driver.
Note: After you install akaAT Studio tool successfully, you only need install WinApp Driver only once time
Step 2: Setting WindApp Driver Path in akaAT Studio
Note: if version WinApp Driver is 1.2.1, driver path is set in Program File (x86).

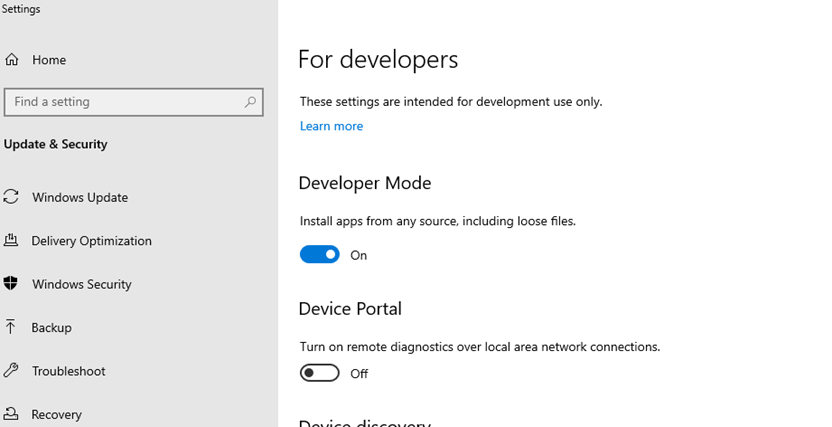
Step 3: Set Developer Mode on your PC.
Step 4: Create Windows Capability
- Click Window record icon.
![]()
- Click + button on the Windows recorder screen to create new window capability.Input capability name then search and select WinAppID in the dropdown options.
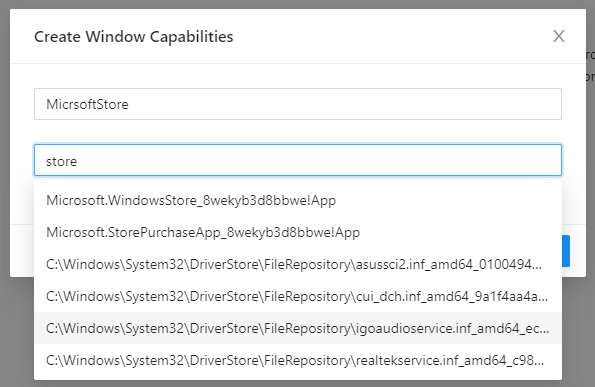

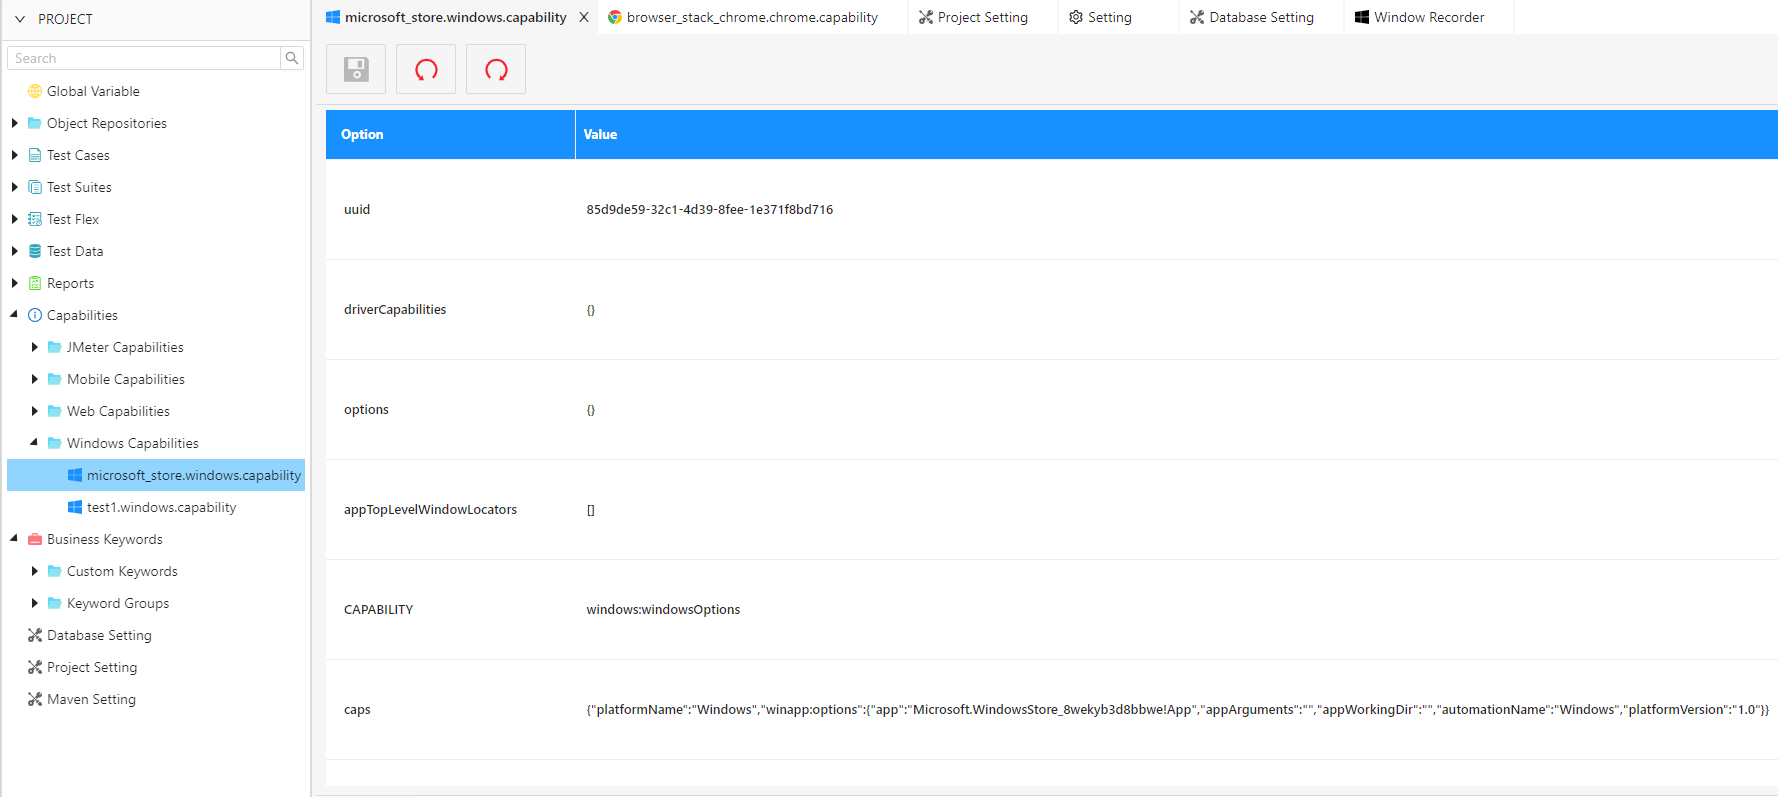
- Click OK button to create new Windows capability. Go to Capabilities folder to then select capability at Step 2 to see cap information.
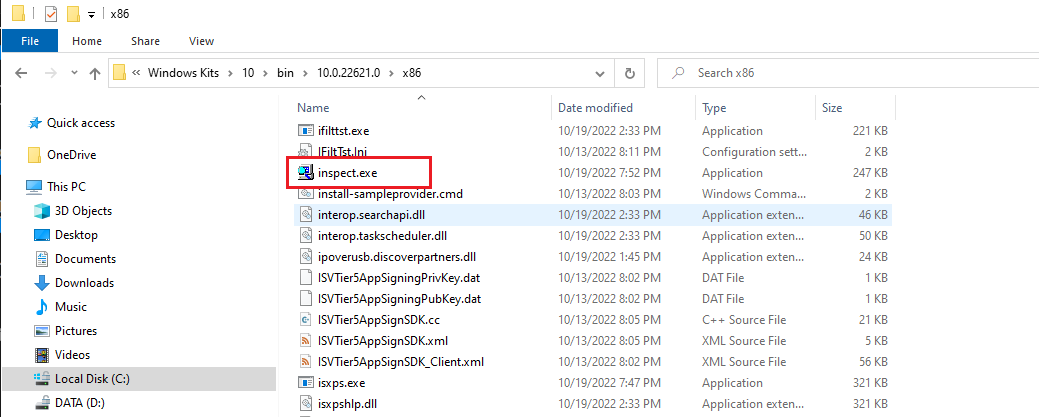
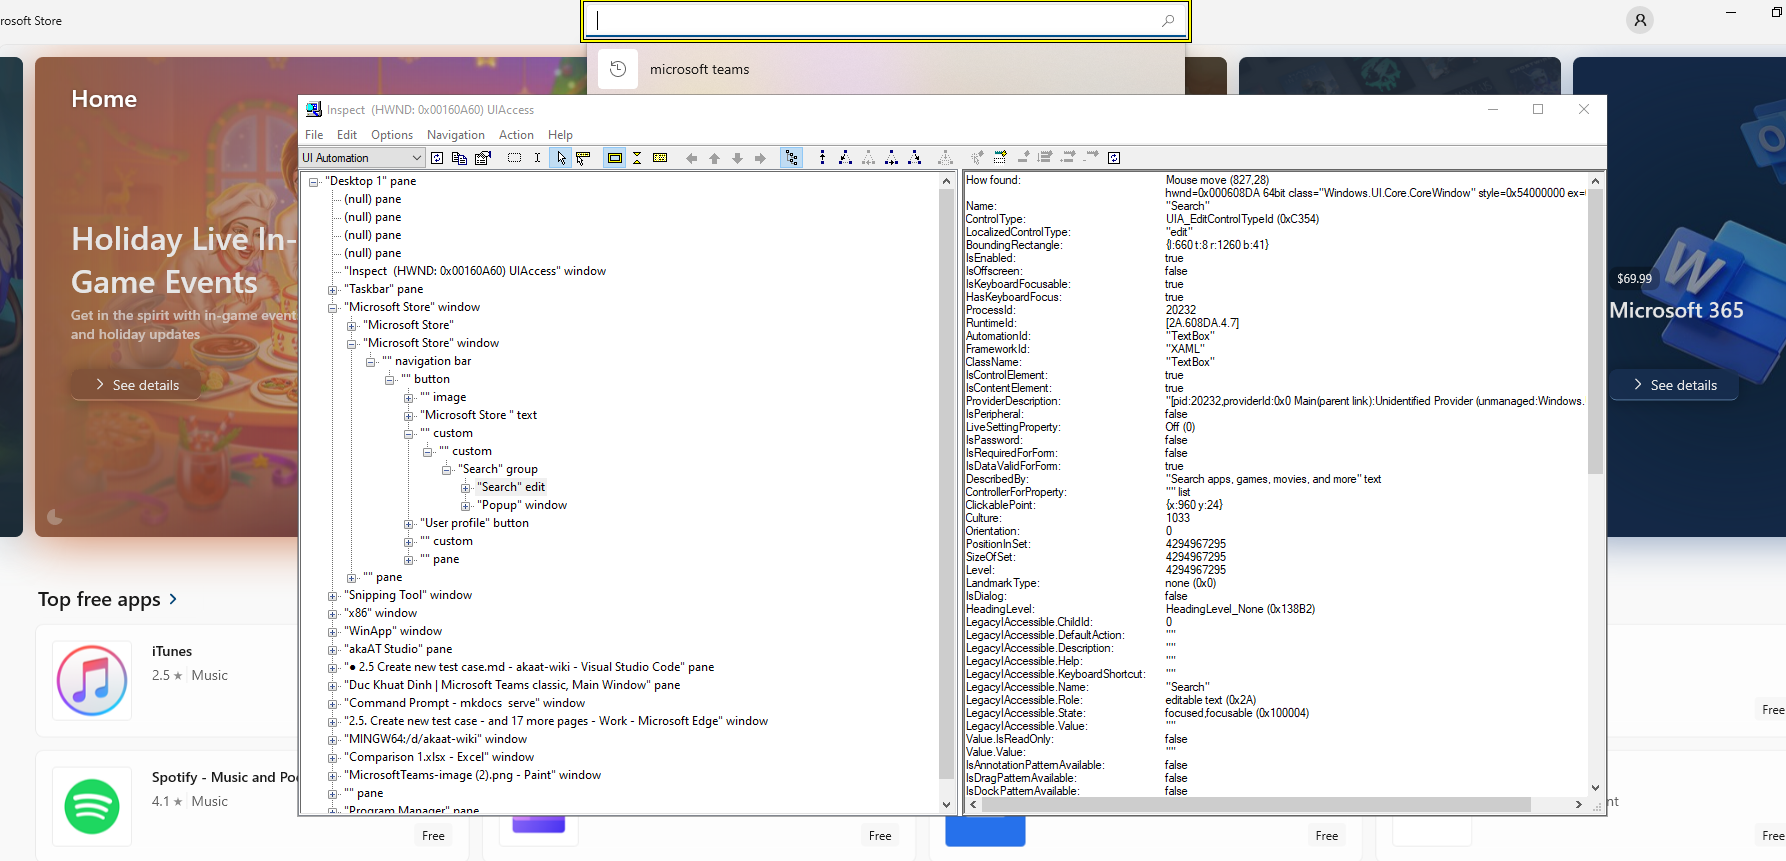
Step 5: Run inspect.exe to find WinApp elements
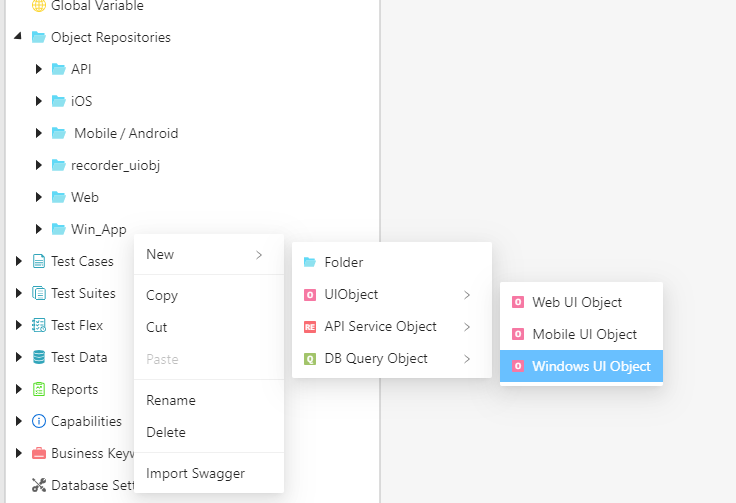
Step 6: Create Windows Object Repository
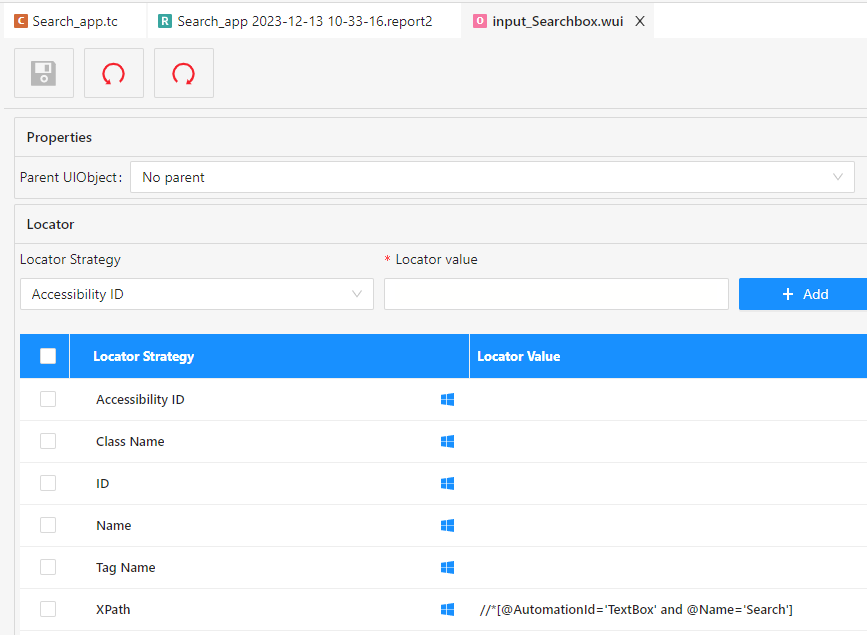
- Create new Windows Object
- Use inspect.exe app to get XPath of element
- Paste location to object in akaStudio
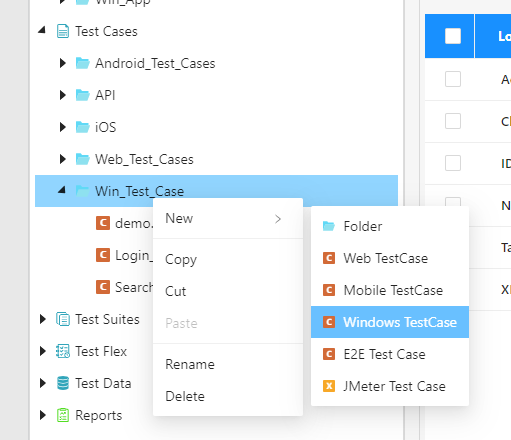
Step 7: Create Windows Test Case as normally
- Create new Windows Test Case.
- Drag and drop keyword to add test step.
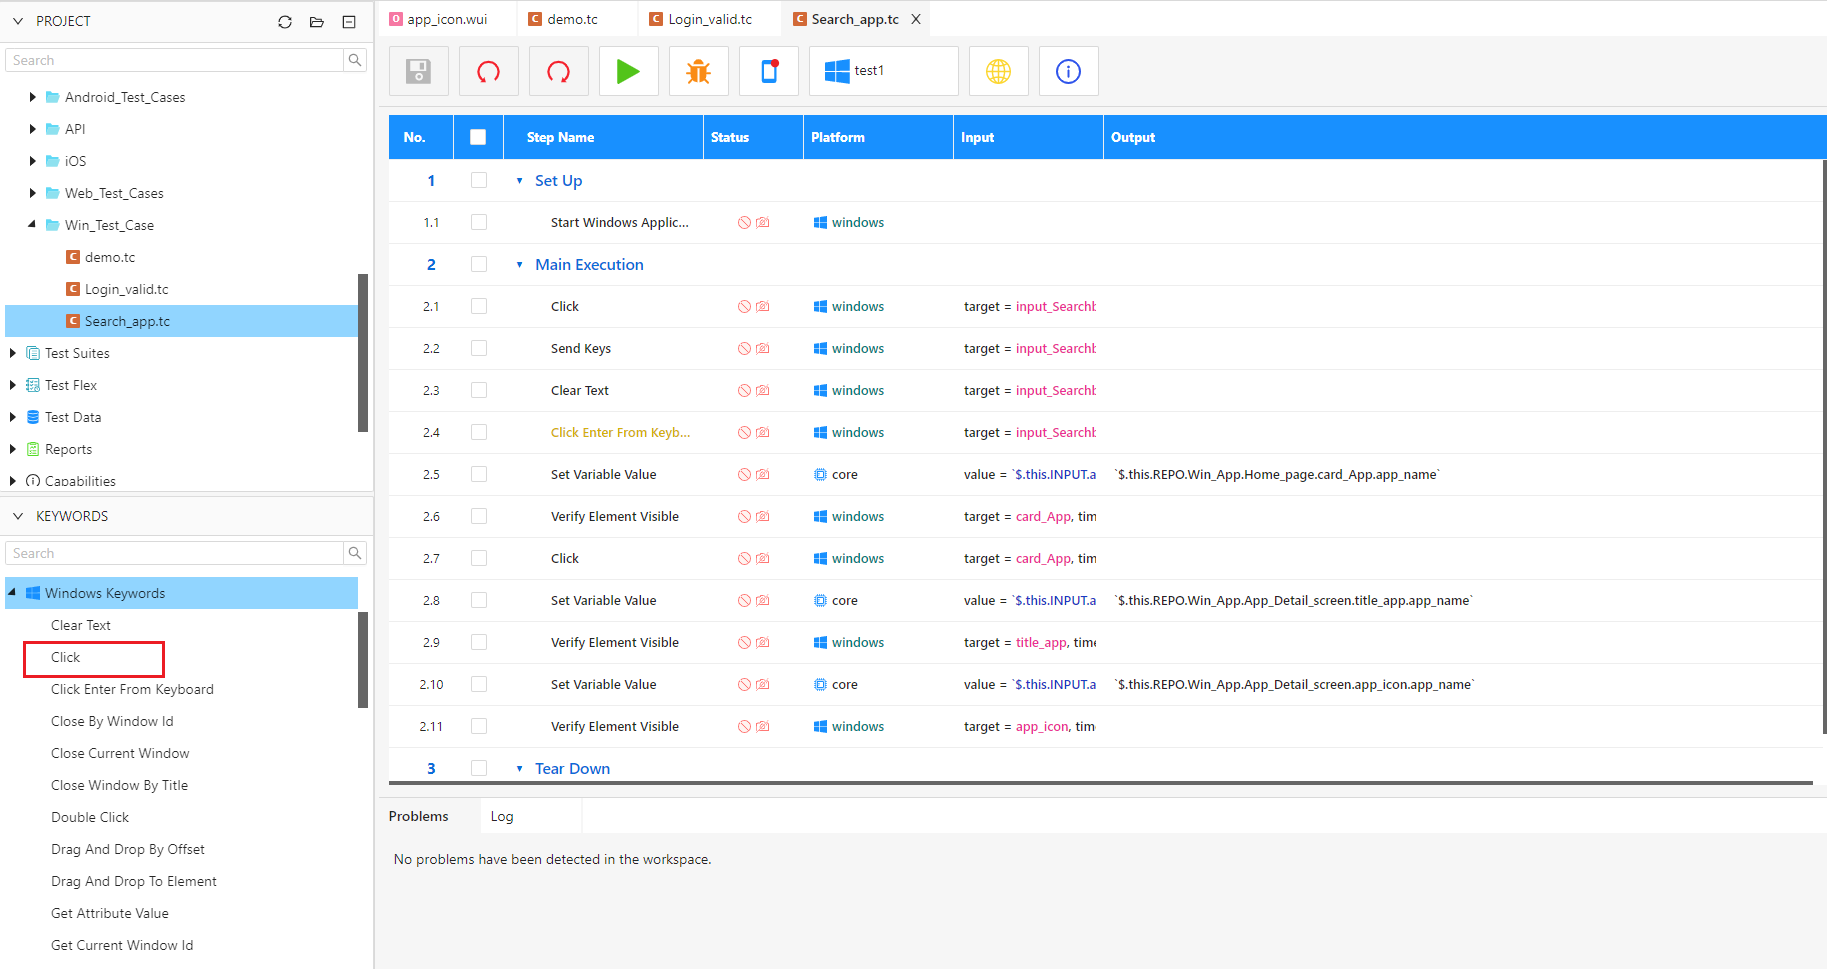
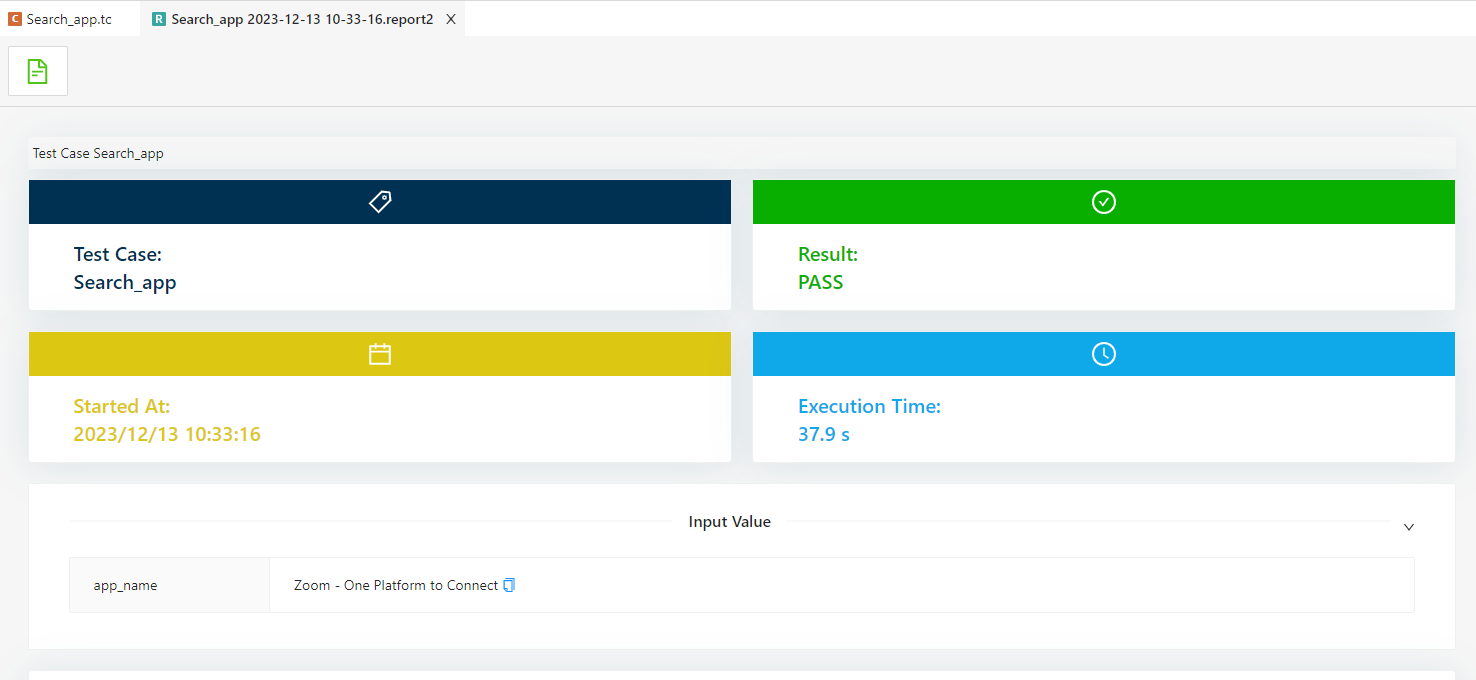
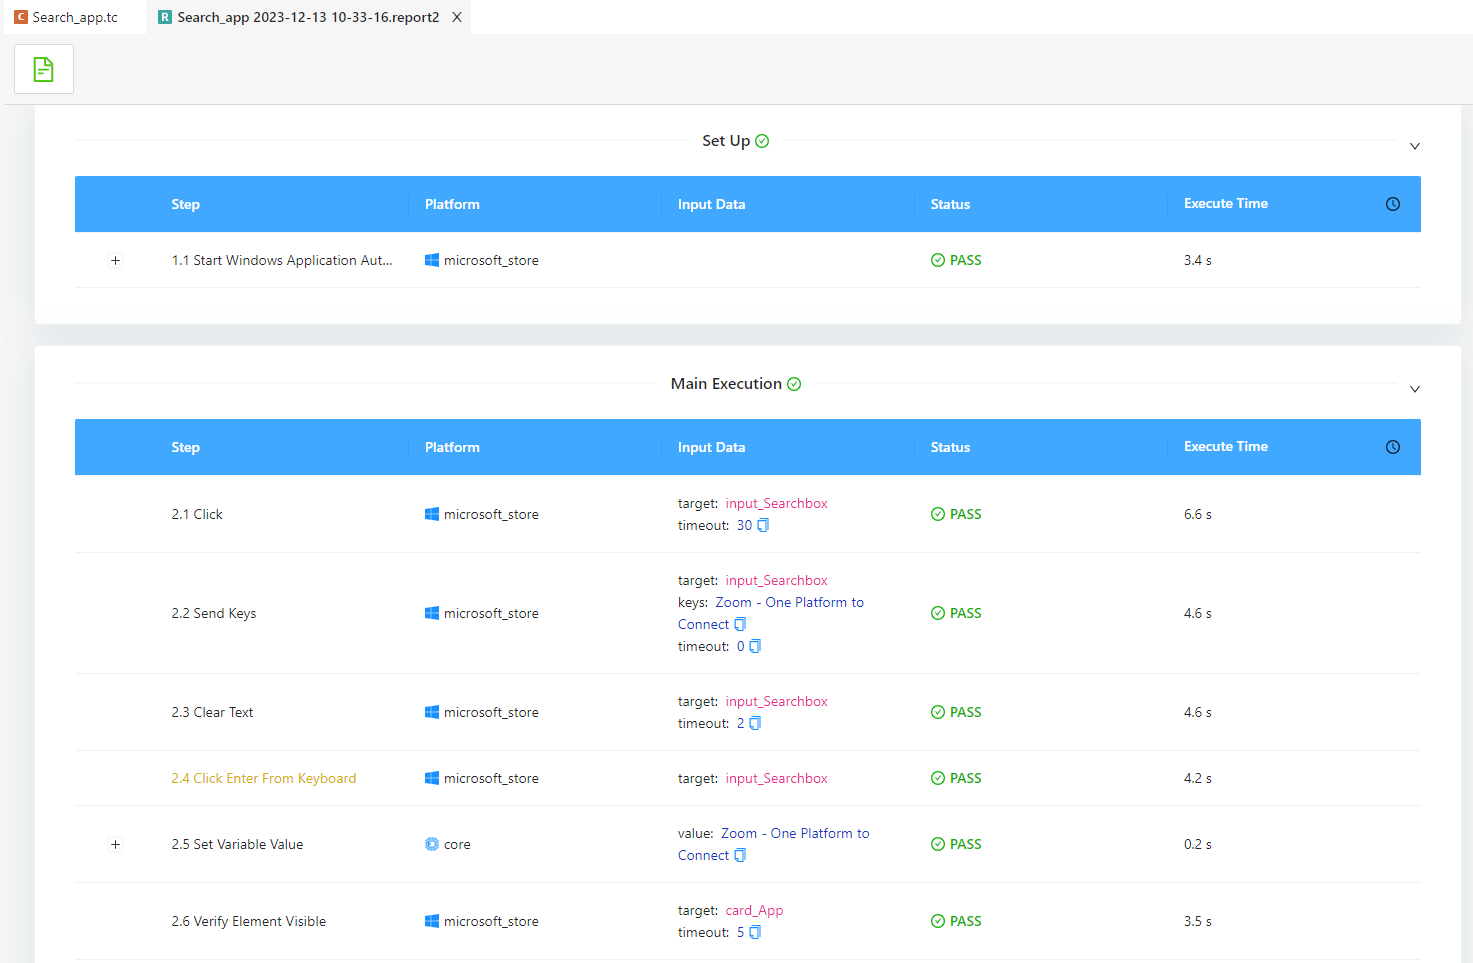
Step 8: Run test case and view test report
-
Click on the
 button to run test script.
 -
View test report.
2.5.5. Database Testing
Before creating an Object and a Database Test script, you must have a database connector in the library and Database setting.
2.5.5.1. Import database connector in library
- Step 1: Go to the url: https://mvnrepository.com/ then search library. (Refer: 2.17. Import library using maven pom.xml)
+ If it’s MySQL database, Search for "mysql-connector-java"
https://mvnrepository.com/artifact/com.mysql/mysql-connector-j/8.0.31
+ If it’s Oracle database, Search for "oracle Ojdbc" https://mvnrepository.com/artifact/com.oracle.database.jdbc/ojdbc10
- Step 2: Copy dependency of above selected database connector
- Step 3: Go to akaAT Studio > Business Keywords > Custom Keywords > pom.xml
- Step 4: Paste dependecy to pom.xml
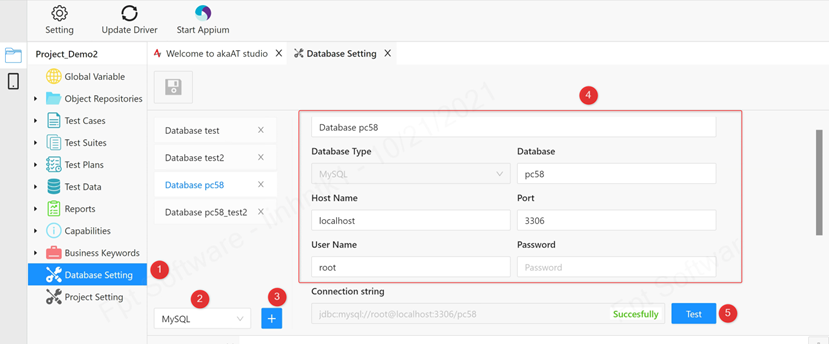
2.5.5.2. Config database setting
- Step 1: Click on “Database Setting”
- Step 2: Select Database Type
- Step 3: Click on [ + ] to create new config
- Step 4: Input necessary information
- Step 5: Click on [Test Connection] button to check
- Step 6: If Test Connection marked Successful => Click on [Save] button to save current Database configuration
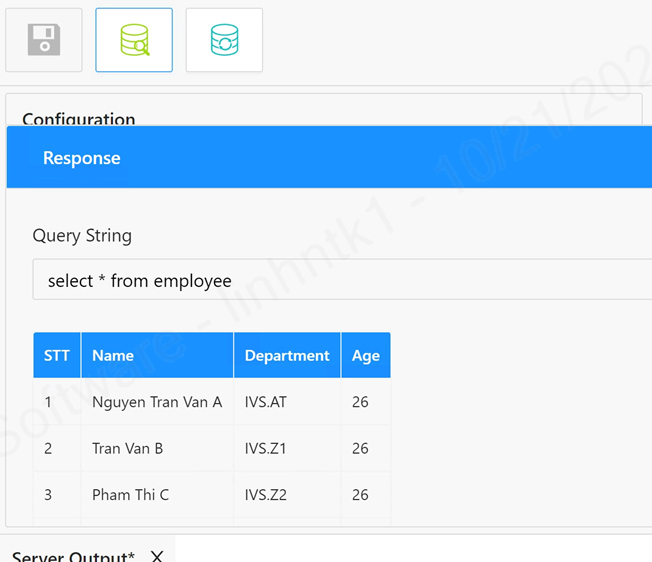
- Step 7: Create “SQL Query Object”
- Step 8: Select newly created Config Name in the field “Database Configuration”
- Step 9: Input Query String
- Step 10: Click on [Execute Query] or [Execute Update] based on Query type.
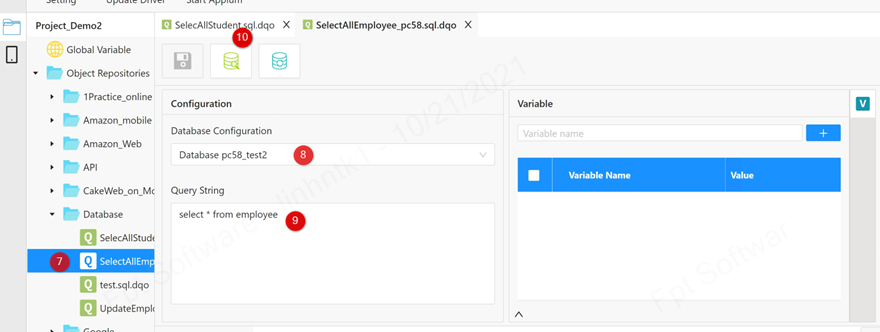
- Step 11: Check response.