2. Record Window
2.1 Overview
Record Window Feature Overview
Migration provides the ability to accurately and efficiently record user actions on applications, paving the way for developing automated test scripts. Highlights of the "Record Window" feature include:
- User Action Recording: This feature allows recording all user actions on the application, including data entry, mouse clicks, and user interface interactions. This flexibility ensures that every aspect of user interaction with the application is captured in detail, resulting in accurate and comprehensive automated test scenarios.
- High-Detail Recording: Migration is designed to record tasks with a high level of detail, thereby serving to develop accurate and effective test scenarios. Every step of the user process, from basic to complex operations, is thoroughly documented, allowing the development team to reproduce and test real-life usage scenarios with ease.
2.2 Setup run record
- Step 1: After you access the Migration folder and open the window-recorder.exe file, the application screen will appear as follows:
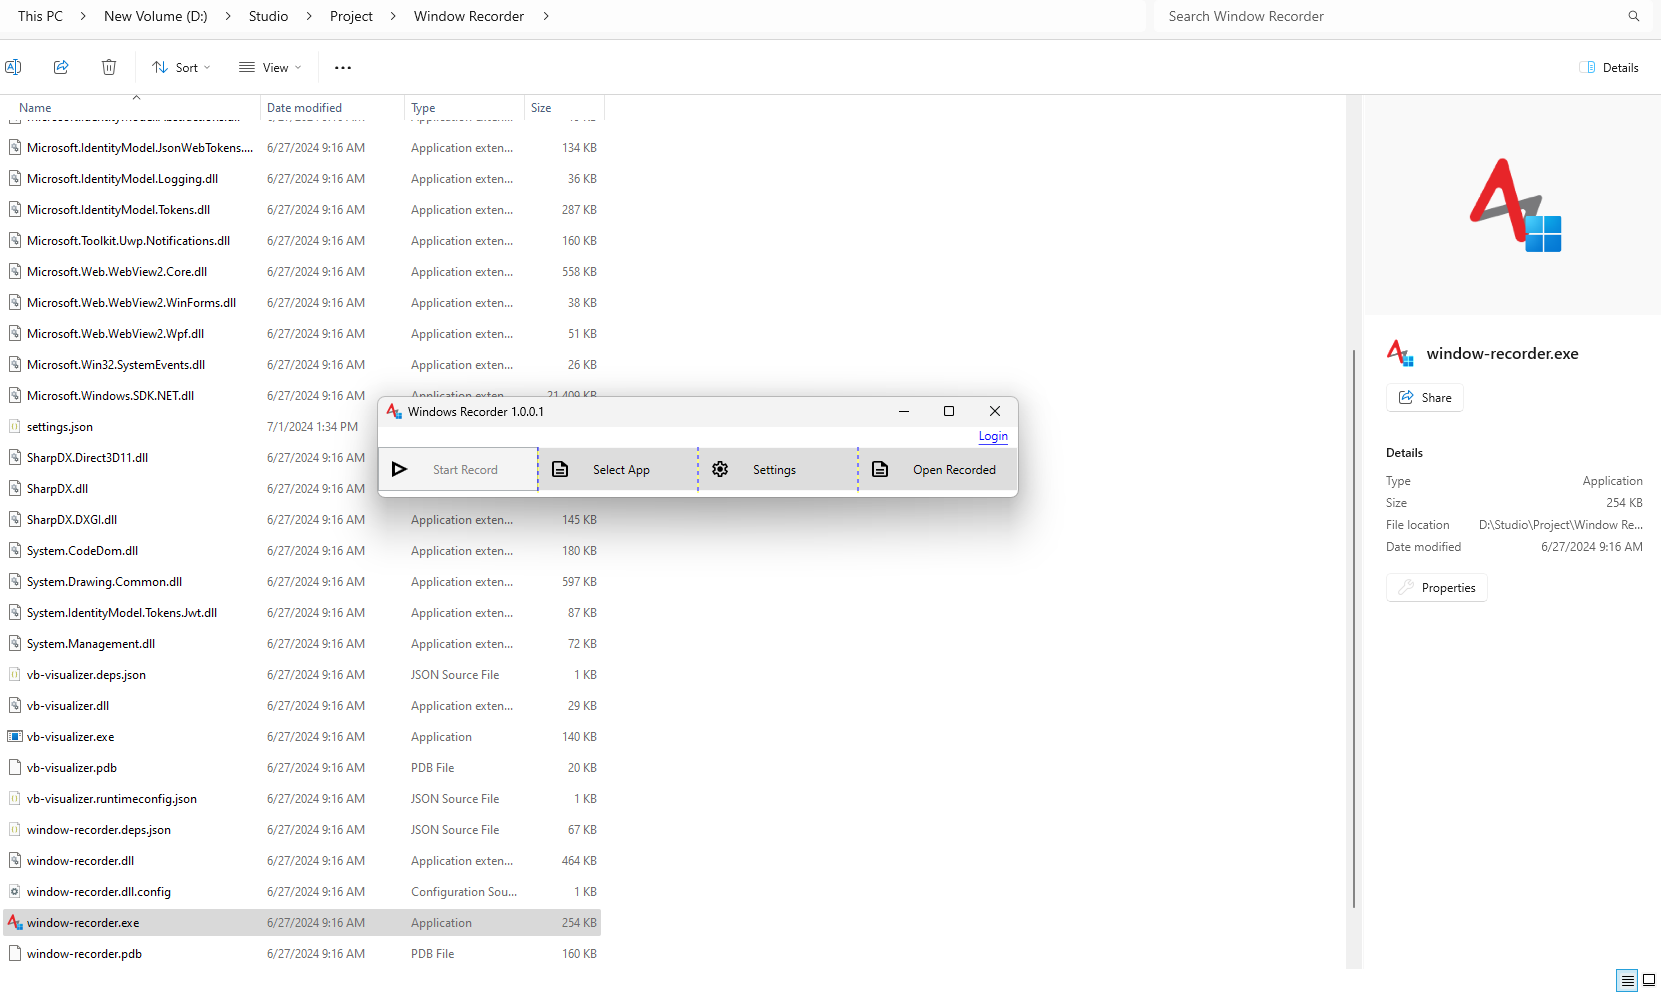
2.1.1 Start screen application
- There are four main buttons:
- Start Record: run record window applicaion after settup
- Sellect App: select application of window
- Settings: setting tool or setting mapping
- Open Recorded: open an existing record
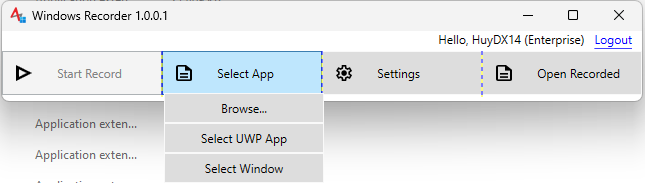
2.1.2 Option choose
- Step 2: In Select app button, you can choose in 3 ways:
- Browse: choose file .exe in window
- Select UWP App: select existing on your Window
- Select Window: select the application in the list of open applications on your Window
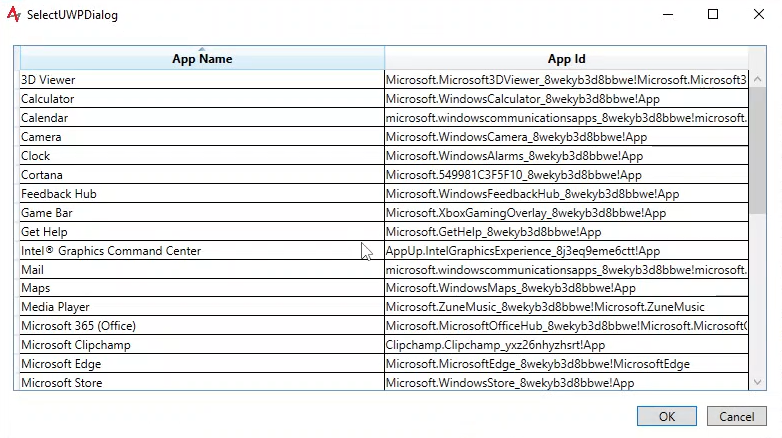
2.1.3 Screen when you click to "Select UWP App"
- Step 3: After choosing application, you click on Start record to run record
2.3 Example: Record Application Calculator
- After start record, the application screen appears along with the manipulation screen, you can use your mouse to remote

2.2.1 The green border identifies the element. You hover and wait Until the green border stabilizes (no more flashing) to interact.
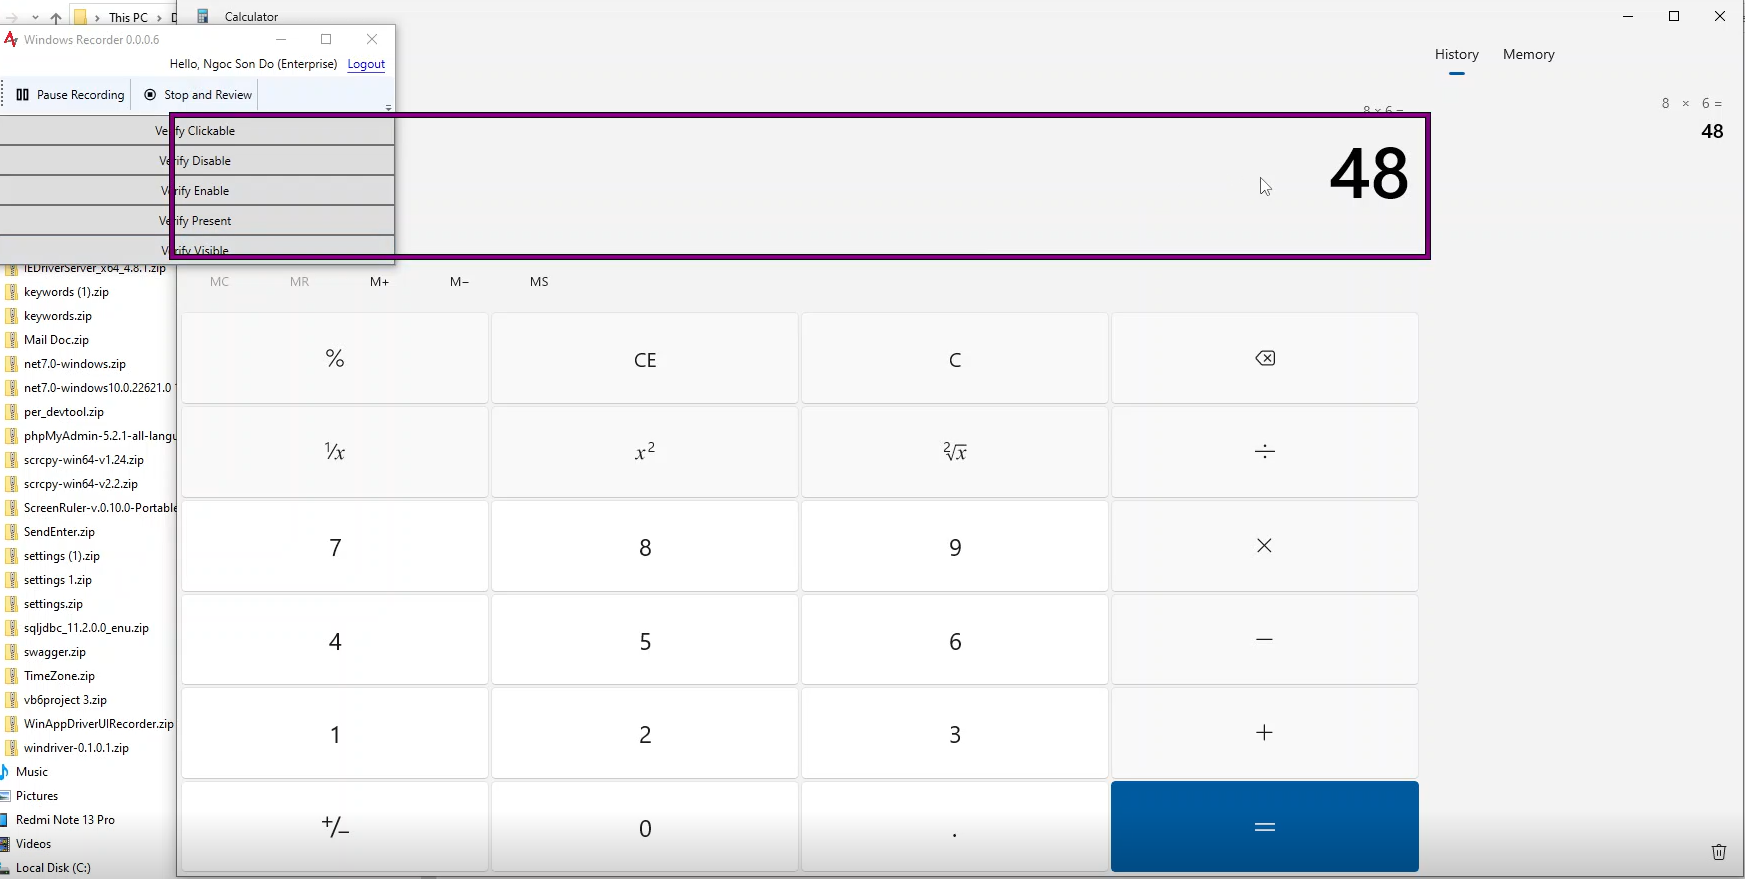
2.2.2 For verify methods, you need to hold and drag the method to the element until the element is bordered in purple.
- Click Stop and preview button in manipulation screen, the system will record the steps and display them as below:
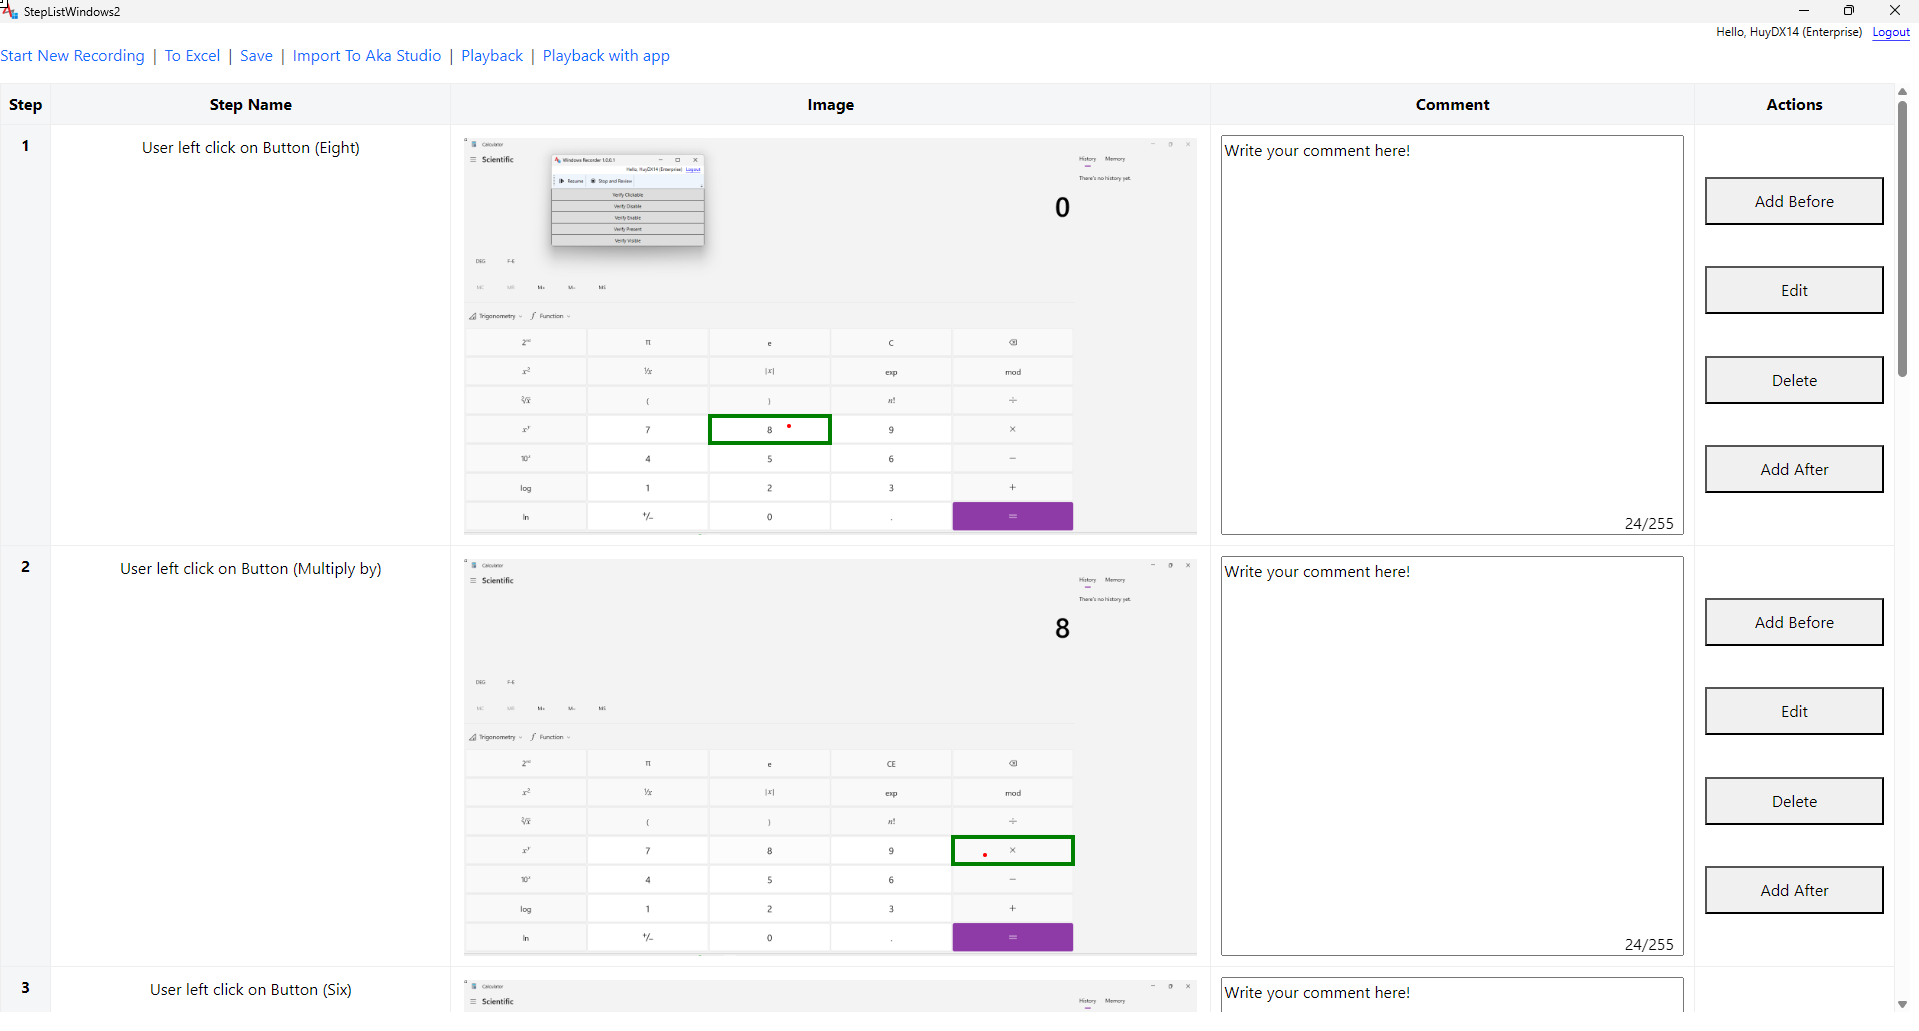
2.2.3 Generate record screen.
2.4 Functions
After recording is complete, the screen recording the steps will be displayed along with some functions on the toolbar as follows:
-
In Toolbar:
- Start new recording: Create new recording
- to Excel: export record to excel file
- Save: save record
- Import to Aka Studio: import the record into akaAT Studio
- Playback: playback the record
- Playback with app: playback with another app (Often used to test different versions) -
In Action window:
- Add Before: add a new step before step you chosen
- Edit: change keyword/method manipulate in step
- Delete: delete the step chosen
- Add After: add a new step after step you chosen
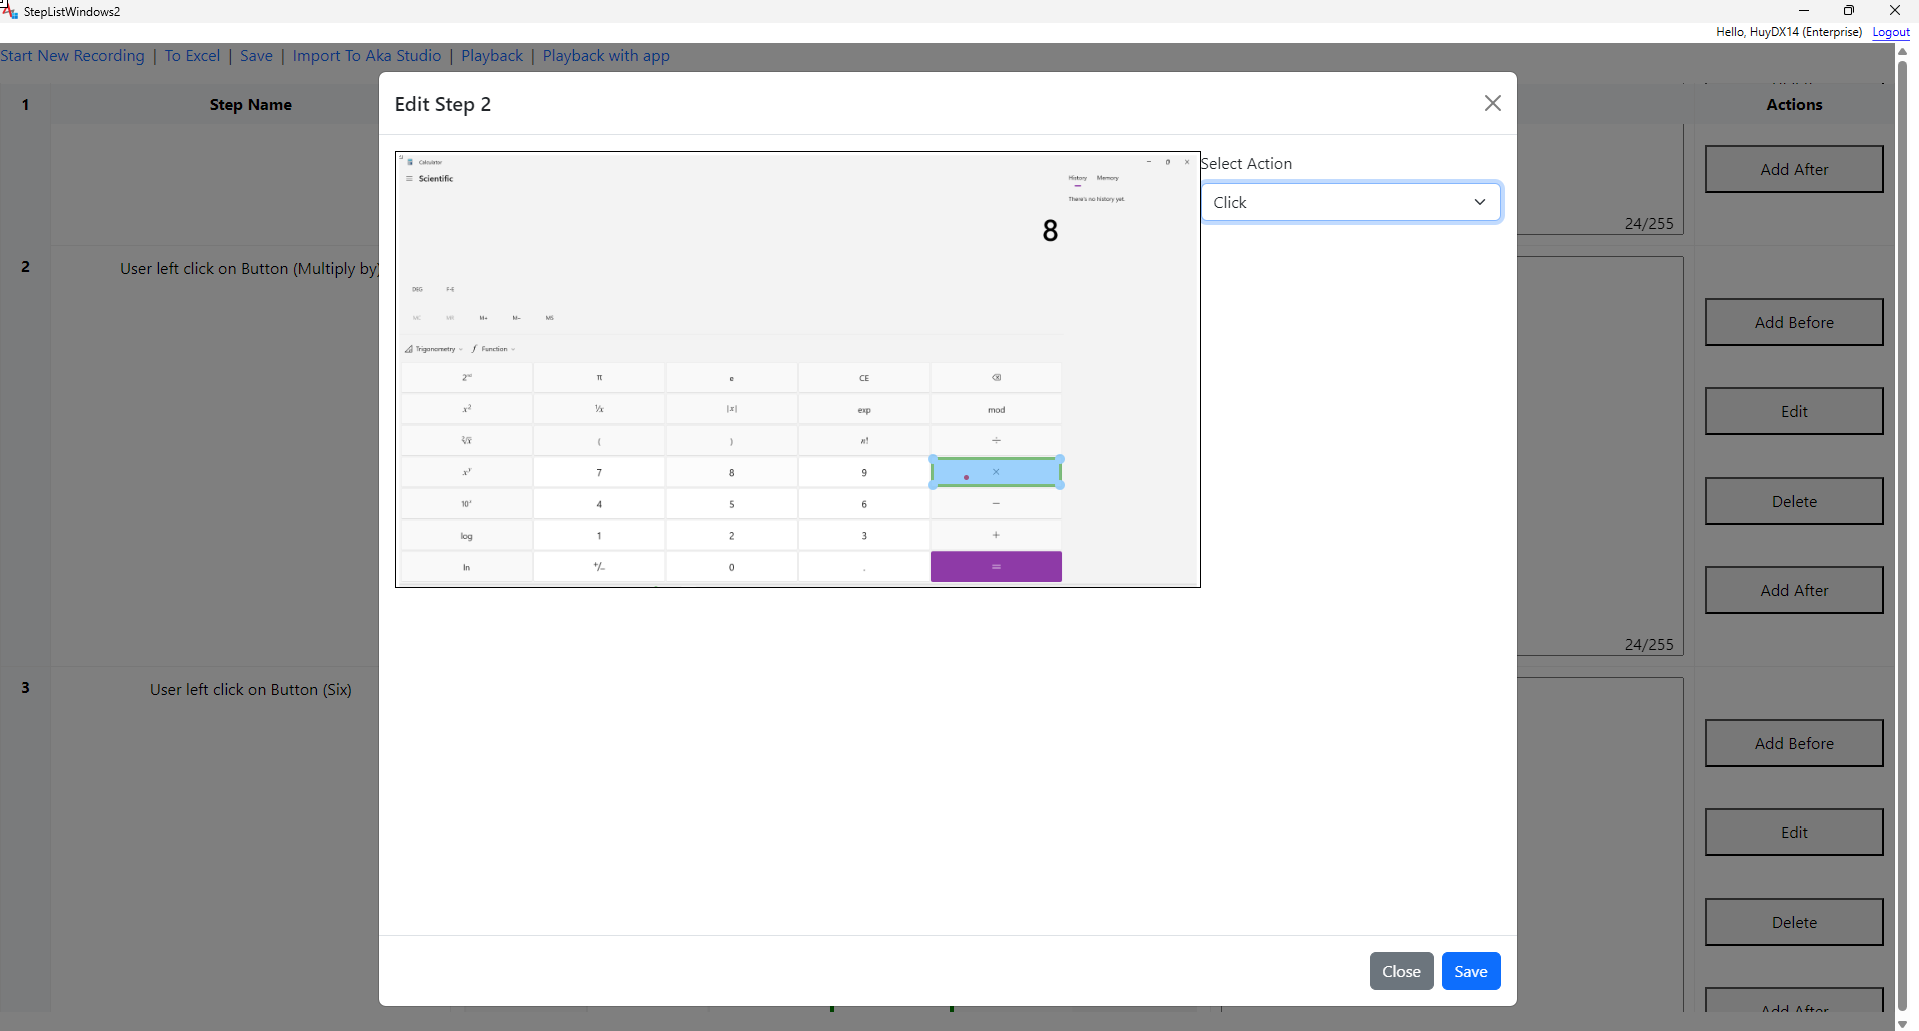
2.3.1 Edit Test Step Screen

2.3.2 Edit Test Step Screen (2)
2.3.1 Depending on your needs, you can edit the record accordingly