CI/CD Pipelines
1. Adding CI/CD Pipeline job
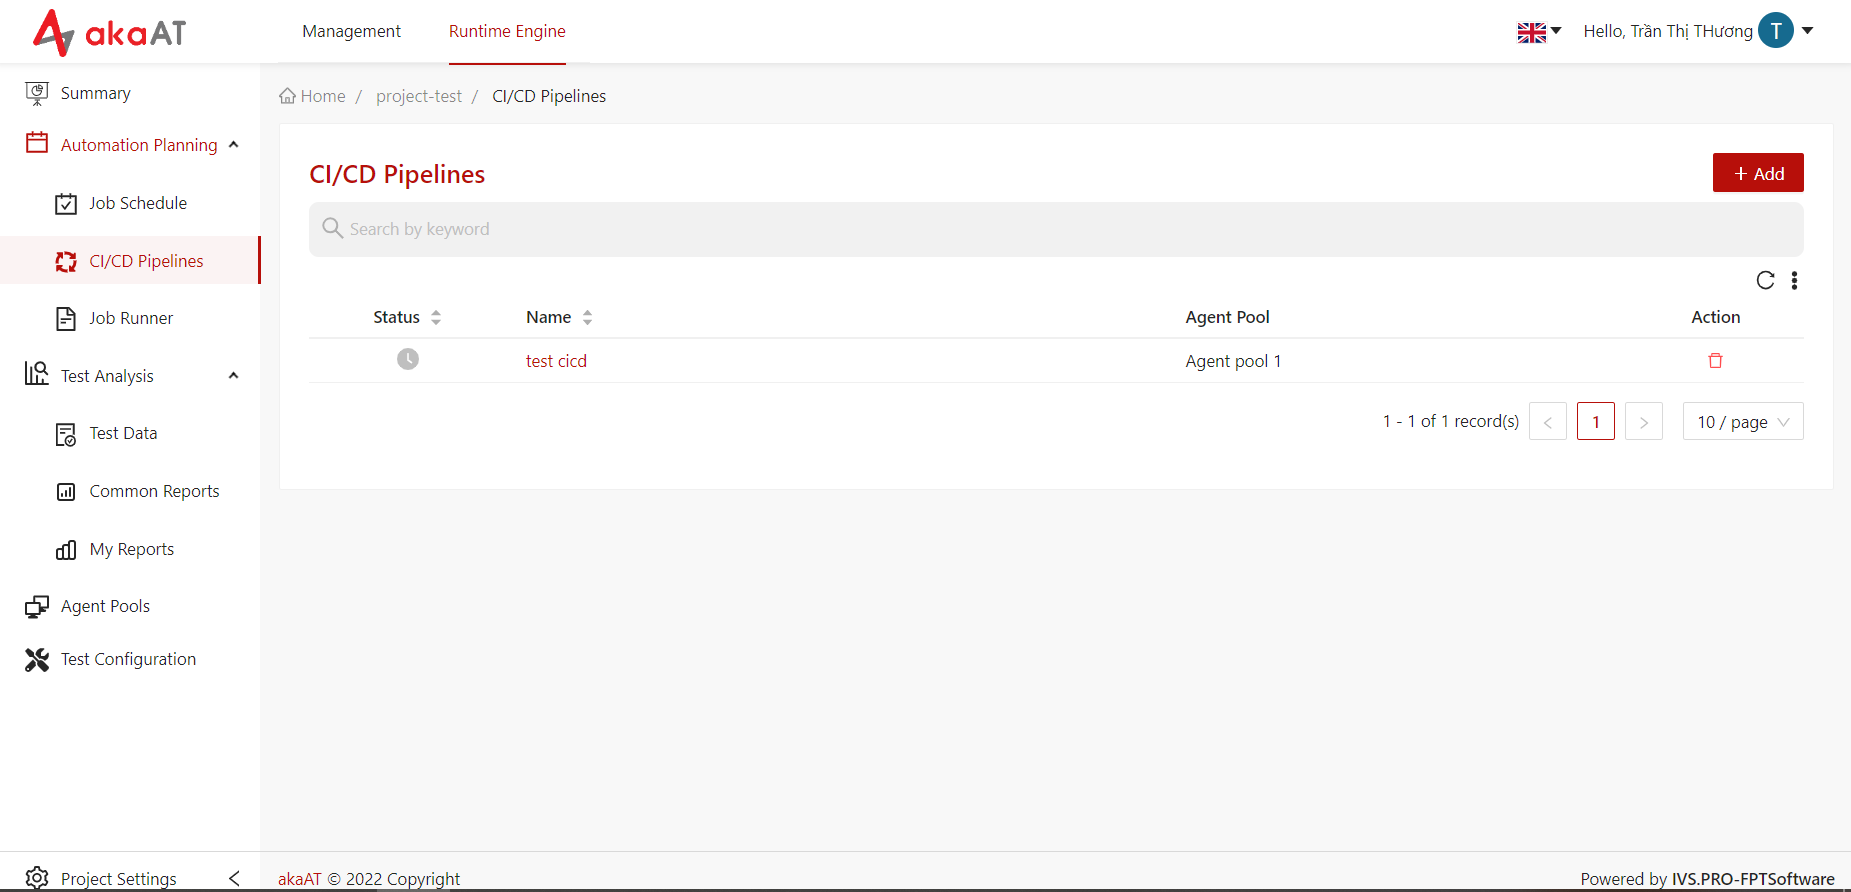
- Go to CI/CD Pipelines
-
Click to Add button in the upper right corner
-
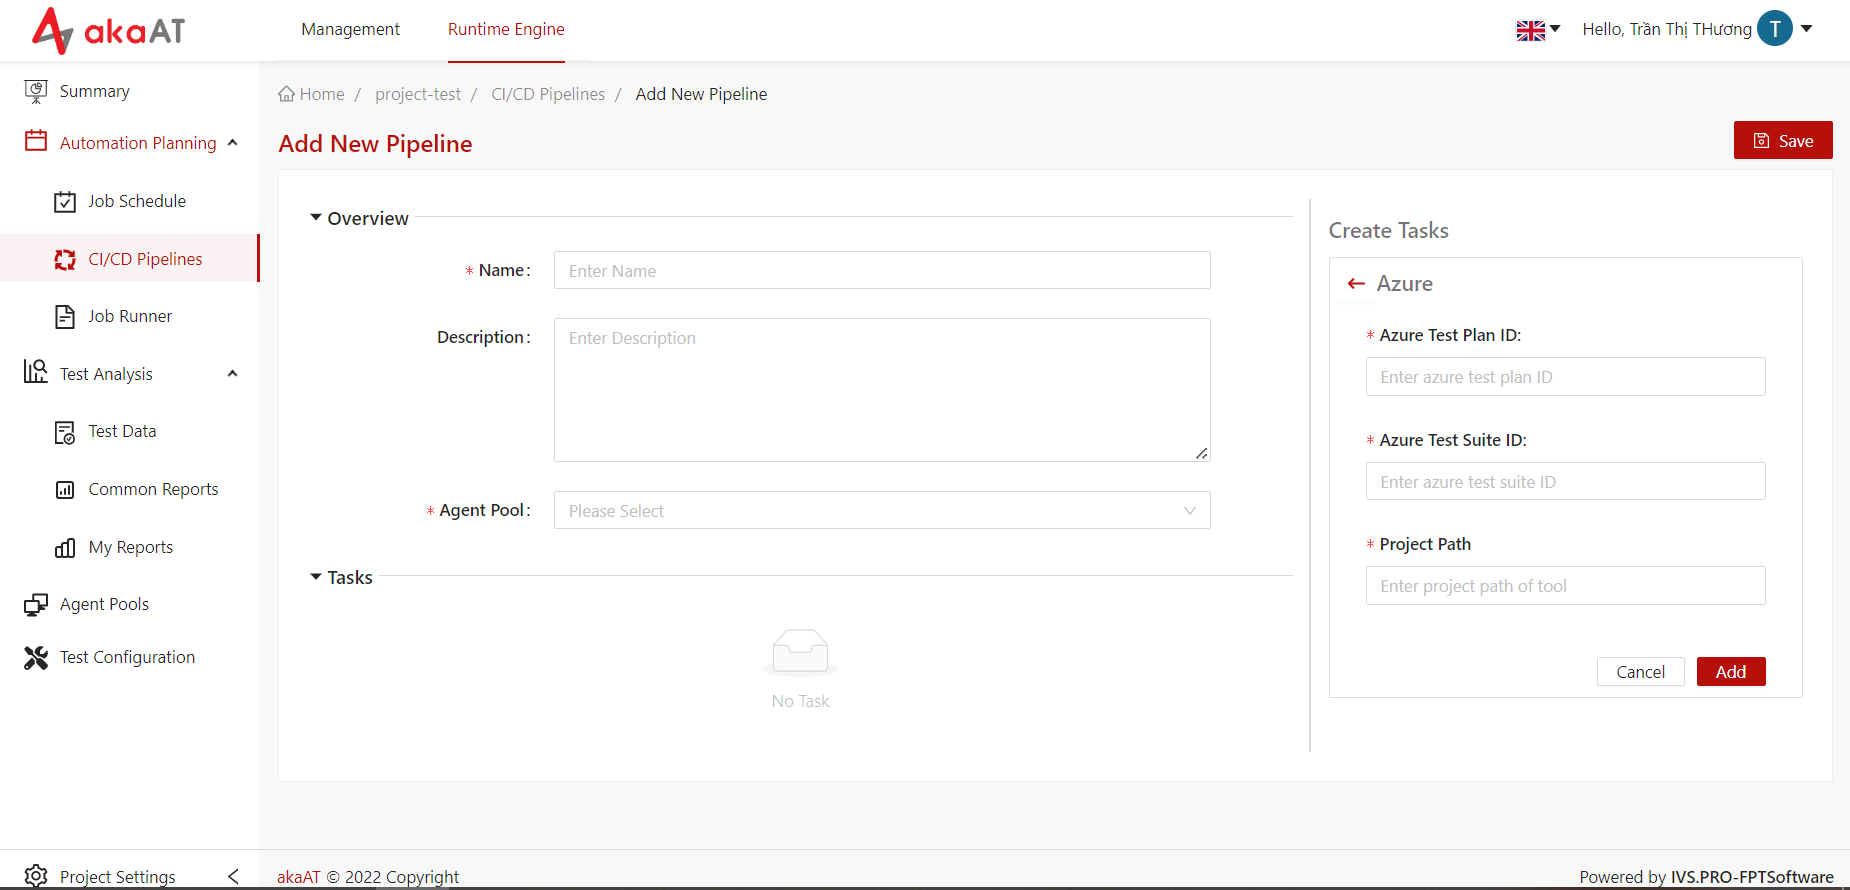
System will move to Add new Pipelines
-
-
Fill in the mandatory fields for adding a schedule job
- Name: The name of the CI/CD Pipelines job that is displayed in the CI/CD Pipelines for job.
- Description: Description of the CI/CD Pipelines job.
- Agent pool: Select an agent pool - is a collection of agents. When running the job, it runs on an agent from that pool. (See How to create an Agent Pool)
-
Adding tasks.
Adding Tasks in CICD Job will be the same with adding task in Job Schedule (See Adding Job and Sample flow)
-
After filling in the fields, click on the Save button to add new task.
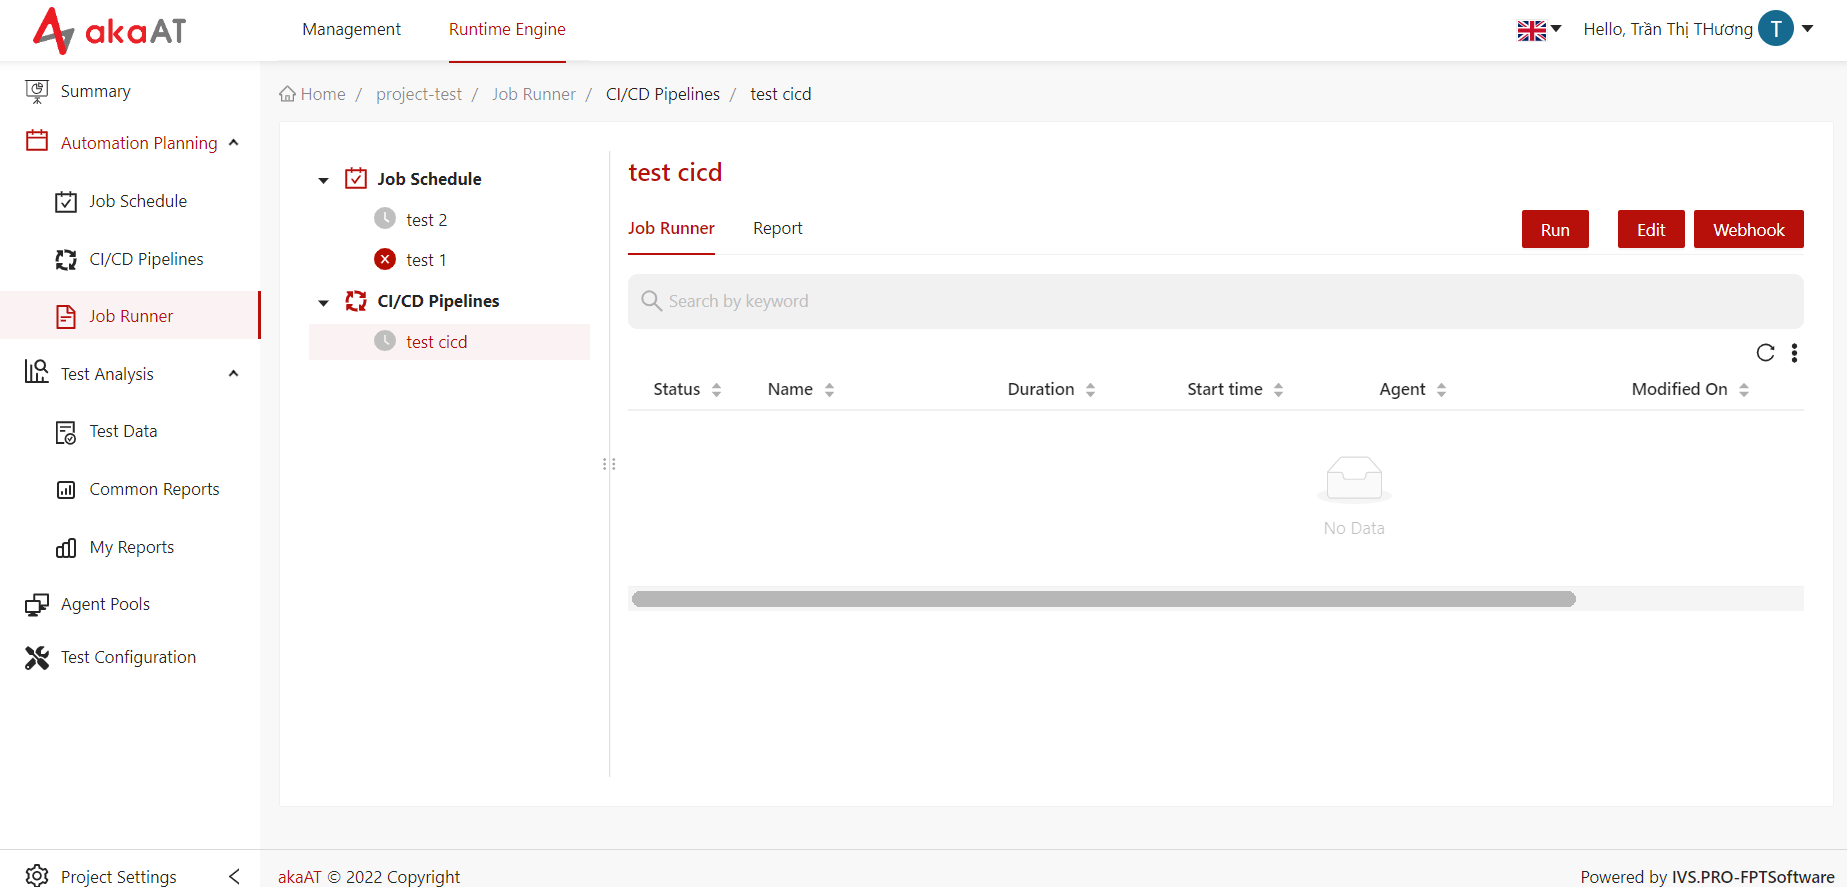
- After saving successfully, click on Webhook button of selected CICD Job

- System will show information of job for previewing

- You can re-preview information of job by:
- In list of CI/CD Pipelines jobs, you click on name of the job that wanting to re-preview
- Clicking on Webhook button
Note: To run CI/CD Pipeline job by event (Eg: merge code, build code) → You have to use these information to config in third-party
Or you can test by click Run directly on Job
2. Trigger CI/CD event
Precondition: You have already created new CICD job successfully and agent have registered successfully.
2.1. Trigger CI/CD via Azure DevOps Webhook
-
Step 1: On the Azure project, select Project Setting then click on the Service hooks.
-
Step 2: Click on the Create new subscription button.
-
Step 3: Select Web Hooks is the service to integrate then click on the Next button.

- Step 4: On the Trigger information, select type of event then filter event. For example, I select Code push event and I filter repository, member group,...It means that CICD job will run whenever member of selected group push code to the selected repository. Click on the Next button.

- Step 5: Copy URL, Header from Webhook information on Test Engine then paste into URL, Header textbox of Webhook azure popup.

- Step 6: Click on the Test button on the popup. If connection is successful, the system will fill into Basic authentication user and Basic authentication passsword text fields automatically. Then click on the Finish button

- Step 7: Back to job cicd and verify that when connect successfully, the job will run automatically.


- Step 8: Try to push code from local to the repository, you can see the CICD job will be run automatically.
Note: If connection is falsed, please go to Webhook information on the Test Engine then click on the Revoke Token button next to the Header text field. After that, you repeat from step 5 to step 8.
2.2. Trigger CI/CD via Jenkins pipeline
2.2.1. Set up your Jenkins connection
-
Step 1: Go to the https://phoenixnap.com/kb/install-jenkins-on-windows to see the guideline How to install Jenkins.
-
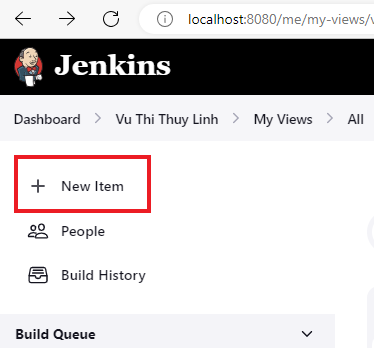
Step 2: On the Jenkins Dashboard page, click on the New Item button, then Add new Item screen will be displayed.
- Step 3: On the Add new Item screen, input item name, select Pipeline option then click on the OK button.

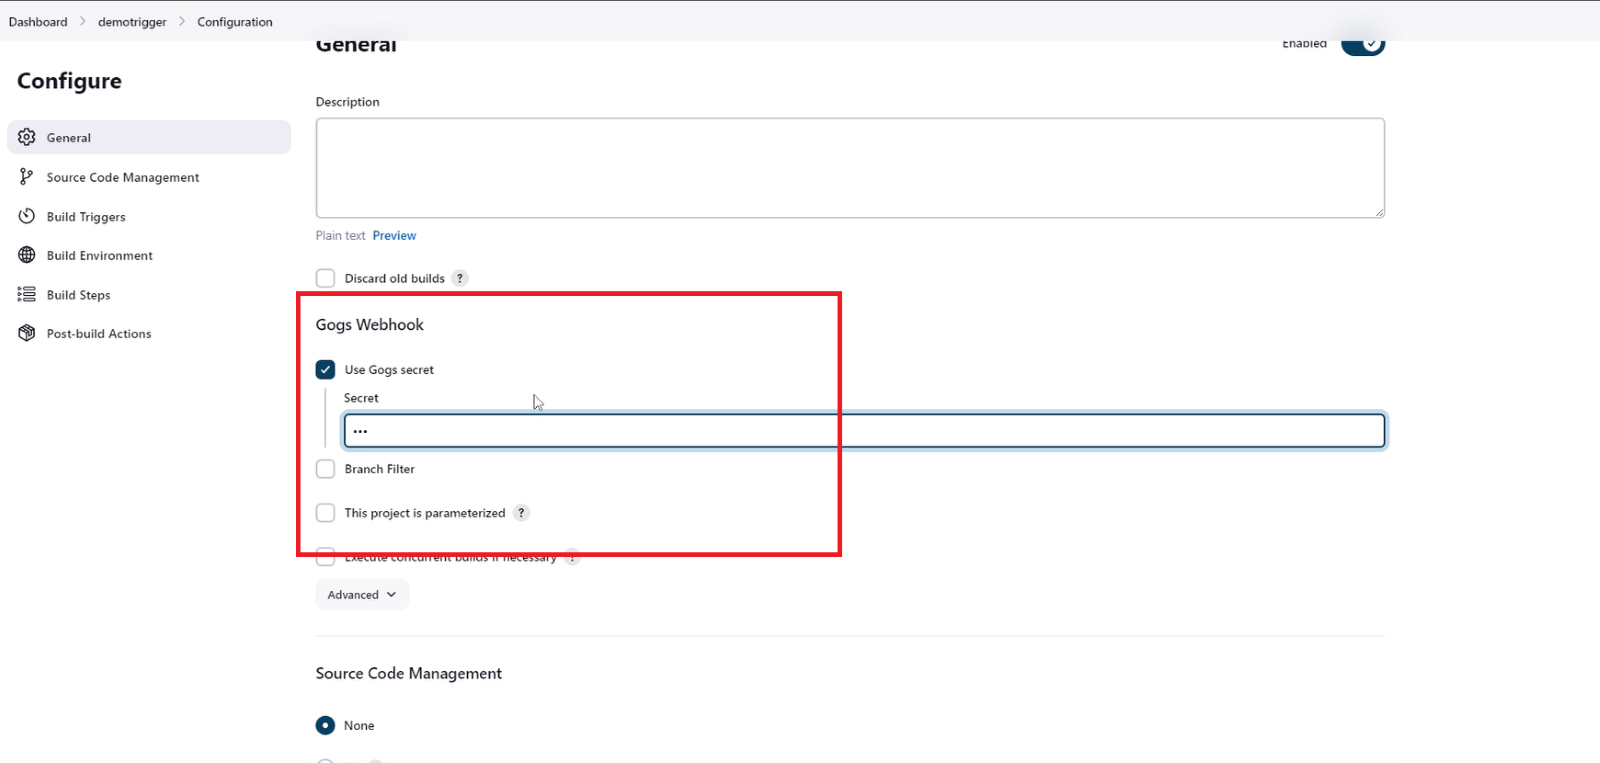
- Step 4: On the Configuration screen, In Gogs Webhook section, user select User Gogs secret and enter secret in the blank field.
- Step 5: Select Build when a change is pushed to Gogs in Build Triggers option.
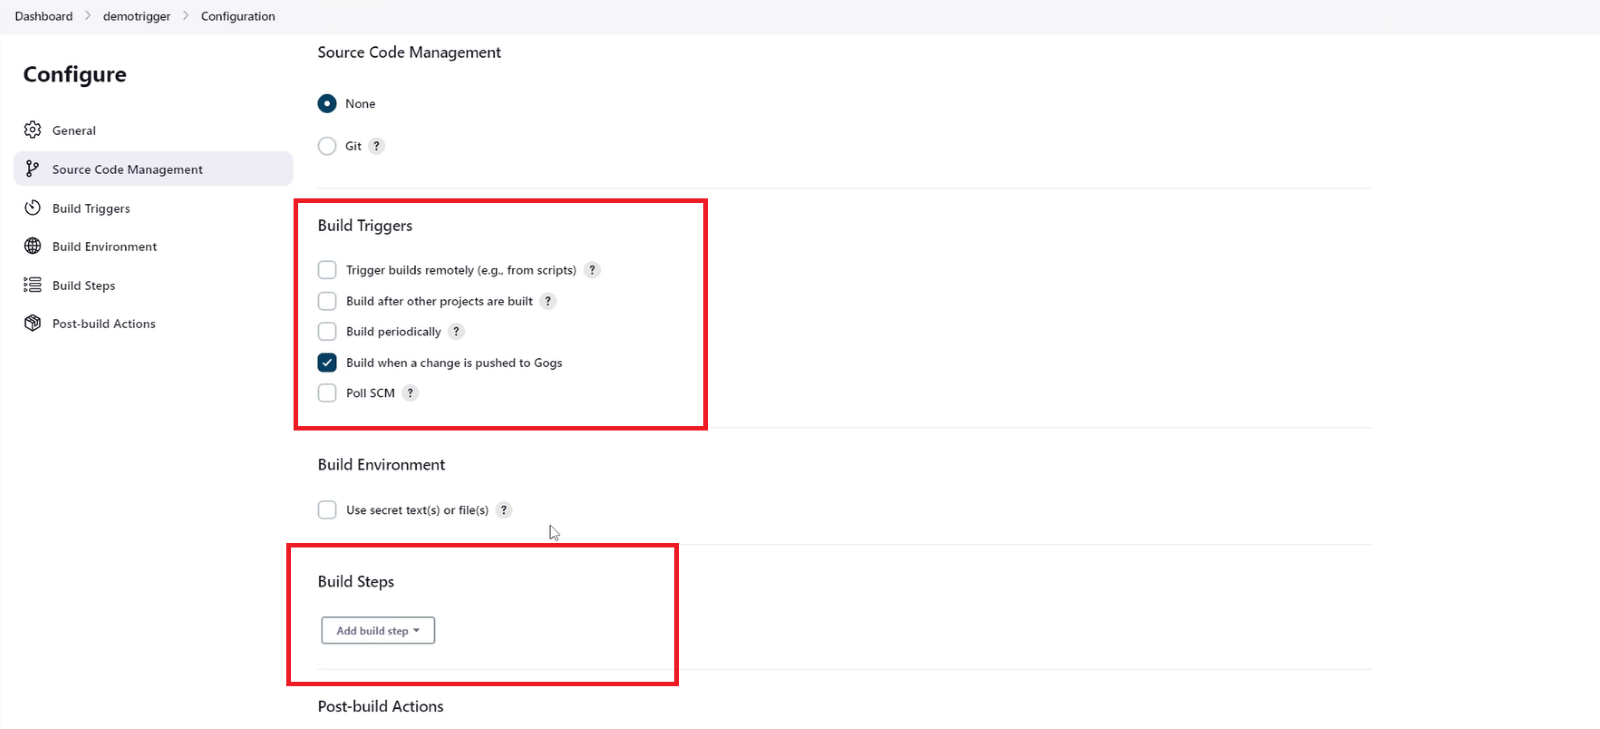
- Step 6: Select Execute Shell in Build Steps section, paste url Jenkins Pipeline, then click on the Save button.
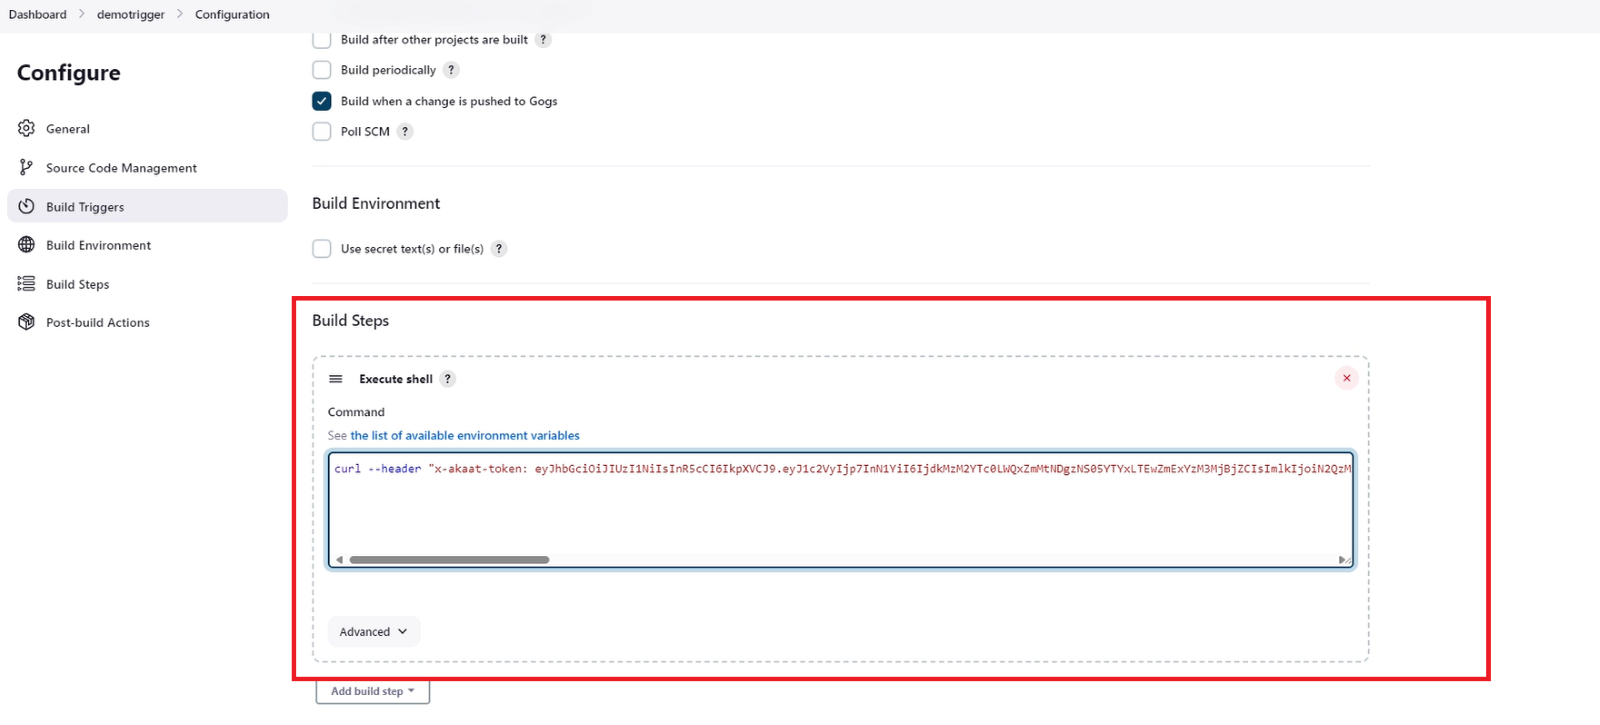
Note: URL Pipeline should be saved when you created CI/CD job on Test engine.
For example: I want to run CICD job whenever have change on the special repository of any branch. If you change any code on the master branch, you can see the CICD job will run automatically.
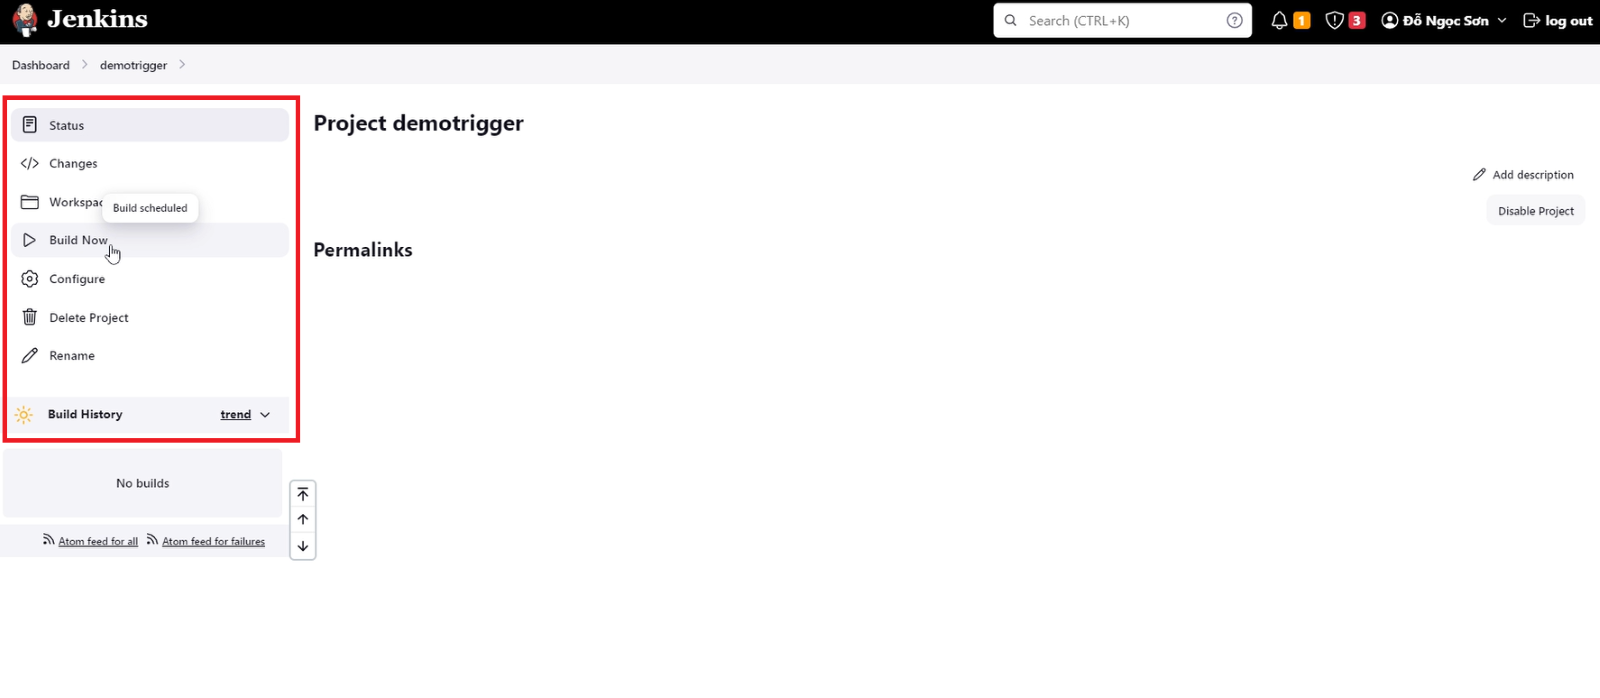
- Step 7: In the main screen, User can click Build Now to check if this task runs successfully.
2.2.2. Setup on your GIT to automatically trigger CICD
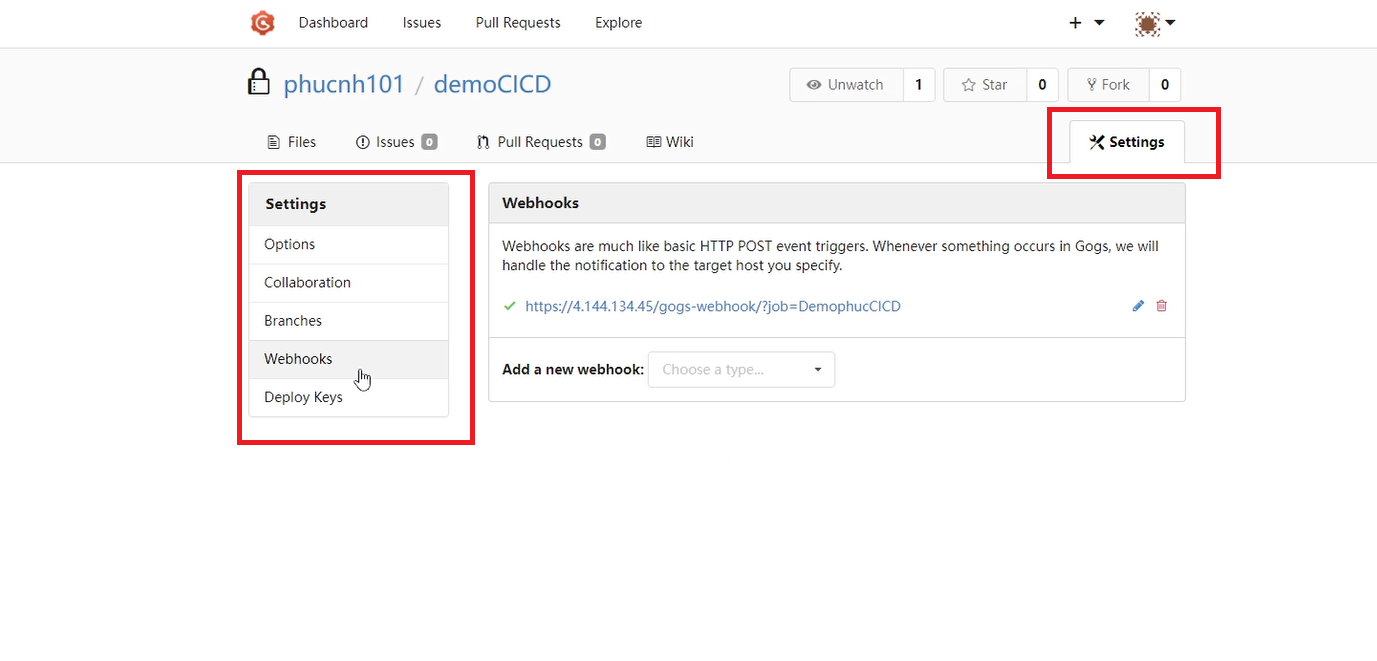
- Step 1: Click on the setting & Select Webhooks.
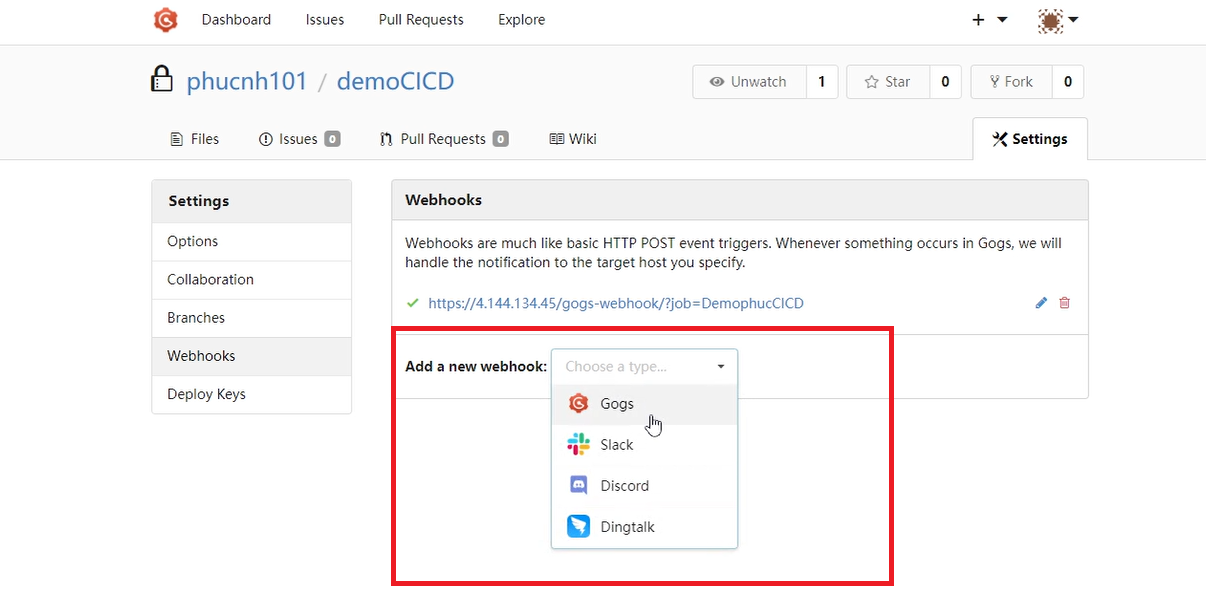
- Step 2: Select Add a new webhook & Select Gogs option.
- Step 3: Enter Payload URL, Format Payload URL:
http(s)://<< jenkins-server >>/gogs-webhook/?job=<< jobname >>
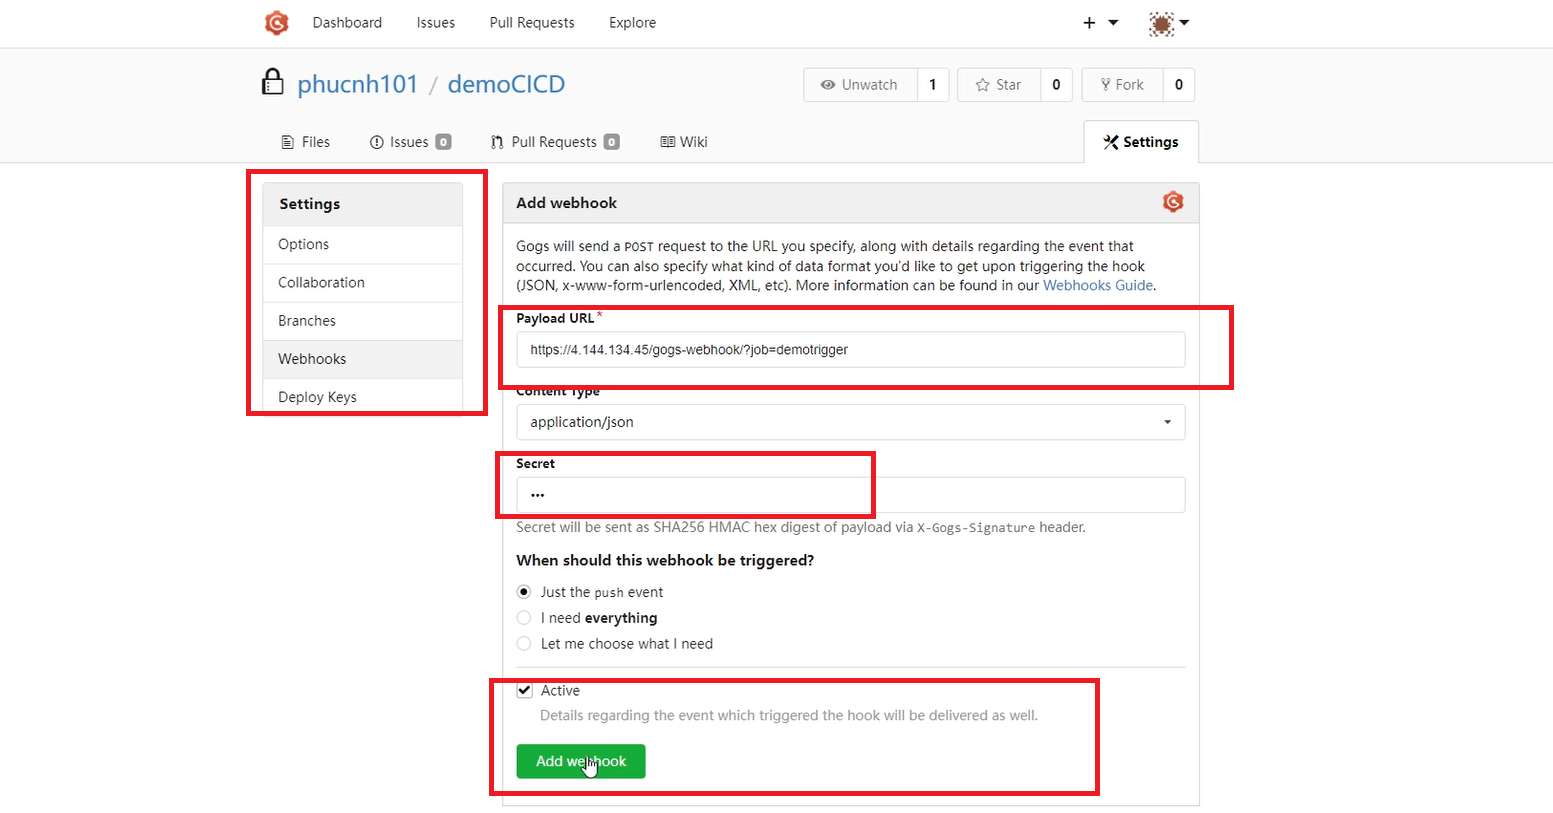
- Step 4: Enter application/json & secret and click Add webhook.
2.2.3. Run job CI/CD on Test Engine
- User return to Test Engine, click Run Job to check if the task is set up successfully.
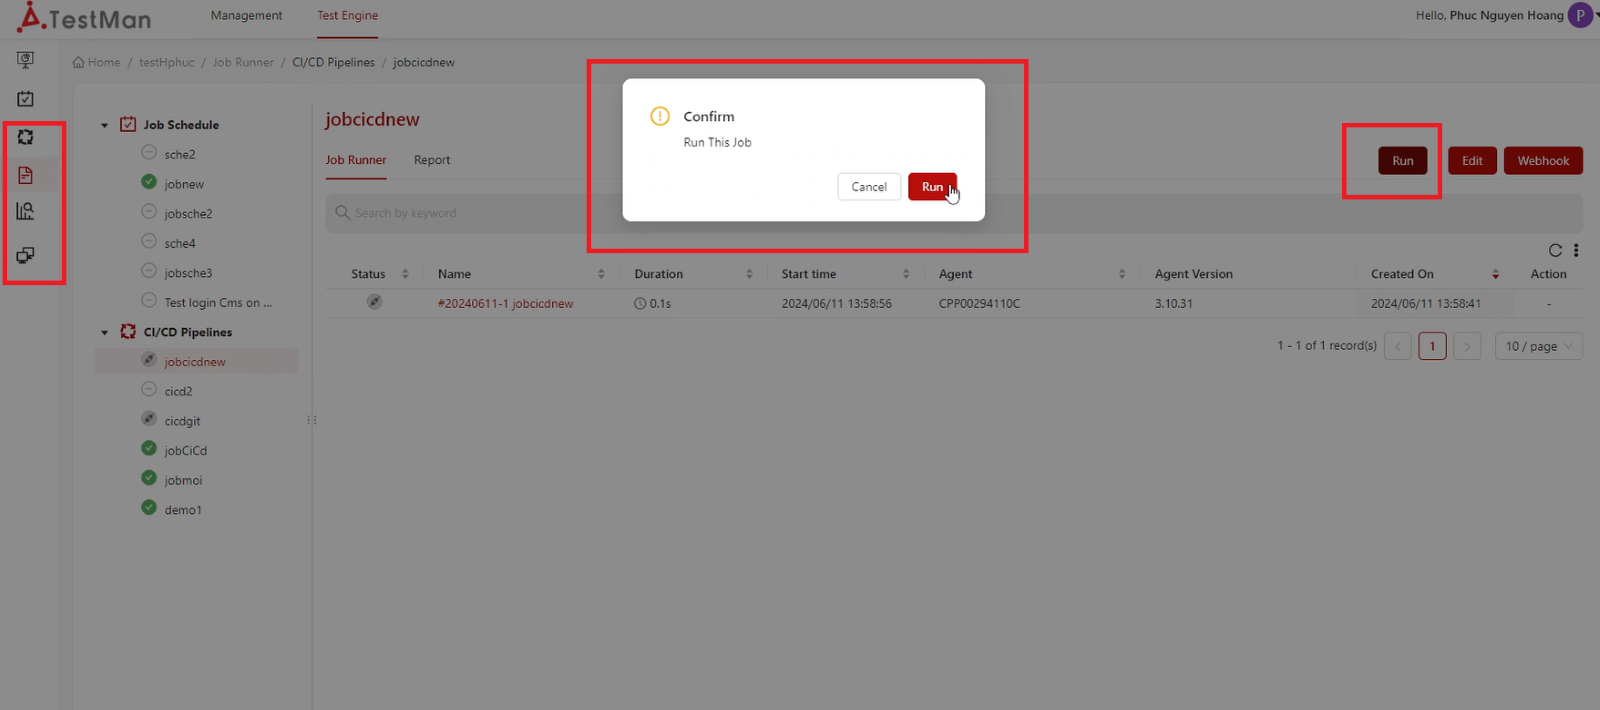
- Then, after the run complete, users can view all result of job runner in tab “Test Result” on Test Engine.

3. Editing CI/CD Pipeline job
-
On job CI/CD Pipelines screen, click on the job that wanting to edit.
-
System shows screen job runner of that job
-
-
Click on Edit button in the top right corner
- Systems shows edit job screen
- Users can:
- Edit overview of the job.
- Add/edit/delete tasks.
- After editing, click on the Save button to finalize any changes to the job.
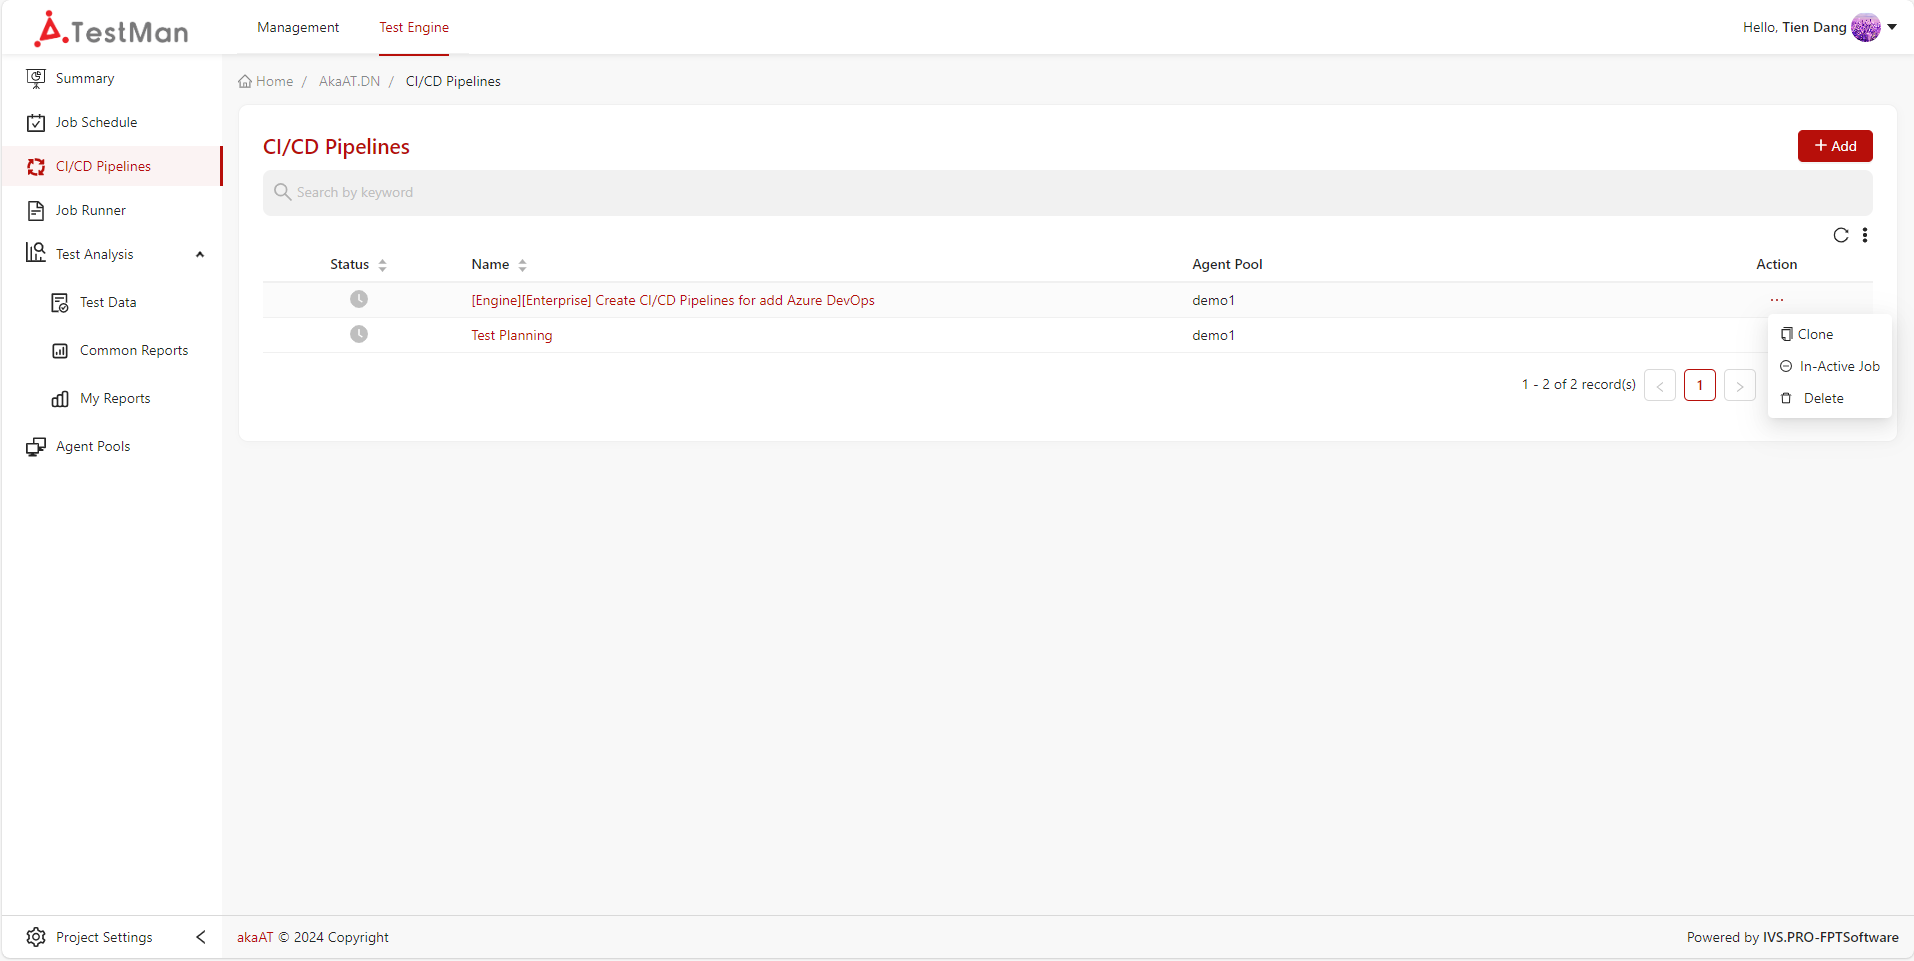
4. Deleting CI/CD Pipeline job
-
Go to “CI/CD Pipelines” screen
-
System shows list of jobs in CI/CD Pipelines
-
-
Simply click on horizontal ellipsis in each job and click Delete in dropdown menu.
-
A pop-up will appear asking "Are you sure you want to delete"?
- Confirm by entering the text, then click on Delete button to remove job.
5. Clone CI/CD Pipeline job
- Go to “CI/CD Pipelines” screen
-
System shows list of jobs in CI/CD Pipelines
-
Simply click on horizontal ellipsis in each job and click Clone in dropdown menu.
-
A copy version will appear
- Click on Save button to clone job.
6. Active/In-Active CI/CD Pipeline job
- Go to “CI/CD Pipelines” screen
-
System shows list of jobs in CI/CD Pipelines
-
Simply click on horizontal ellipsis in each job.
- Click Active job or In-Active job in dropdown menu to active or in-active job.