Job Schedule
1. Adding Job Schedule
- Go to Schedule.
-
Click to + Add button in the upper right corner.
-
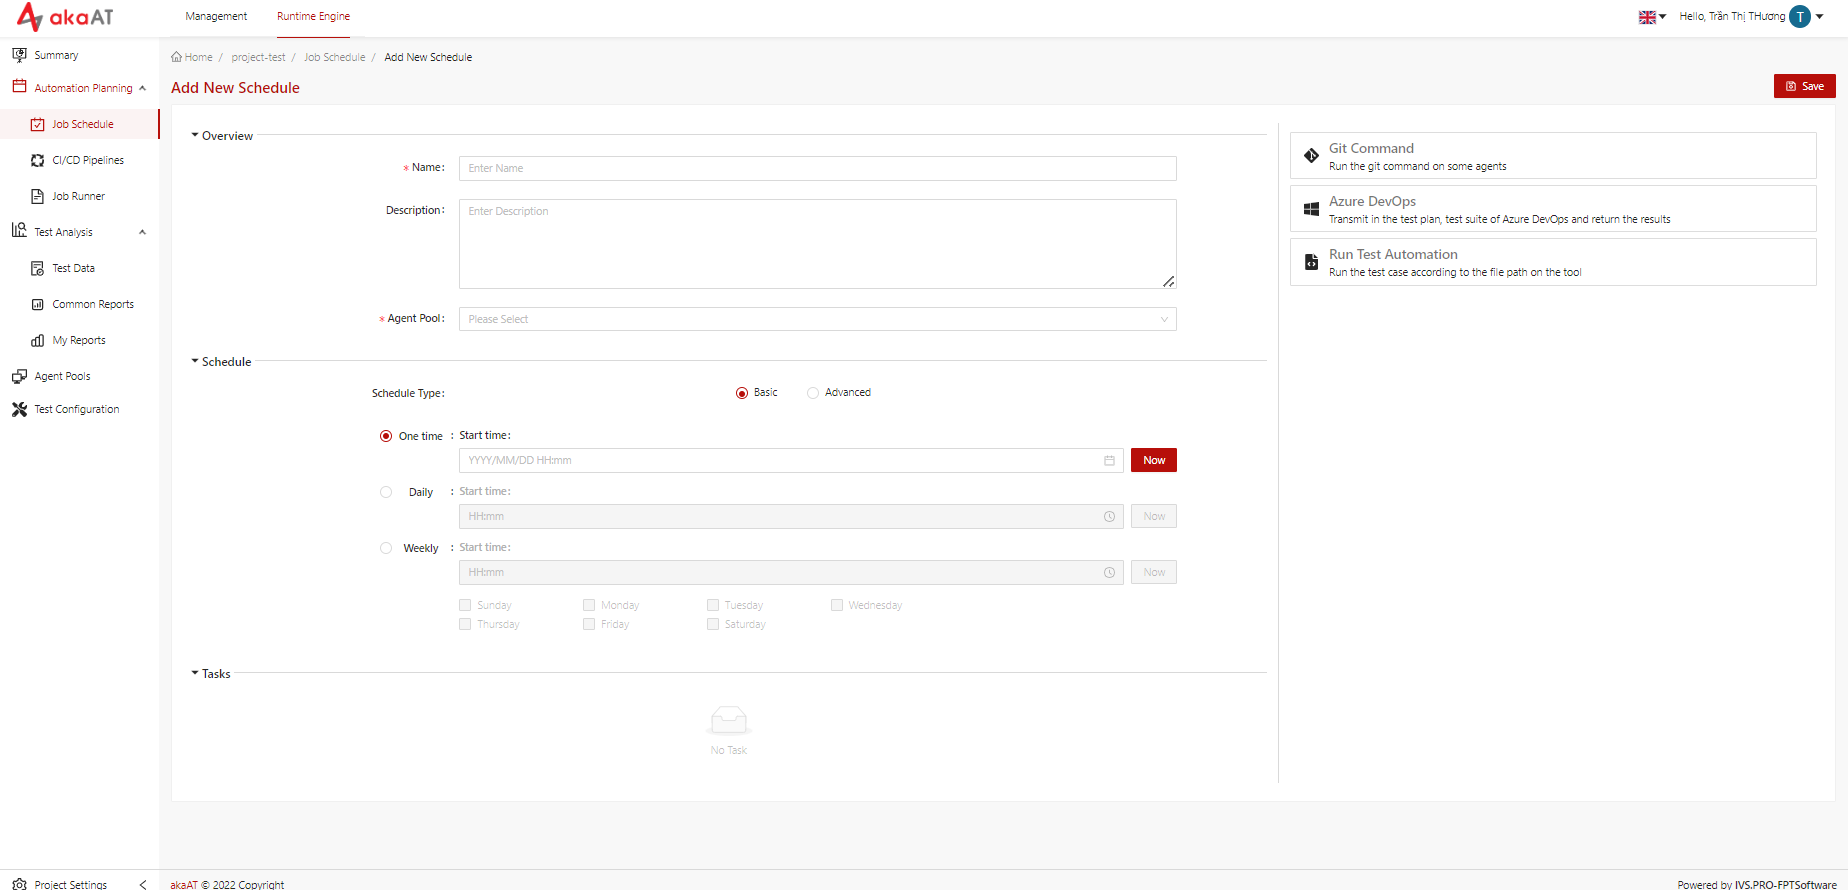
System will move to “Add new schedule”
-
-
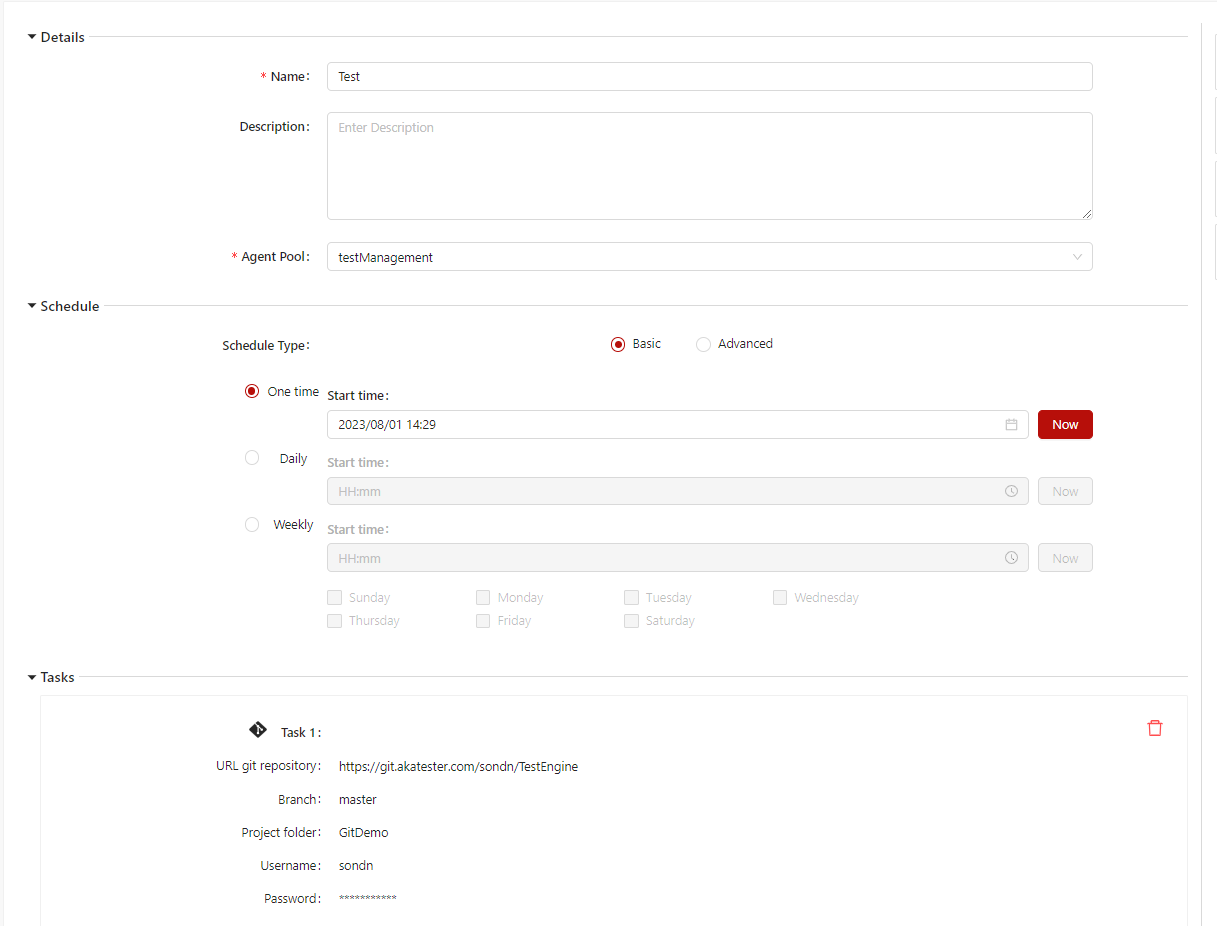
Fill in the mandatory fields for adding a schedule job.
- Name: The name of the Schedule job that is displayed in the schedule for test planning.
- Description: Description of the Schedule job
- Agent pool: Select an agent pool - is a collection of agents. When running the job, it runs on an agent from that pool.
- Schedule type: Choose the time to automatically run the job
- Basic: Users can choose one time in 3 times:
- One time: Pick time (specific date, hour and minute time) and job will be automatically run on that set time one time.
- Daily: Pick time (specific hour and minute time) and job will be automatically run on that set time everyday.
- Weekly: Pick time (specific hour and minute time) and pick day of week. Job will be automatically run on that set time every week.
-
Advance: Users can set time by Cron expression
View more in *Cron Expression
- Basic: Users can choose one time in 3 times:
-
Adding tasks.
View more in Adding tasks
-
After filling in the fields, click on the Save button to finalize any changes to the job.
2. Editing Job Schedule
-
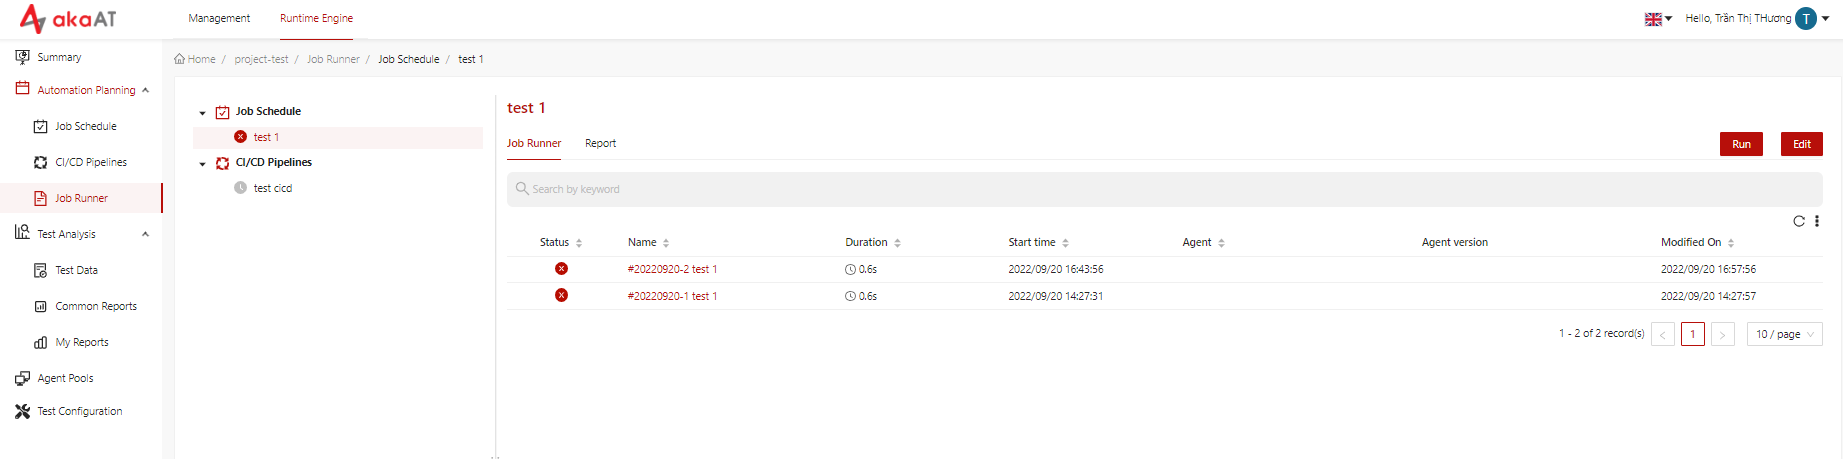
On job schedule screen, click on the job that wanting to edit.
-
System shows screen job runner of that job
-
-
Click on Edit button in the top right corner.
- Systems shows edit that job screen
- Users can:
- Edit overview of the job, re-set time
- Add/edit/delete tasks
- After editing, click on the Save button to finalize any changes to the job.
3. Deleting Job Schedule
-
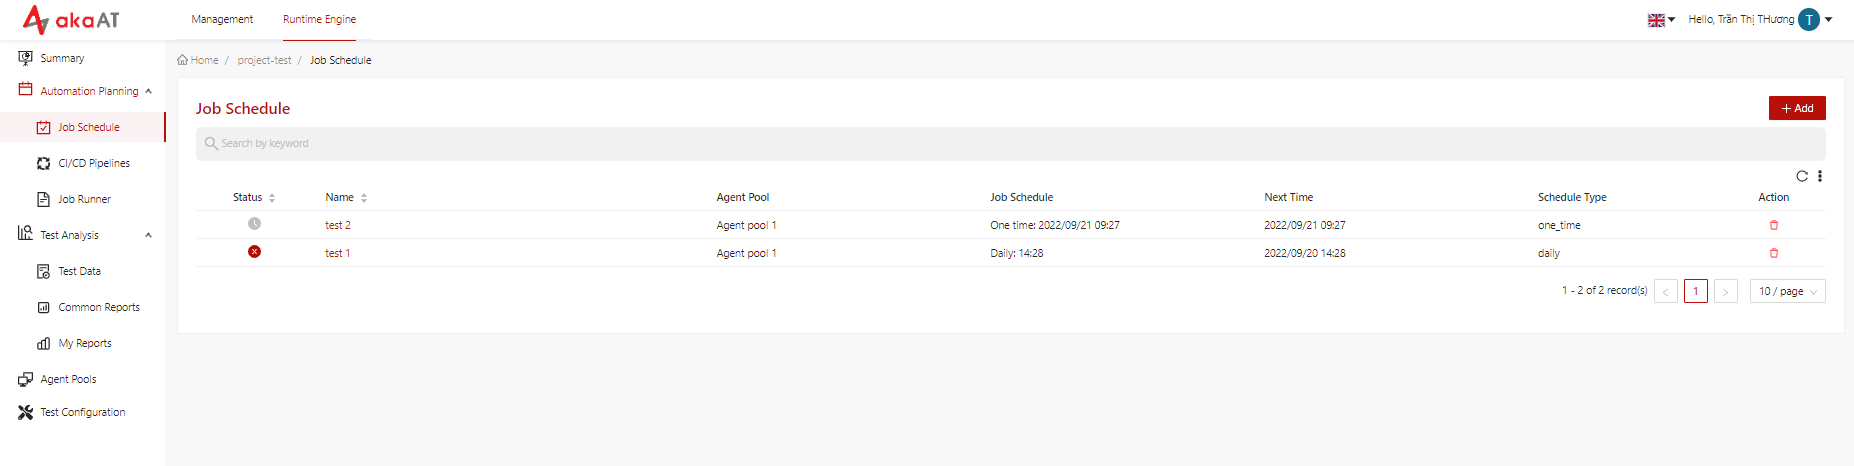
Go to “Job schedule” screen
-
System shows list of jobs in Job Schedule
-
-
Simply click on horizontal ellipsis in each job and click Delete in dropdown menu.
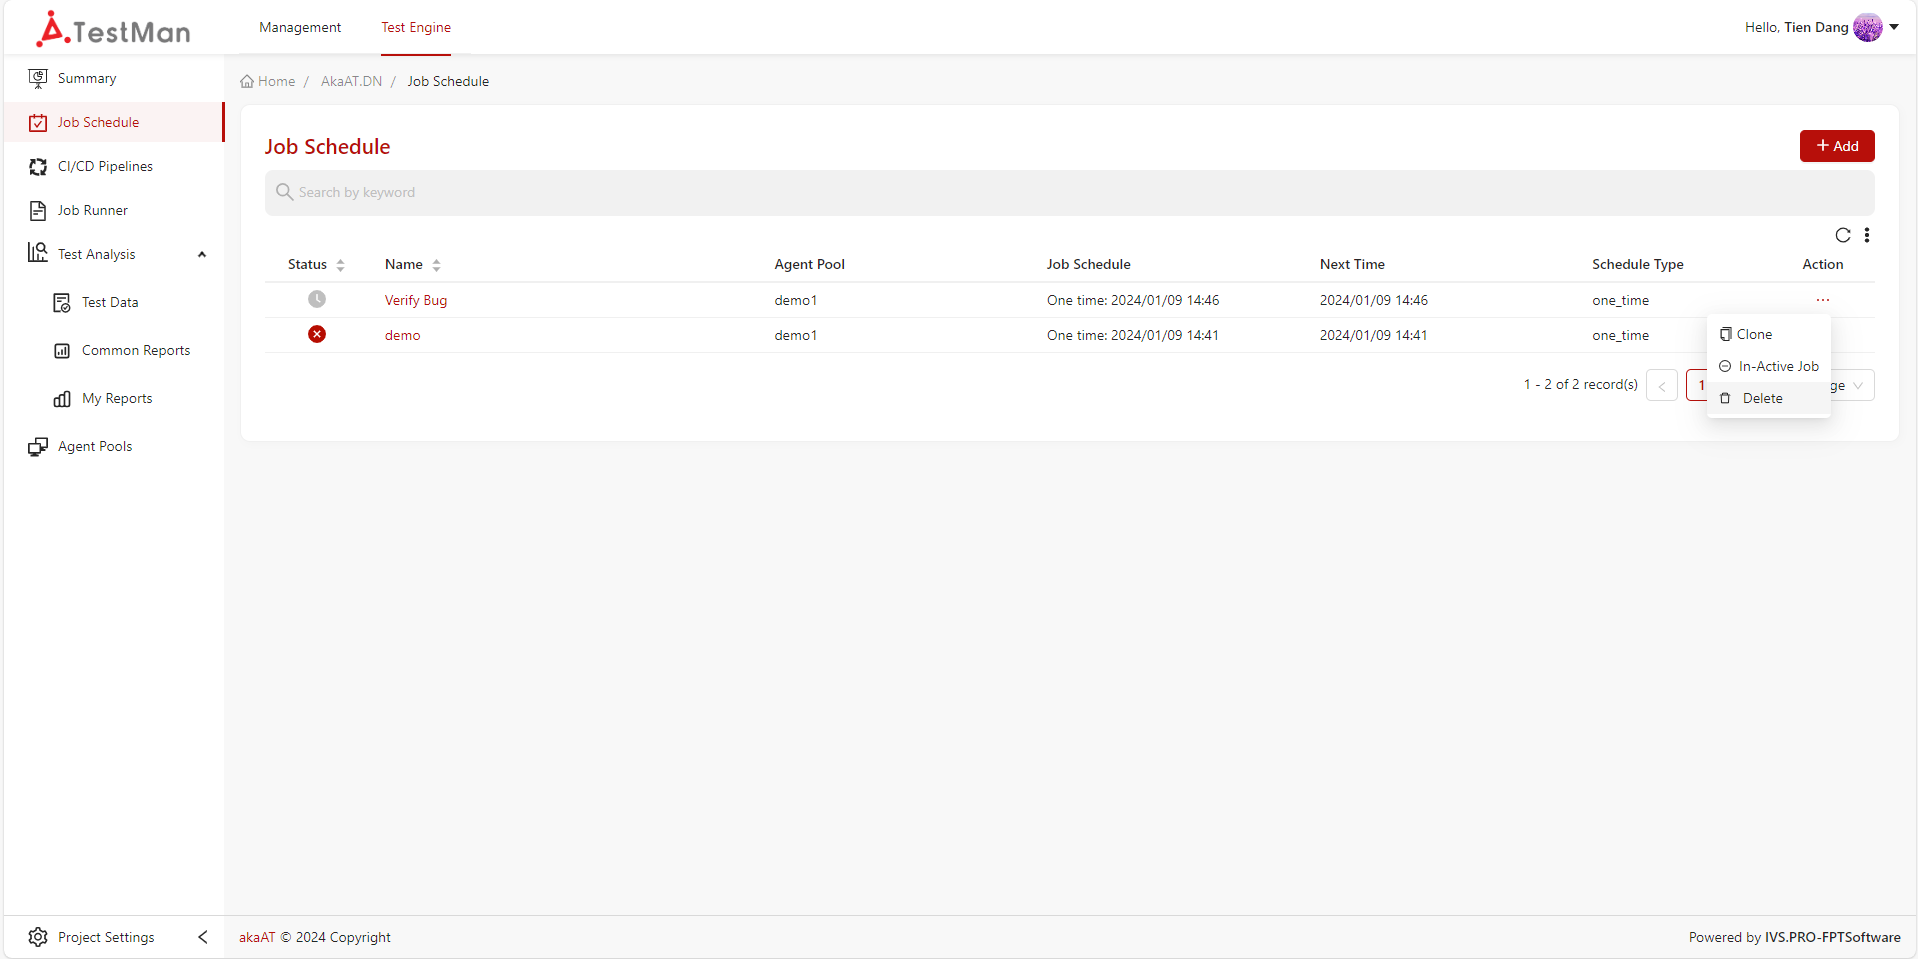
- A pop-up will appear asking "Are you sure you want to delete"?
-
Confirm by entering the text, then click on Delete button to remove job.
4. Clone Job Schedule
-
Go to “Job schedule” screen
-
System shows list of jobs in Job Schedule
-
-
Simply click on horizontal ellipsis in each job and click Clone in dropdown menu.
- A copy version will appear
-
Click on Save button to clone job.
5. Active/In-Active Job Schedule
-
Go to “Job schedule” screen
-
System shows list of jobs in Job Schedule
-
-
Simply click on horizontal ellipsis in each job.
-
Click Active job or In-Active job in dropdown menu to active or in-active job.
6. Sample Flow
Here are flow and collaborated tasks that are commonly used
Step 1: Create Agent Pool (Refer: Agent Pool)
Step 2: Register New Agent (Refer: Register New Agent)
Step 3: Create Test Environment (Refer: Test Environment)
Step 4: Go to Job Schedule in Test Engine and add a job (Refer Adding Job)
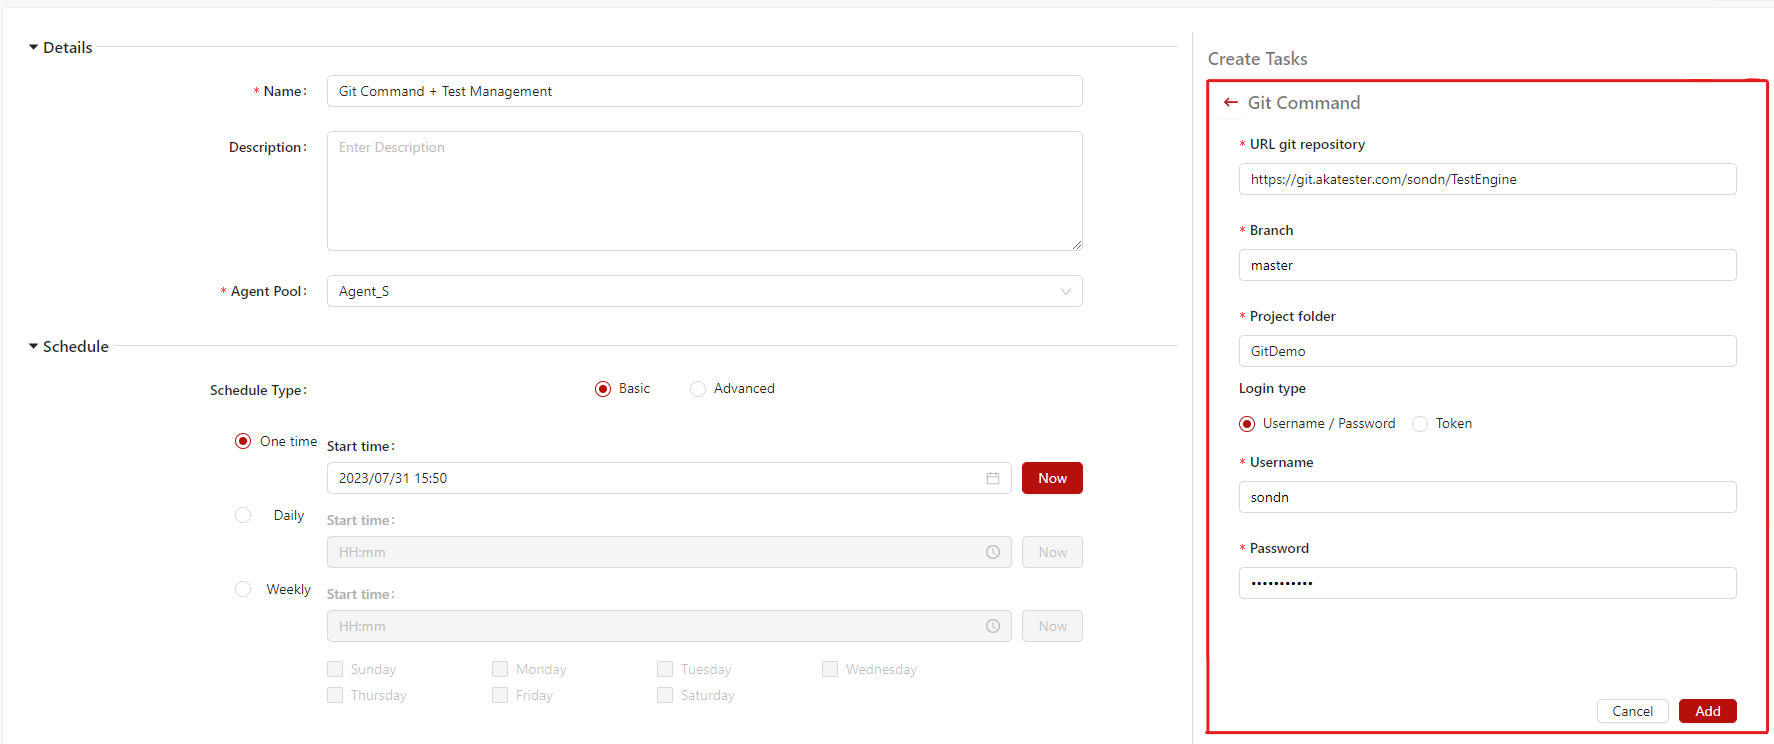
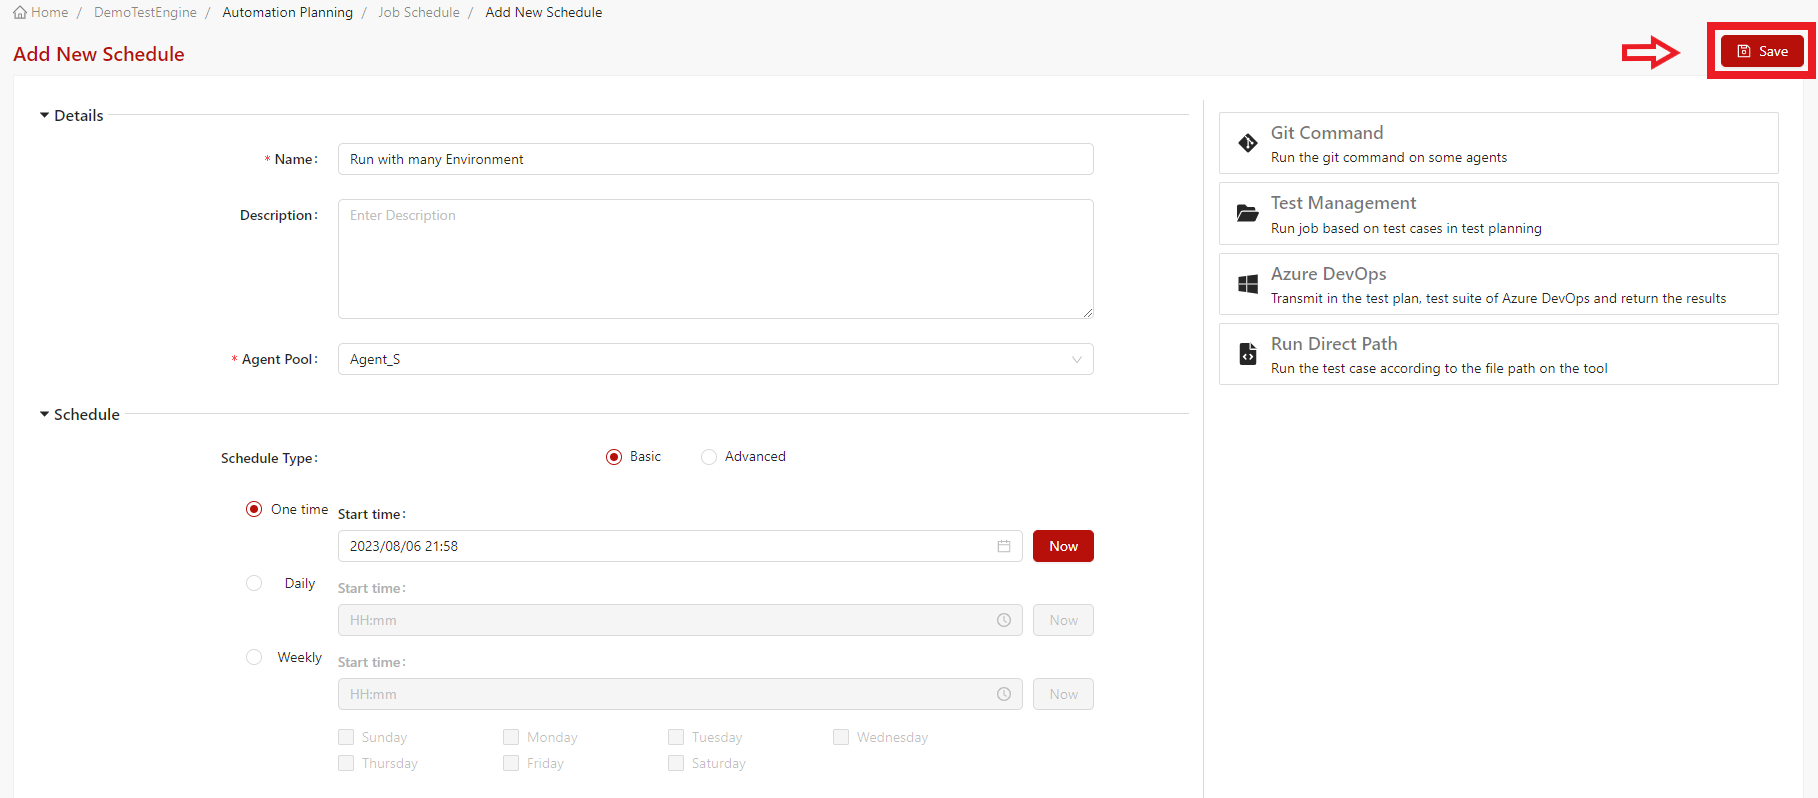
6.1. Git Command + Test Management
In case you want to always run the latest script fetched from git and run it according to the plan on TestManagement, the results will be returned to the Test execution report on Test Management
Step 1: The fields in the Task Git Command will be filled as follows - URL git repository: Enter your url of git repository that contains your project (Eg: https://git.akatester.com/sondn/TestEngine.git)
-
Branch: Name of git branch (Eg: master)
-
Project folder: Name of folder that contains folder when it is pulled
-
Login type: 2 options (username/password and token)
-
Username/password of git account
-
Token is gotten in personal access token (Eg: Refer How to get personal access token in github)
-
When click on "Add" button, the second task will show below on the task field

Then click on "Save" button
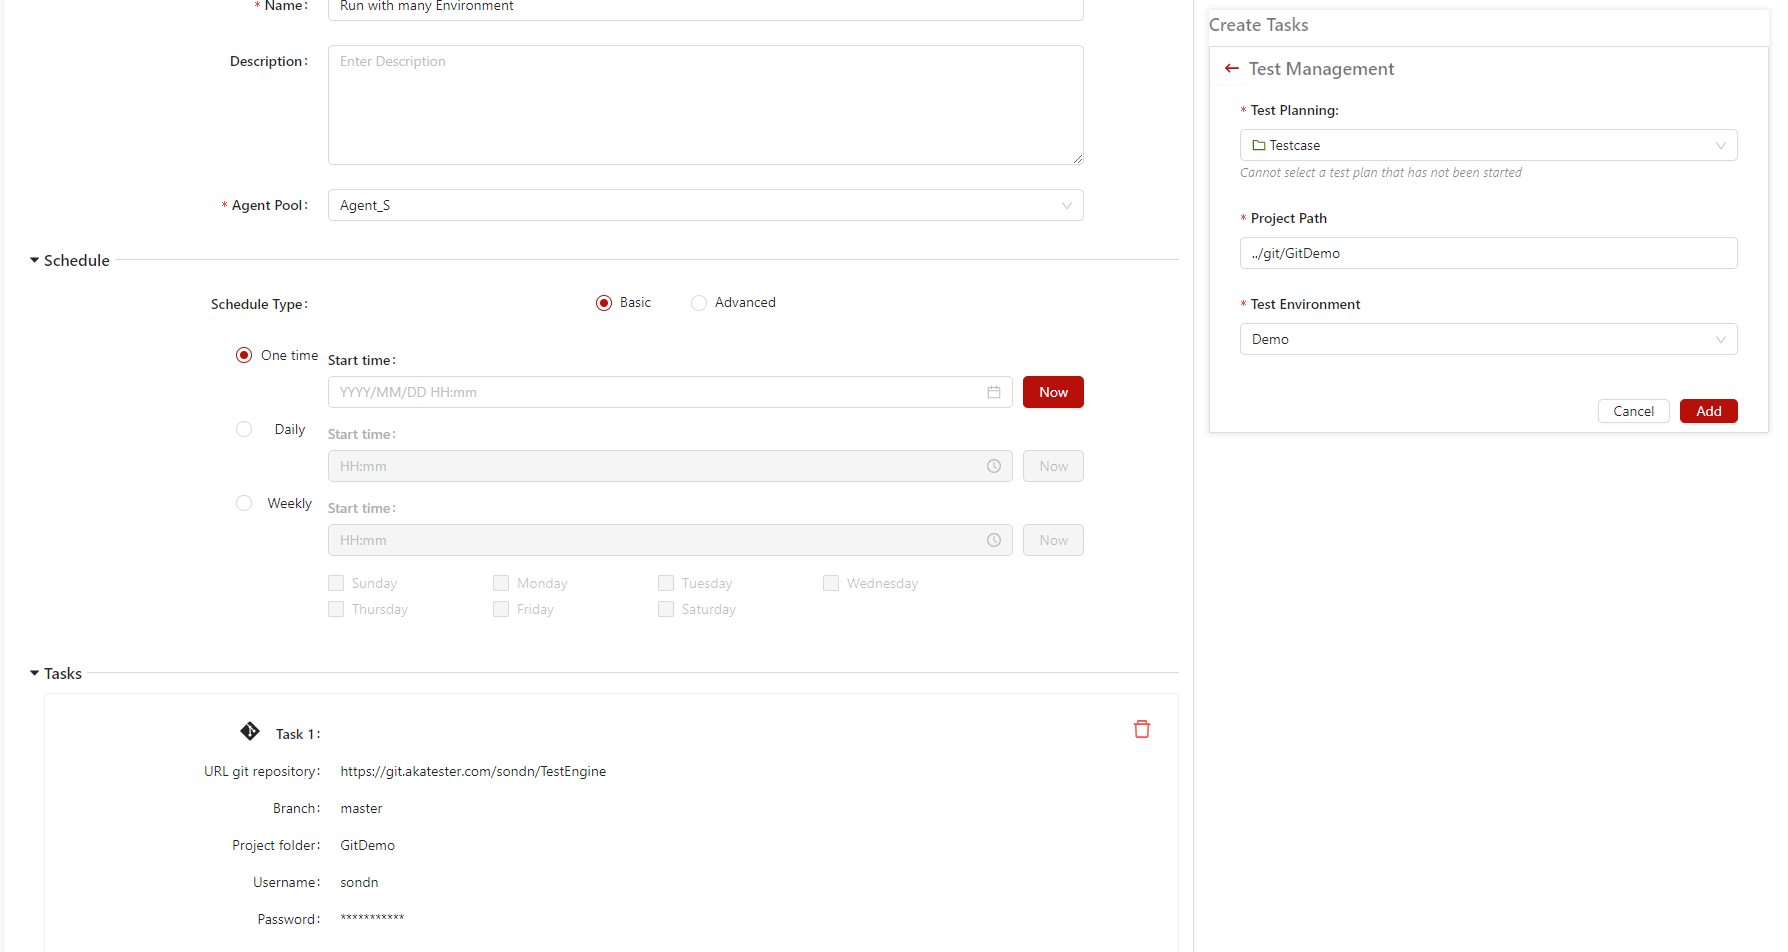
Step 2: The fields in the Test Management will be filled as follows
-
Test Planning (Refer to Test Planning) Note: Your test plan has had to be started
-
Project Path: Path direct to project folder (Note: Project path will be same as Project Folder of Git Command. Version 3.8.x and higher should be applied "../git/Project Folder")
-
Test Environment: Select test configuration that you created in Test Environment
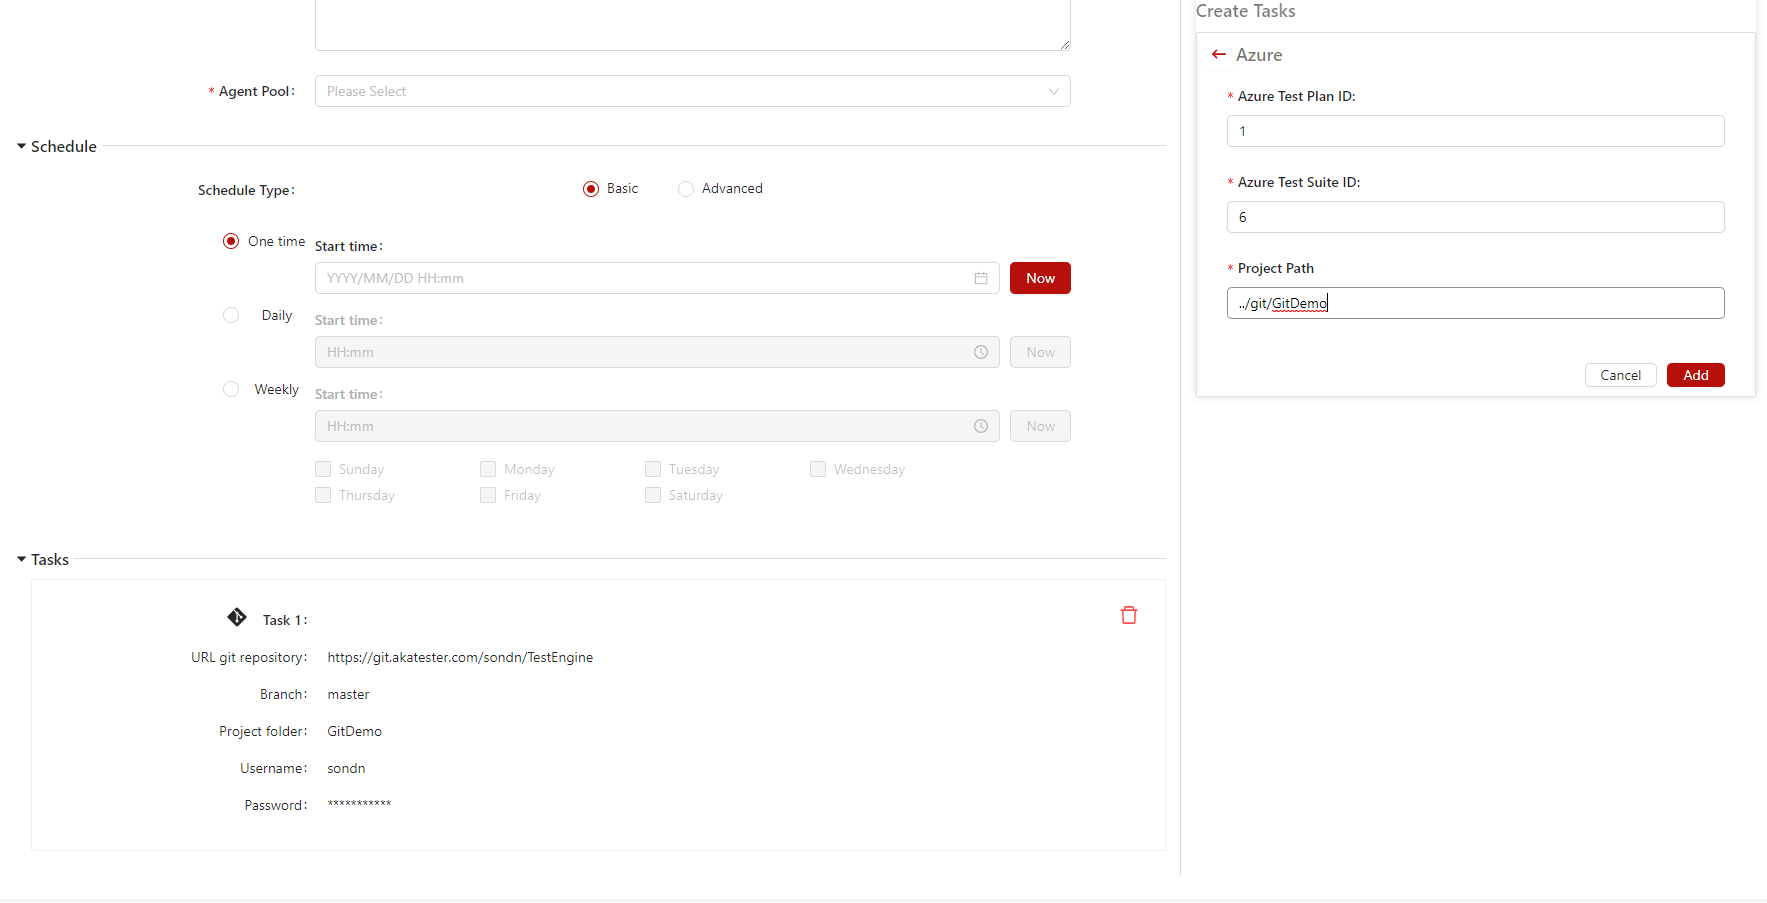
6.2. Git Command + Azure DevOps
In case you want to always run the latest script fetched from git and run it according to the plan on TestManagement, the results will be returned to the Test execution report on Azure DevOps
Step 1: The fields in the Task Git Command will be filled as following the previous task
Step 2: The fields in the Azure Devops will be filled as follows
-
You must create an integration between TM and Azure DevOps. Please refer to this link Azure Devops
-
Azure Test Plan ID: Type Test Plan ID of Azure
-
Azure Test Suite ID: Type Test Suite ID of Azure
-
Project Path: Path direct to project folder
(Note: Project path will be same as Project Folder of Git Command. Version 3.8.x and higher should be applied "{../git/Project Folder}")
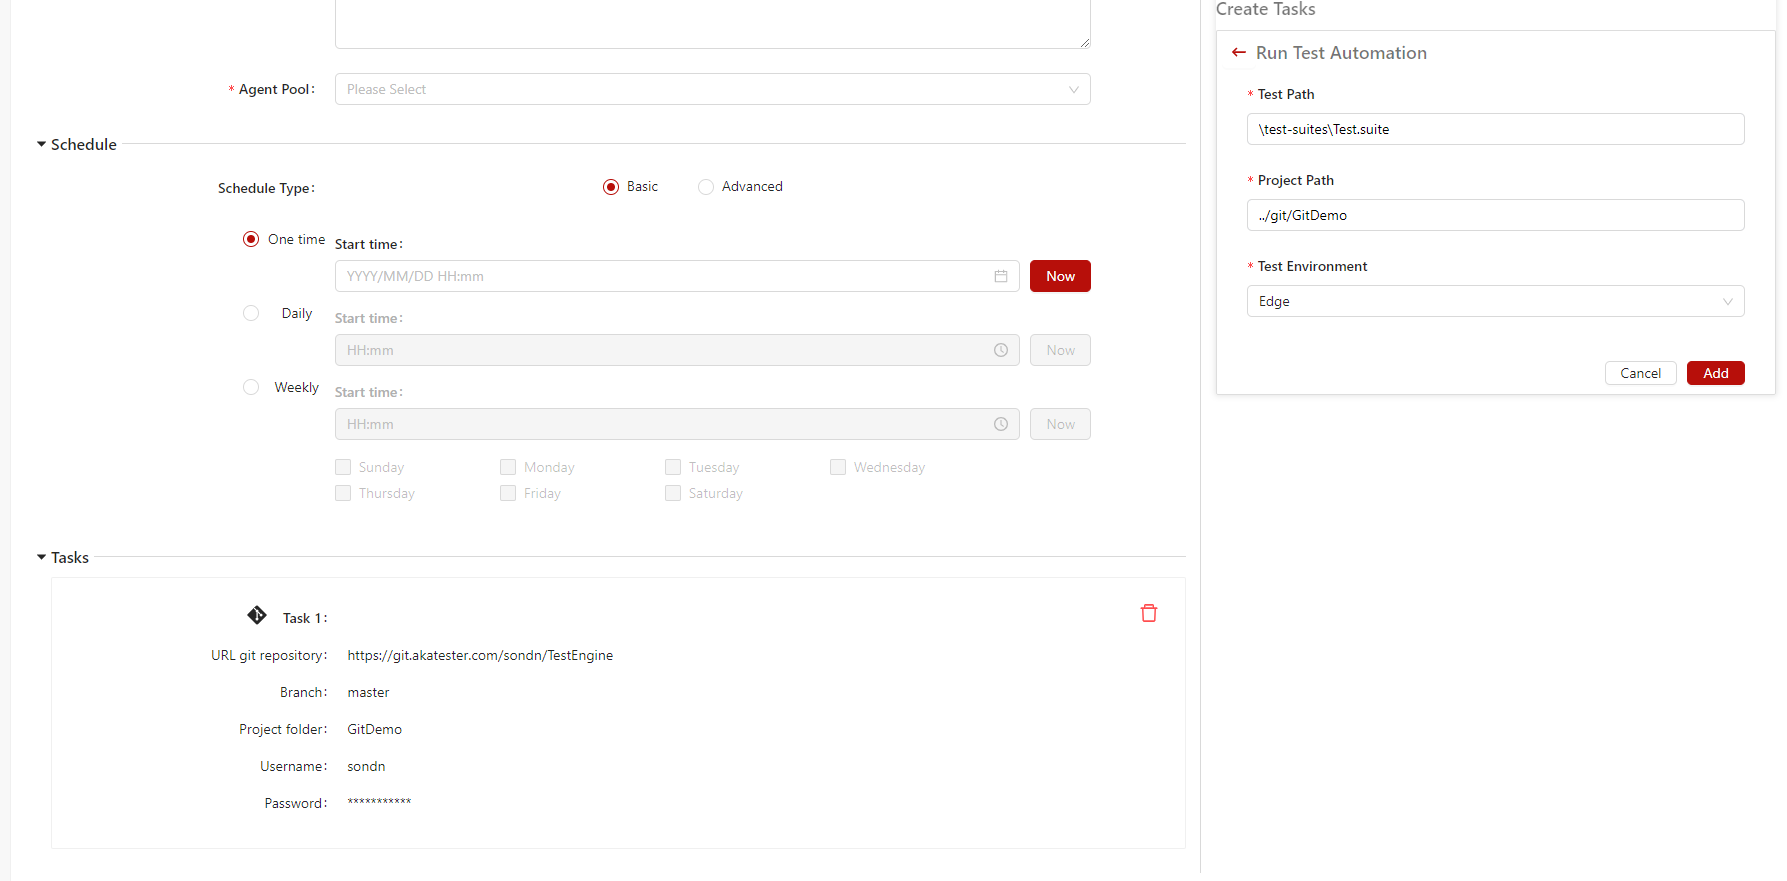
6.3. Git Command + Run Direct Path
In case you want to always run the latest script fetched from git and run it according to the plan on TestManagement, the results will be returned to the Test Data in Test Engine
Step 1: The fields in the Task Git Command will be filled as following the previous task
Step 2: The fields in the Run Direct Path will be filled as follows
-
Before filling in the information, please refer to this link Run Direct Path
-
Test Path: Path of test case in Studio that you want to run
-
Project Path: Path direct to project folder
(Note: Project path will be same as Project Folder of Git Command. Version 3.8.x and higher should be applied "../git/{Project Folder}")
- Test Environment: Select test configuration that you created in Test Environment
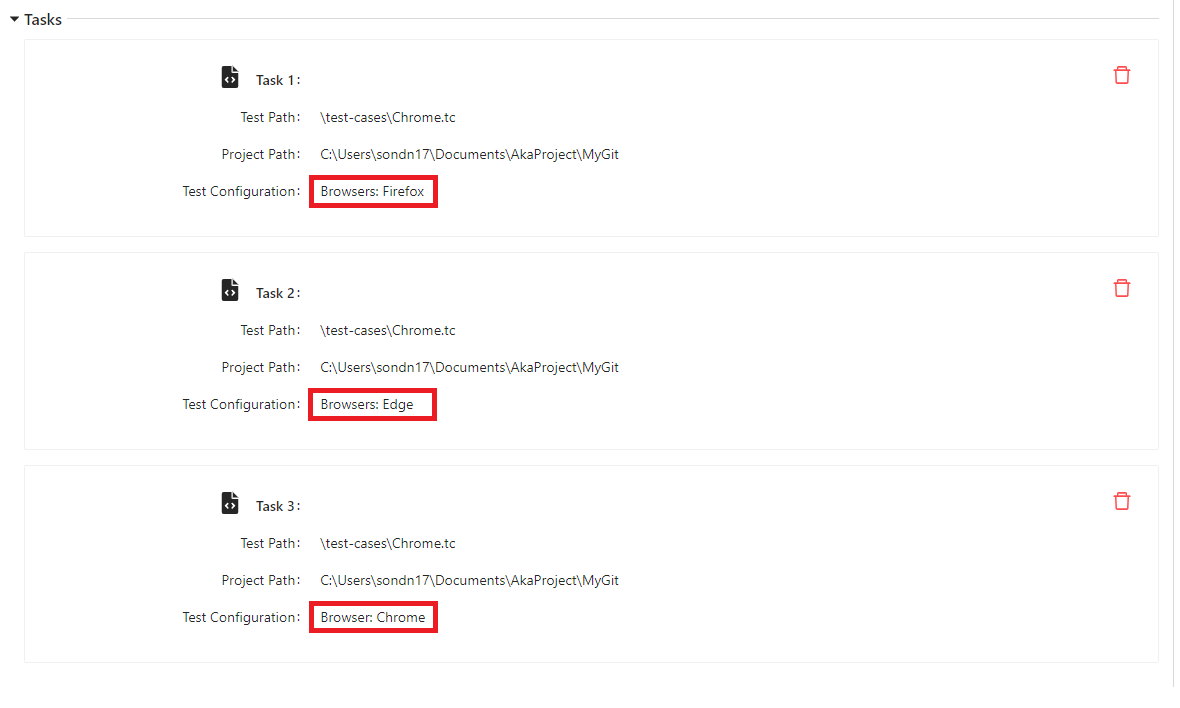
6.4. Run with multiple environments
Note: To run environments that is applied for Test Management and Run Direct Path
- To add multiple Test Management/Run Direct Path, just only change Test Environment
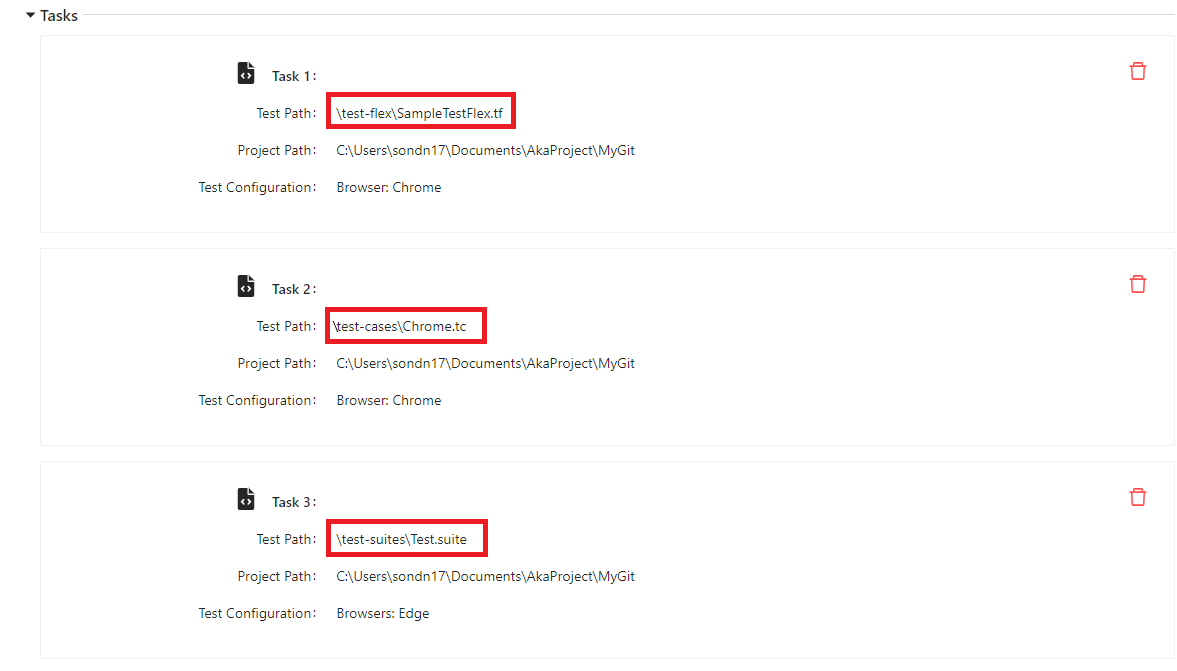
6.5. Run with particular test path
- To run with particular test path, just only change Test Path
Step 5: Choose Agent Pool that you want or created currently
Step 6: Set Schedule time
- Schedule Type has 2 types: Basic and Advanced (Refer to Schedule time)