Notifications
akaAT can send notifications to users when significant events occur. For example, you can get notified when a work ticket is created or completed, or when any of the work ticket's field is updated.
akaAT system are pre-set with notifications called Default Notifications. These notifications are associated with all new projects by default. However, you can modify them from the project via the Project Setting/Notifications page, as described below.
How akaAT notifications work?
Notifications for events that occur close together are grouped and sent in a summary email, just to avoid too many sent to many recipients with different channels. We're calling these notifications batched notifications, as opposed to separate notifications.
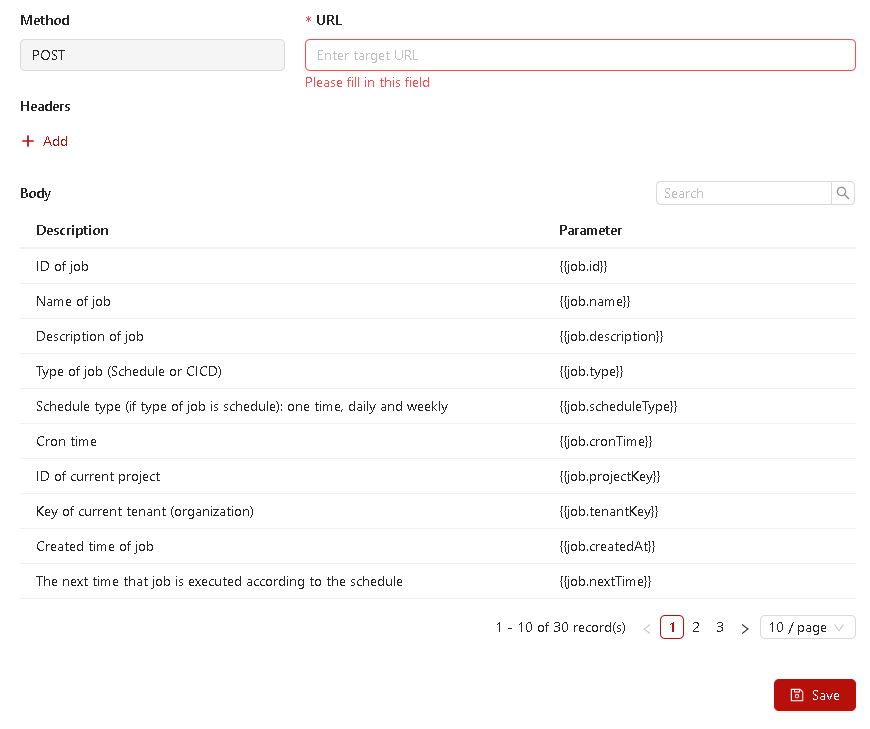
Support content parameters
| Parameter | Description |
|---|---|
| {{job.id}} | ID of job |
| {{job.name}} | Name of job |
| {{job.description}} | Description of job |
| {{job.type}} | Type of job (Schedule or CICD) |
| {{job.scheduleType}} | Schedule type (if type of job is schedule): one time, daily and weekly |
| {{job.projectId}} | ID of current project |
| {{job.projectKey}} | Key of current project |
| {{job.tenantKey}} | Key of current tenant (organization) |
| {{job.createdAt}} | Created time of job |
| {{job.updatedAt}} | The last modified time of job |
| {{job.nextTime}} | The next time that job is executed according to the schedule |
| {{job.status}} | Status of job |
| {{job.createdBy.id}} | ID of member who created the job |
| {{job.createdBy.name}} | Name of member who created the job |
| {{job. updatedBy.id}} | ID of the member who last modified the job |
| {{job. updatedBy.name}} | Name of the member who last modified the job |
| {{job.jobRunner.id}} | ID of job runner |
| {{job.jobRunner.name}} | Name of job runner |
| {{job.jobRunner.status}} | Status of job runner |
| {{job.jobRunner.duration}} | Execution time of a job runner |
| {{job.jobRunner.createdAt}} | Created time of job runner |
| {{job.jobRunner.updatedAt}} | The last modified time of job runner |
| {{job.jobRunner.startTime}} | The time when job runner was started to be executed |
| {{job.jobRunner.endTime}} | The time when the job runner was finished executing |
| {{job.jobRunner.url}} | URL of job runner |
| {{job.jobRunner.agent.id}} | ID agent of job runner |
| {{job.jobRunner.agent.name}} | Name agent of job runner |
| {{job.jobRunner.agent.version}} | Version agent of job runner |
| {{job.jobRunner.agent.poolID}} | ID agent pool of job runner |
| {{job.jobRunner.agent.poolName}} | Name agent pool of job runner |
| {{job.jobRunner.resultSumary.total}} | Total number of test cases of the job runner |
| {{job.jobRunner.resultSumary.totalPass}} | Total number of passed test cases of the job runner |
| {{job.jobRunner.resultSumary.totalFail}} | Total number of failed test cases of the job runner |
| {{job.jobRunner.testResult.id}} | ID of test result |
| {{job.jobRunner.testResult.testCase.id}} | ID of test case |
| {{job.jobRunner.testResult.testCase.name}} | Name of test case |
| {{job.jobRunner.testResult.task.id}} | ID of task |
| {{job.jobRunner.testResult.task.type}} | Type of task (Engine, Azure) |
| {{job.jobRunner.testResult.task.testPath}} | Test case path of task |
| {{job.jobRunner.testResult.task.projectPath}} | Project path of task |
| {{job.jobRunner.testResult.testConfig.id}} | ID of test configuration |
| {{job.jobRunner.testResult.testConfig.name}} | Name of test configuration |
| {{job.jobRunner.testResult.testConfig.value.Operation System}} | Operation System of test result (which was configured in test configuration) |
| {{job.jobRunner.testResult.testConfig.value. Browser}} | Browser of test result (which was configured in test configuration) |
| {{job.jobRunner.testResult.status}} | Status of test result |
| {{job.jobRunner.testResult.duration}} | Duration of test case |
| {{job.jobRunner.testResult.createdAt}} | Created time of test result |
| {{job.jobRunner.testResult.updatedAt}} | The last modified time of test result |
| {{job.jobRunner.testResult.evidence}} | Evidence of test result |
| {{job.jobRunner.testResult.url}} | URL of test result |
Recipients
The following types of recipients can receive notifications.
| Recipient Types | Description |
|---|---|
| Custom email address | Any email address that user wish to alert. |
| People fields | All people fields of current work item/test item 1. Test Engine: Job creator, Last job updater. 2. The others: Creator/Reporter, Last updater, Assignee |
| Project Role | The members of a particular project role for this project. |
| Project members/teams | Teams and Members in your akaAT project. |
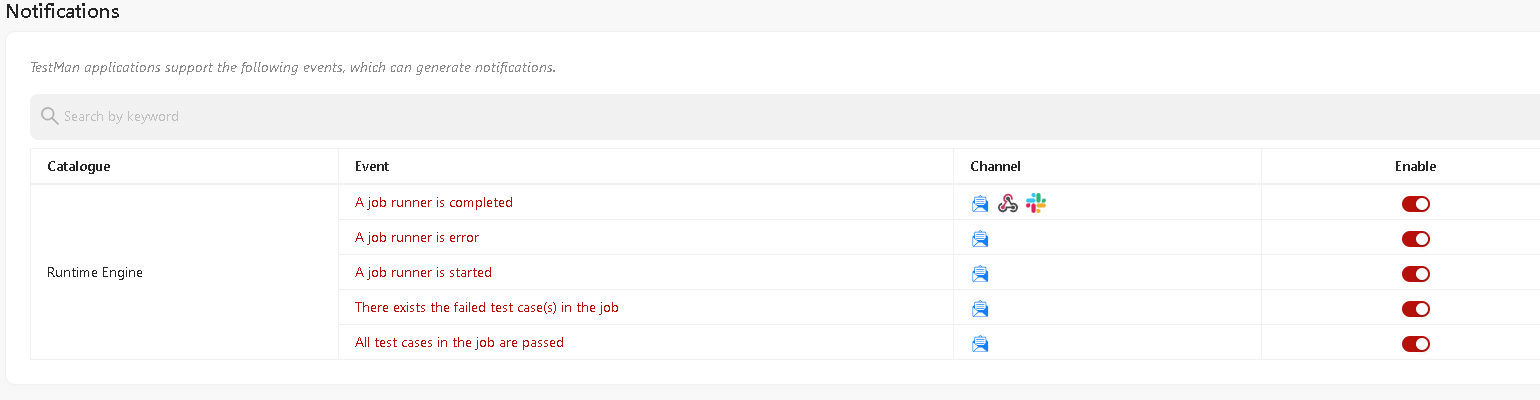
1. Enabling/Disabling an event
All events are enabled by default
- Go to Project setting > Notifications
- Locate the Event that you want to Enable/Disable, and click on the switch button.
2. Add new notification channel
An Event can have one or more notifications of different channels
Each channel has only one notification.
-
Go to Project setting > Notifications
-
Select an Event
-
On the Active notification sidebar, clicking on
 button.
 -
Select the notification channel
At this point, a new notification channel has been added with default information and you can edit them.
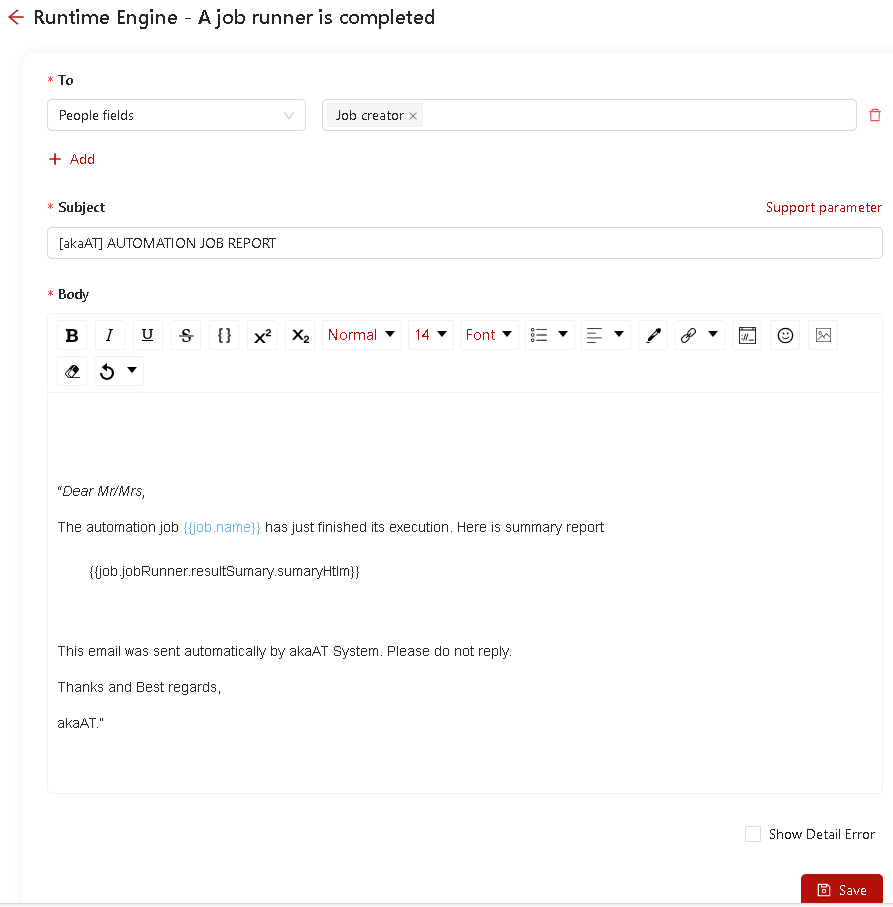
3. Customizing notification content
- Go to Project setting > Notifications
- Select an Event
- On the Active notification sidebar, click on a channel that that you want to customize content
- Fill the details and click on the Save button.
Webhook
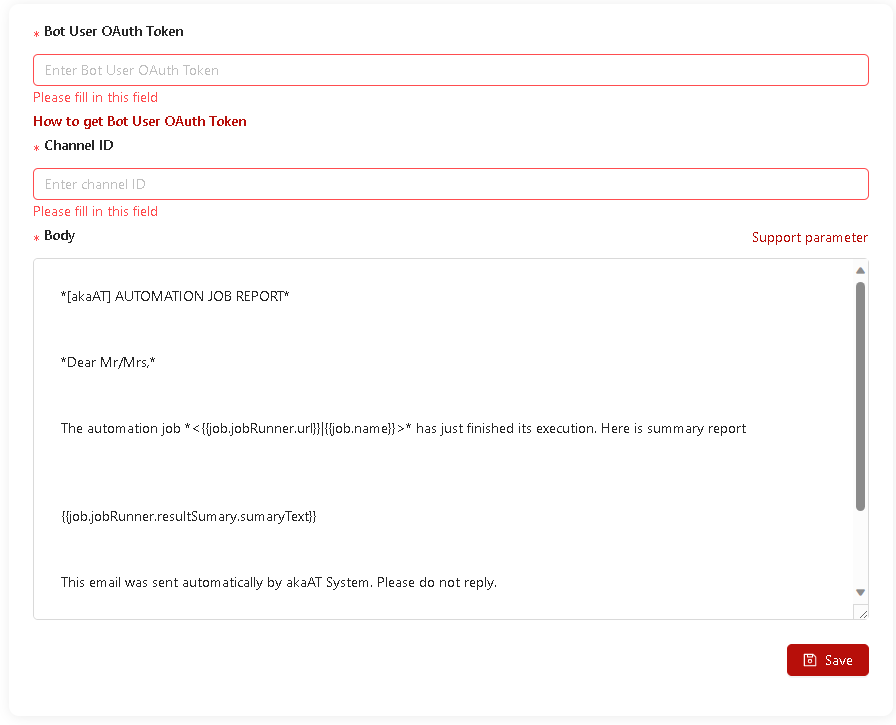
Slack
Pre-Condition:
- You must have "Slack" account
- You must have a workspace and a channel on Slack
Implementation steps
Step 1: Click How to get Bot User OAuth Token hyperlink
Step 2: Click Create a new Slack app button

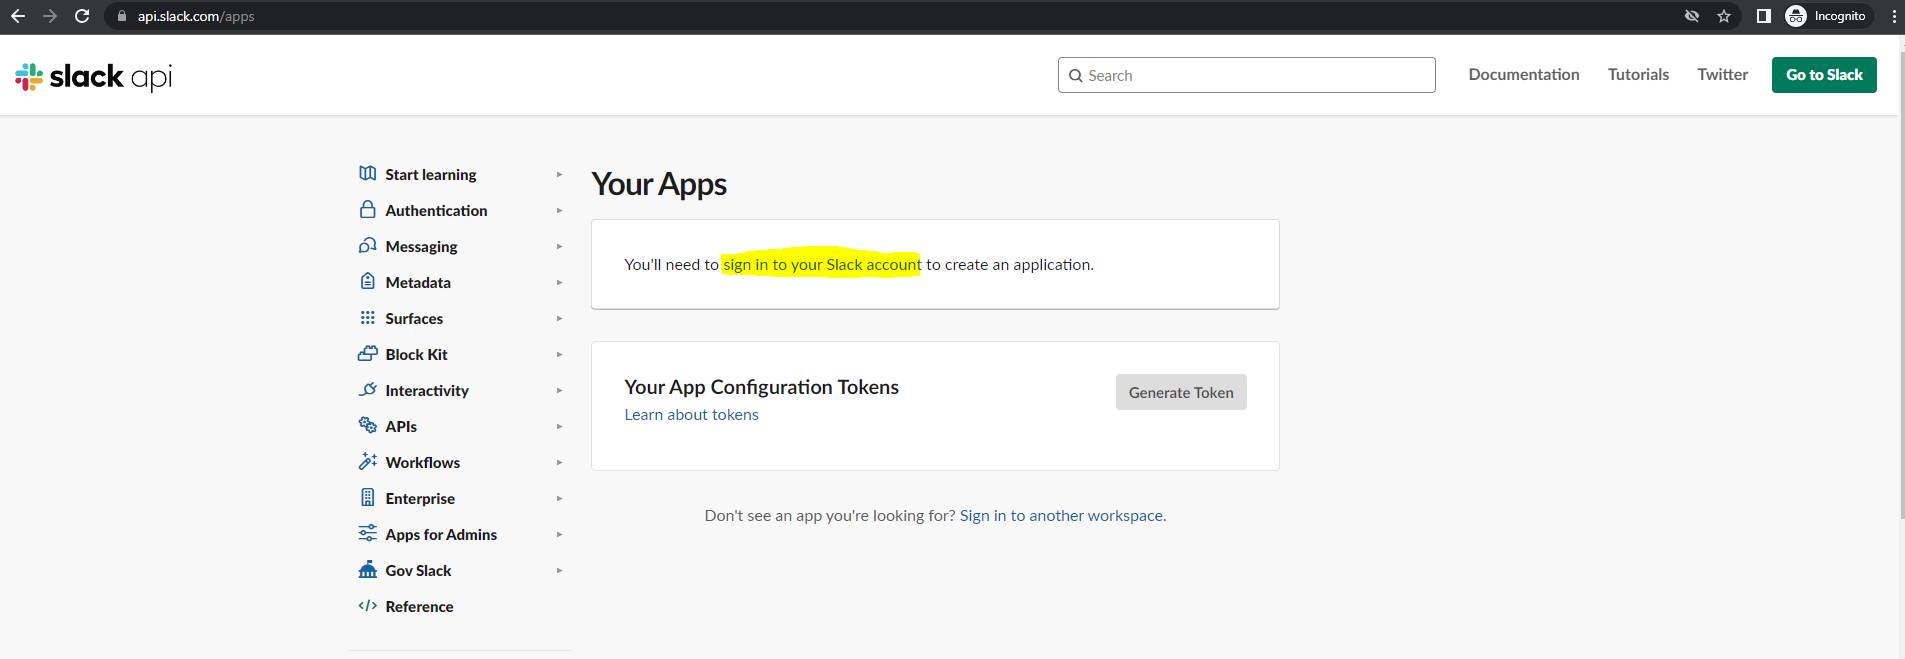
Step 3: Click sign in hyperlink and signin Slack (If you already login, skip to Step 4)
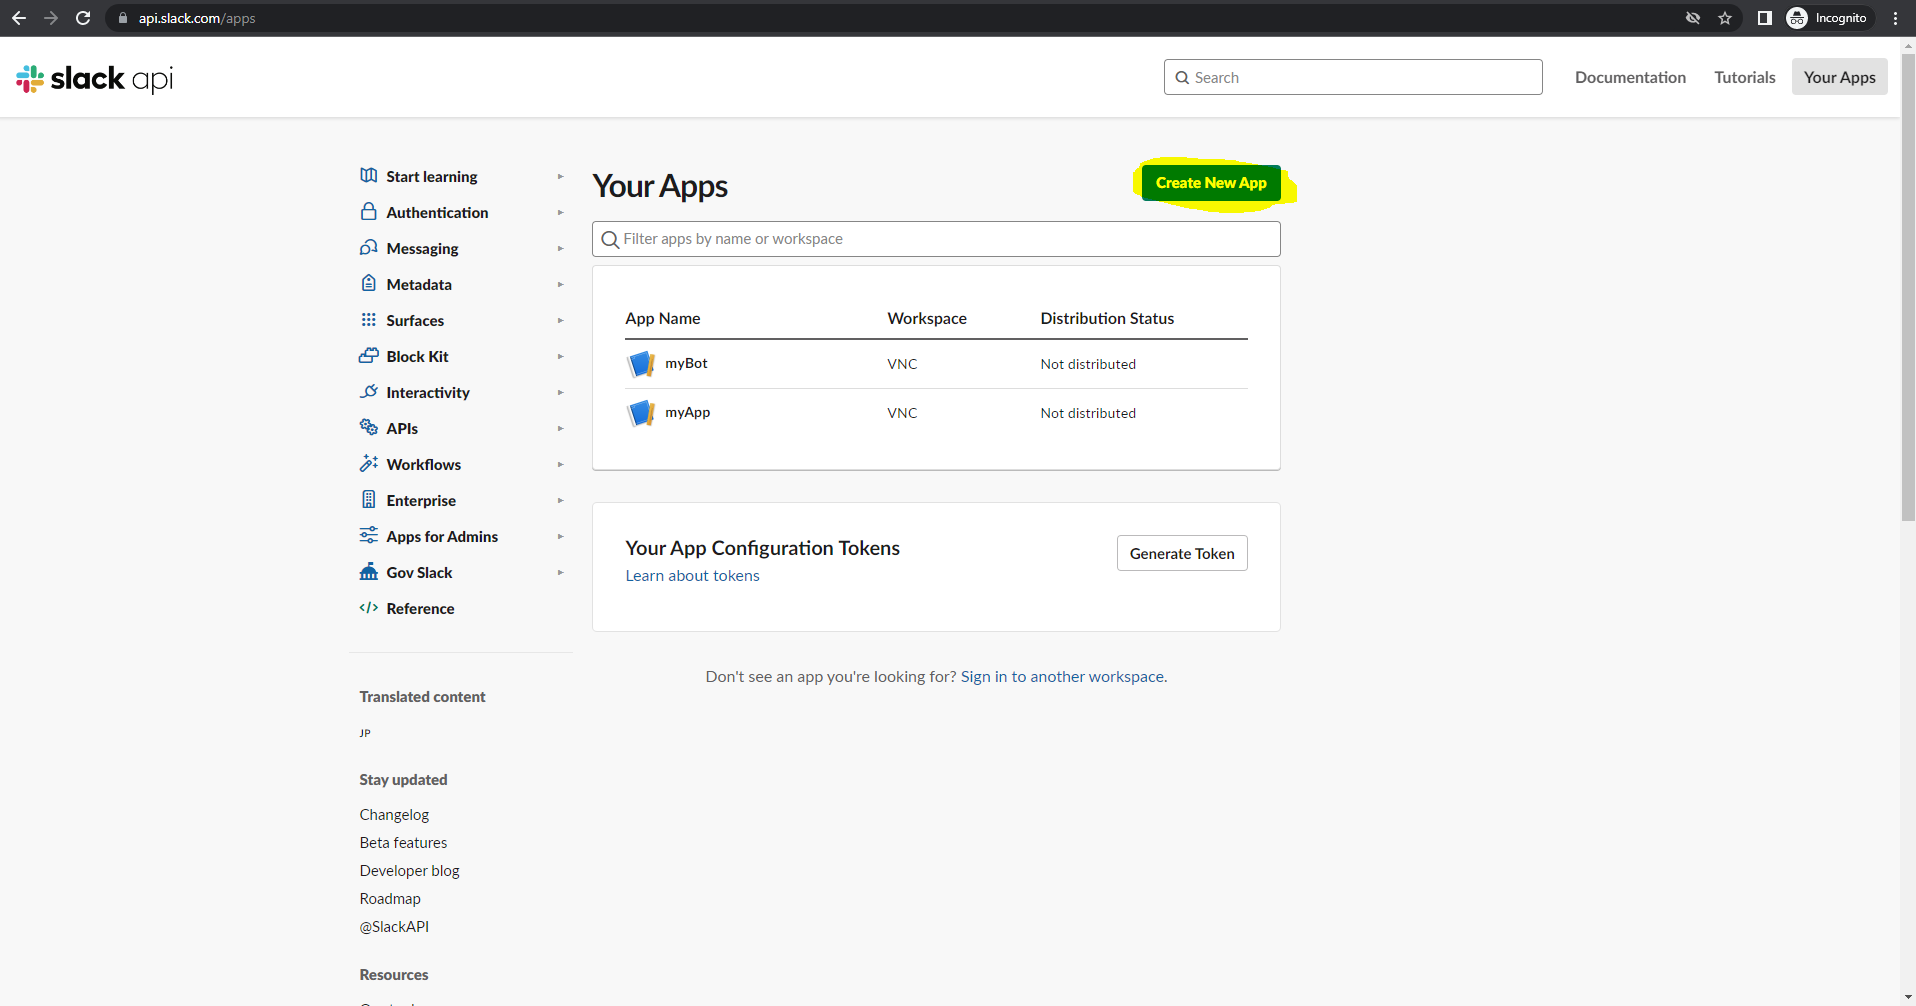
Step 4: Click Create New App button
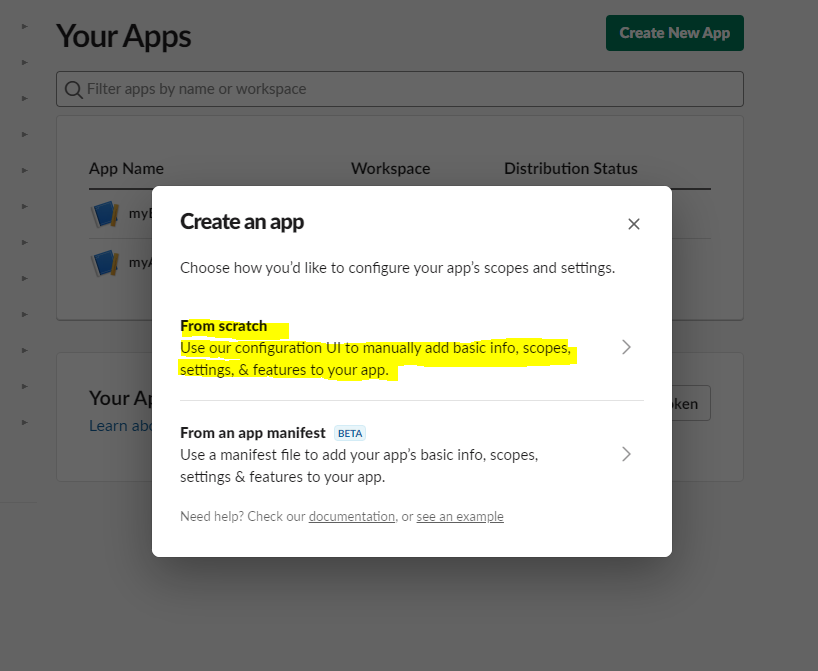
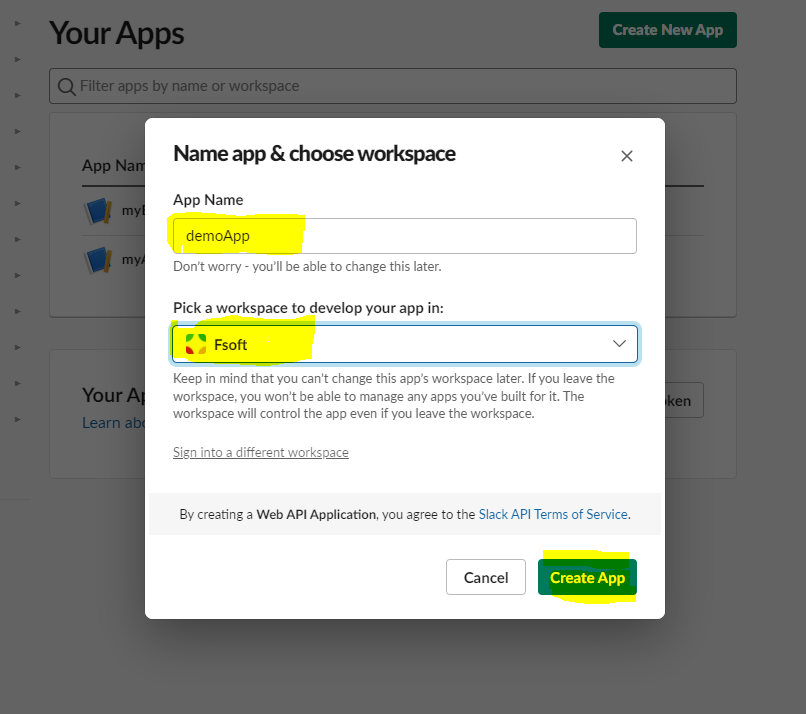
Step 5: Choose From scatch
Input App Name and Pick a workspace then click Create App button
Step 6: Click OAuth & Permissions
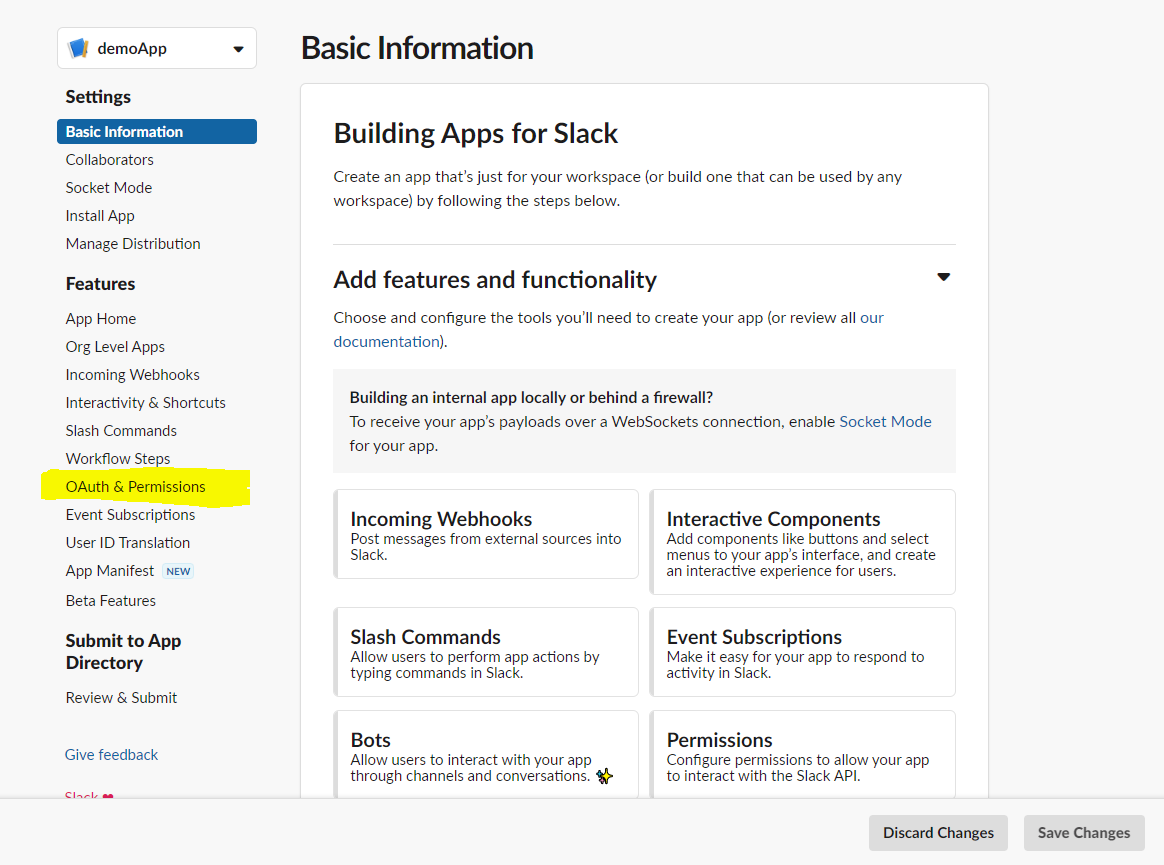
Scroll to Scopes and click Add an OAuth Scope
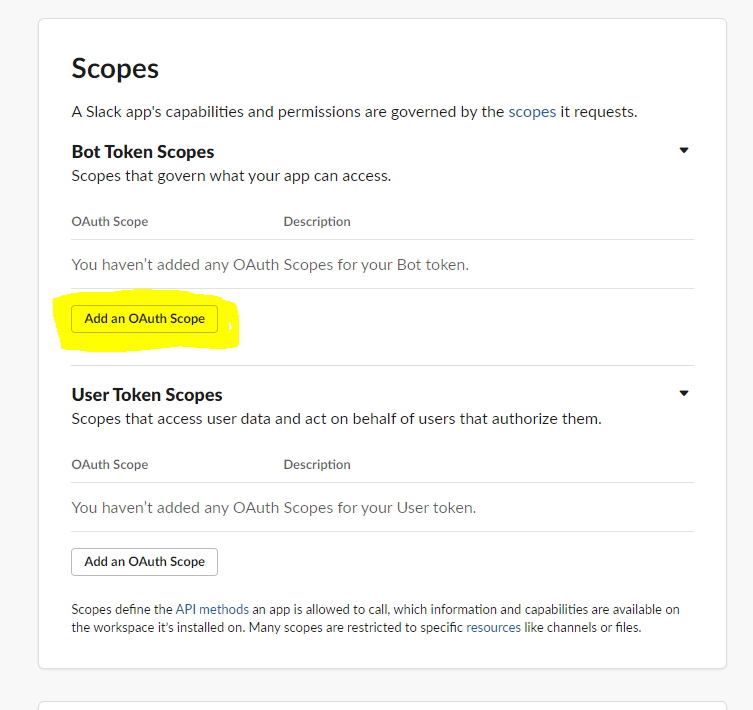
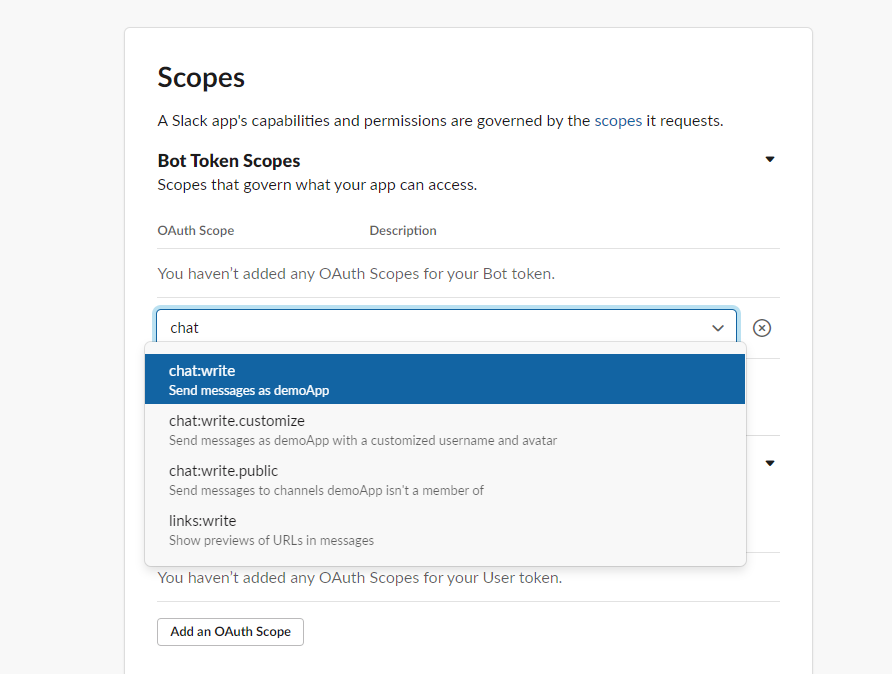
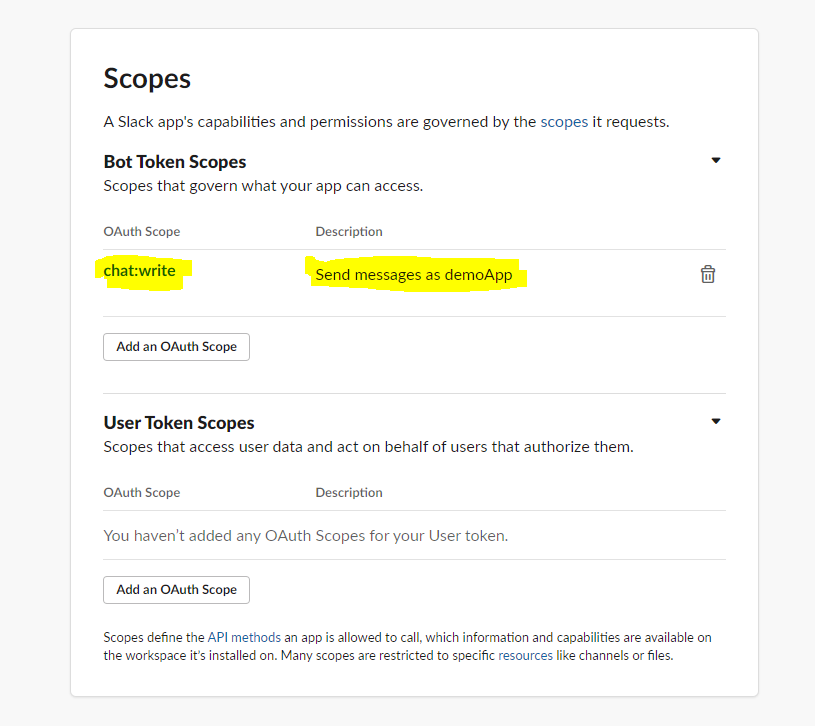
Typing "chat" into input and click chat:write
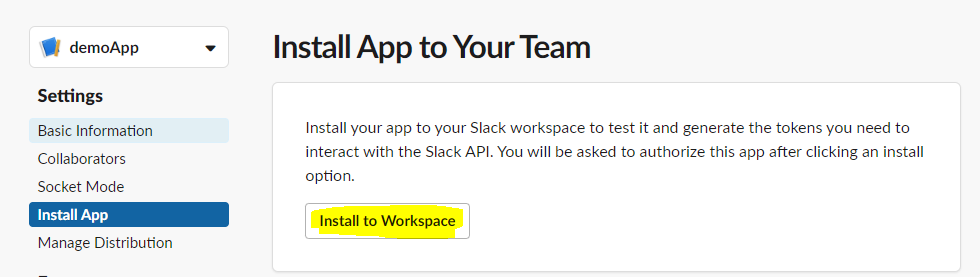
Step 7: Scroll up to top page and click Install App
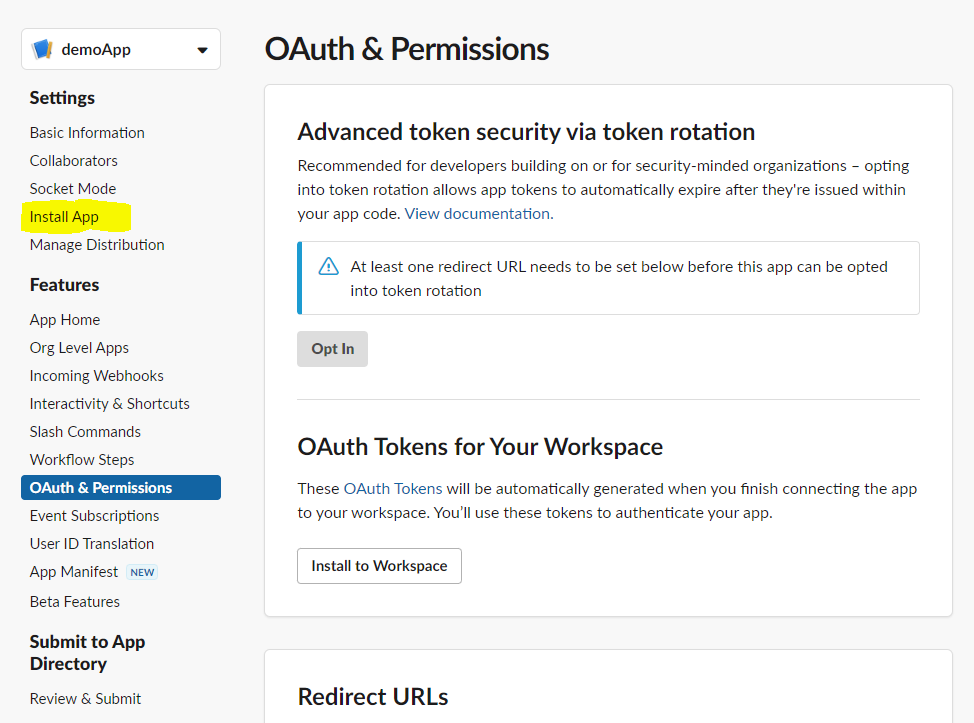
Click Install to Workspace
Click Allow button

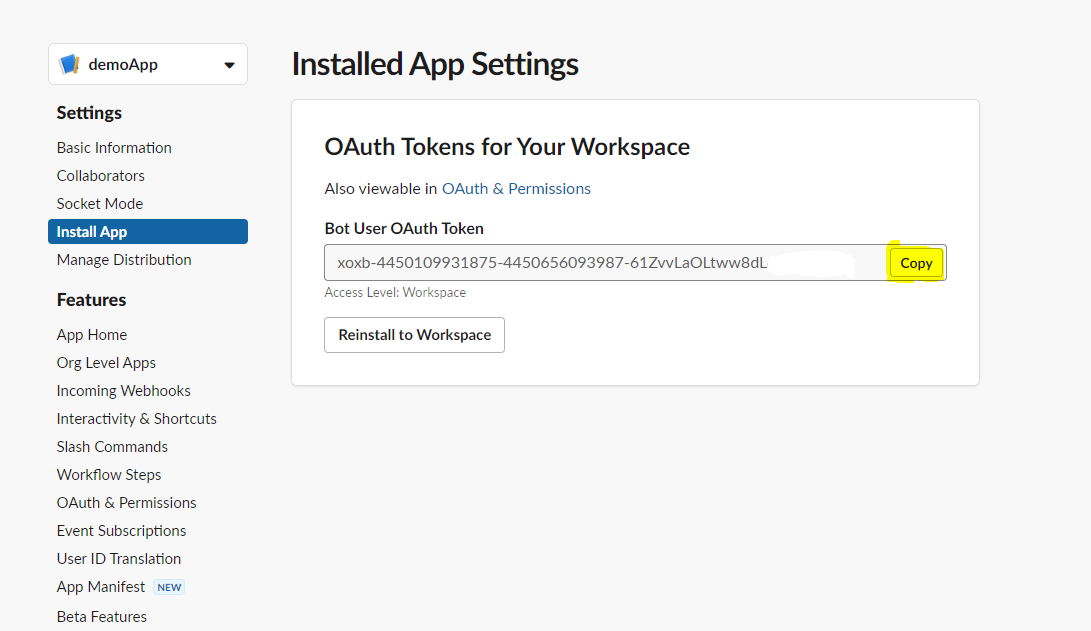
Copy the Bot User OAuth Token
Step 8: Typing your app into the chat box of your channel then press Enter
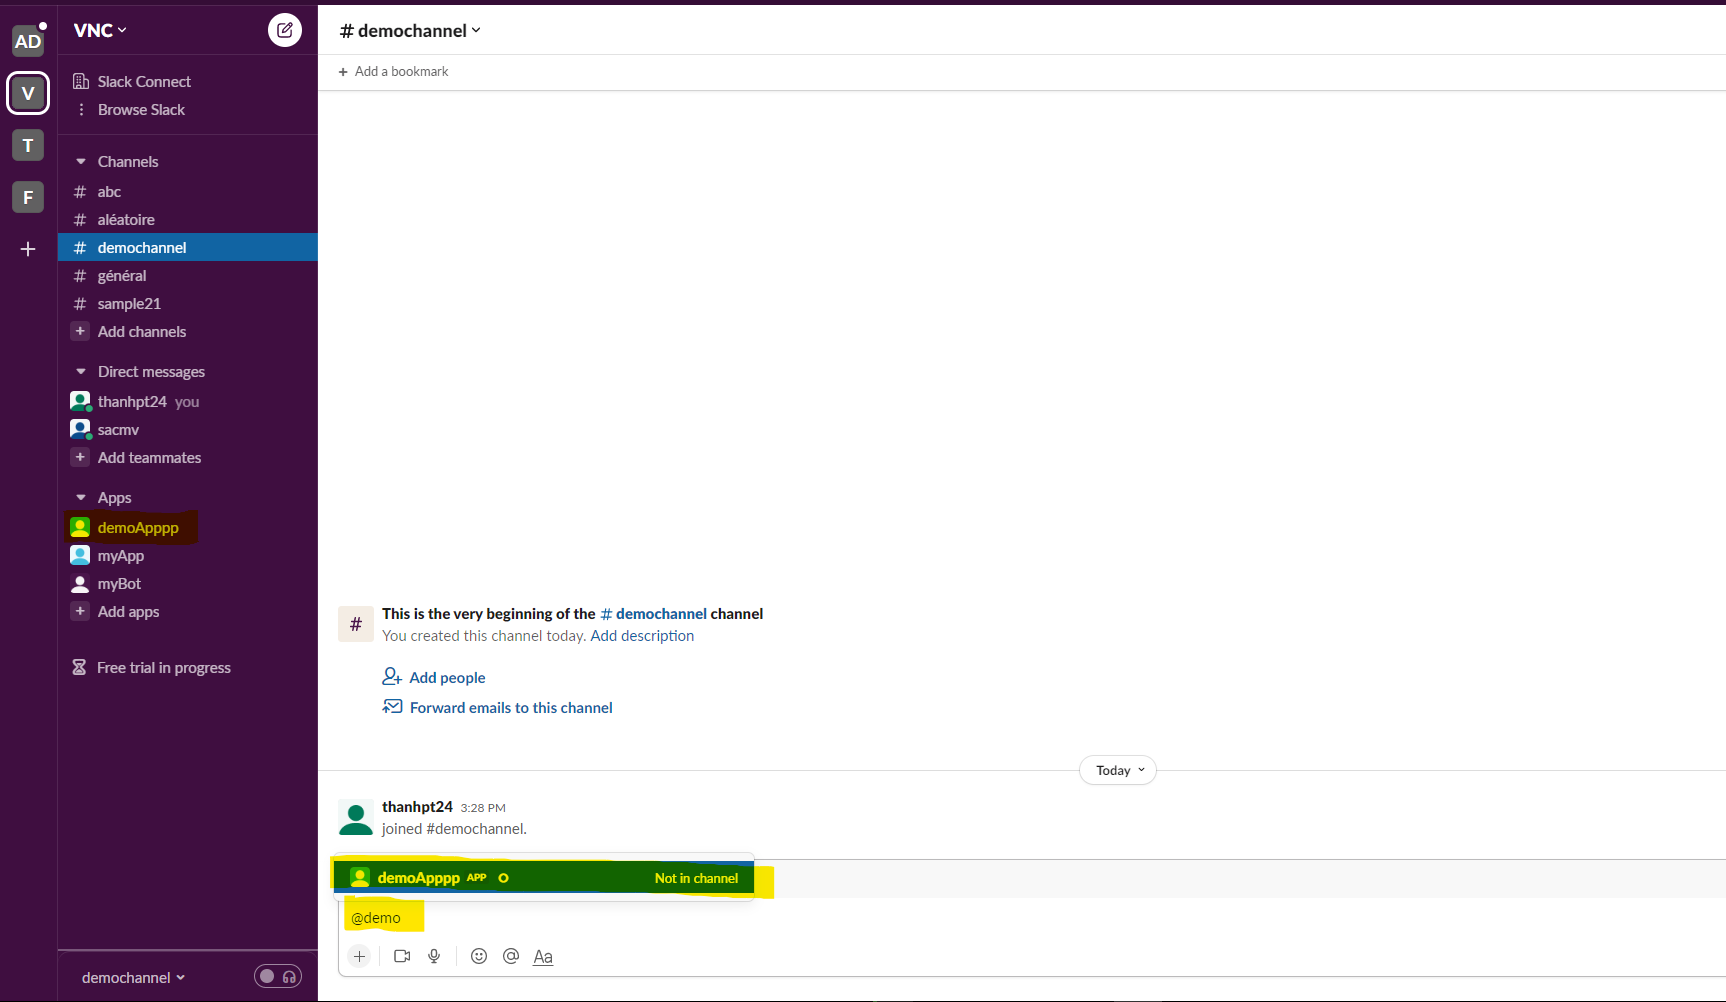
Click Add to Channel button
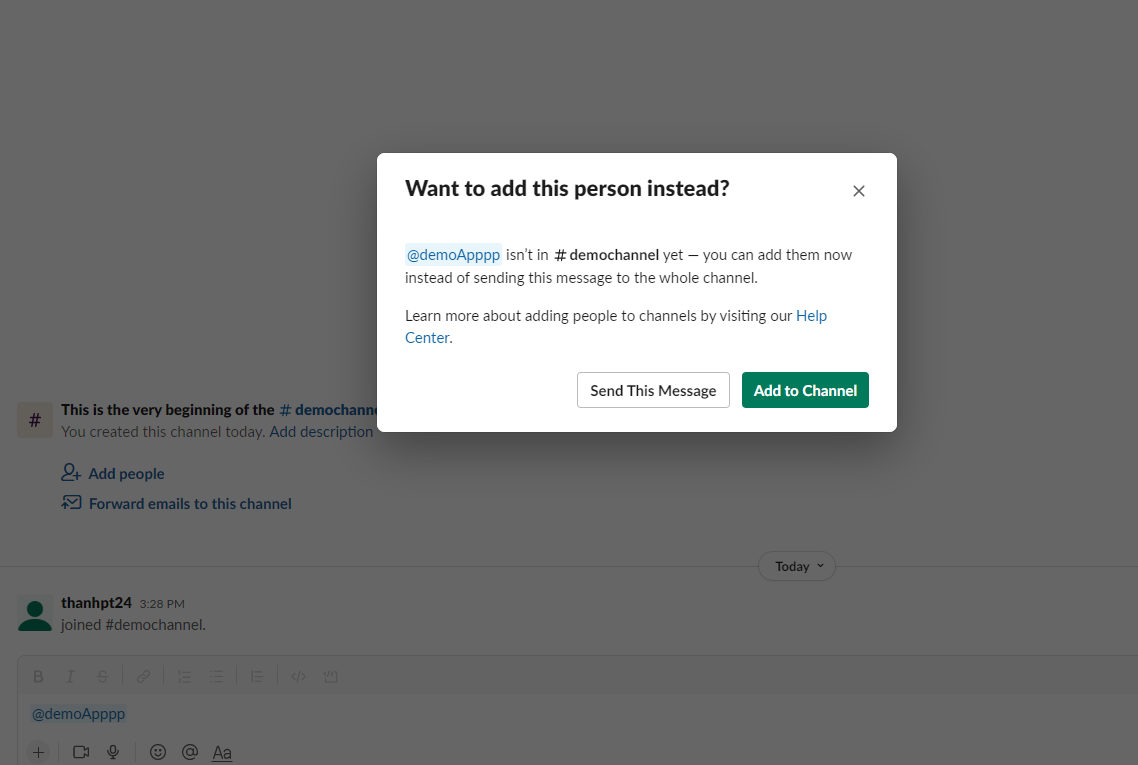
Then copy the channel ID

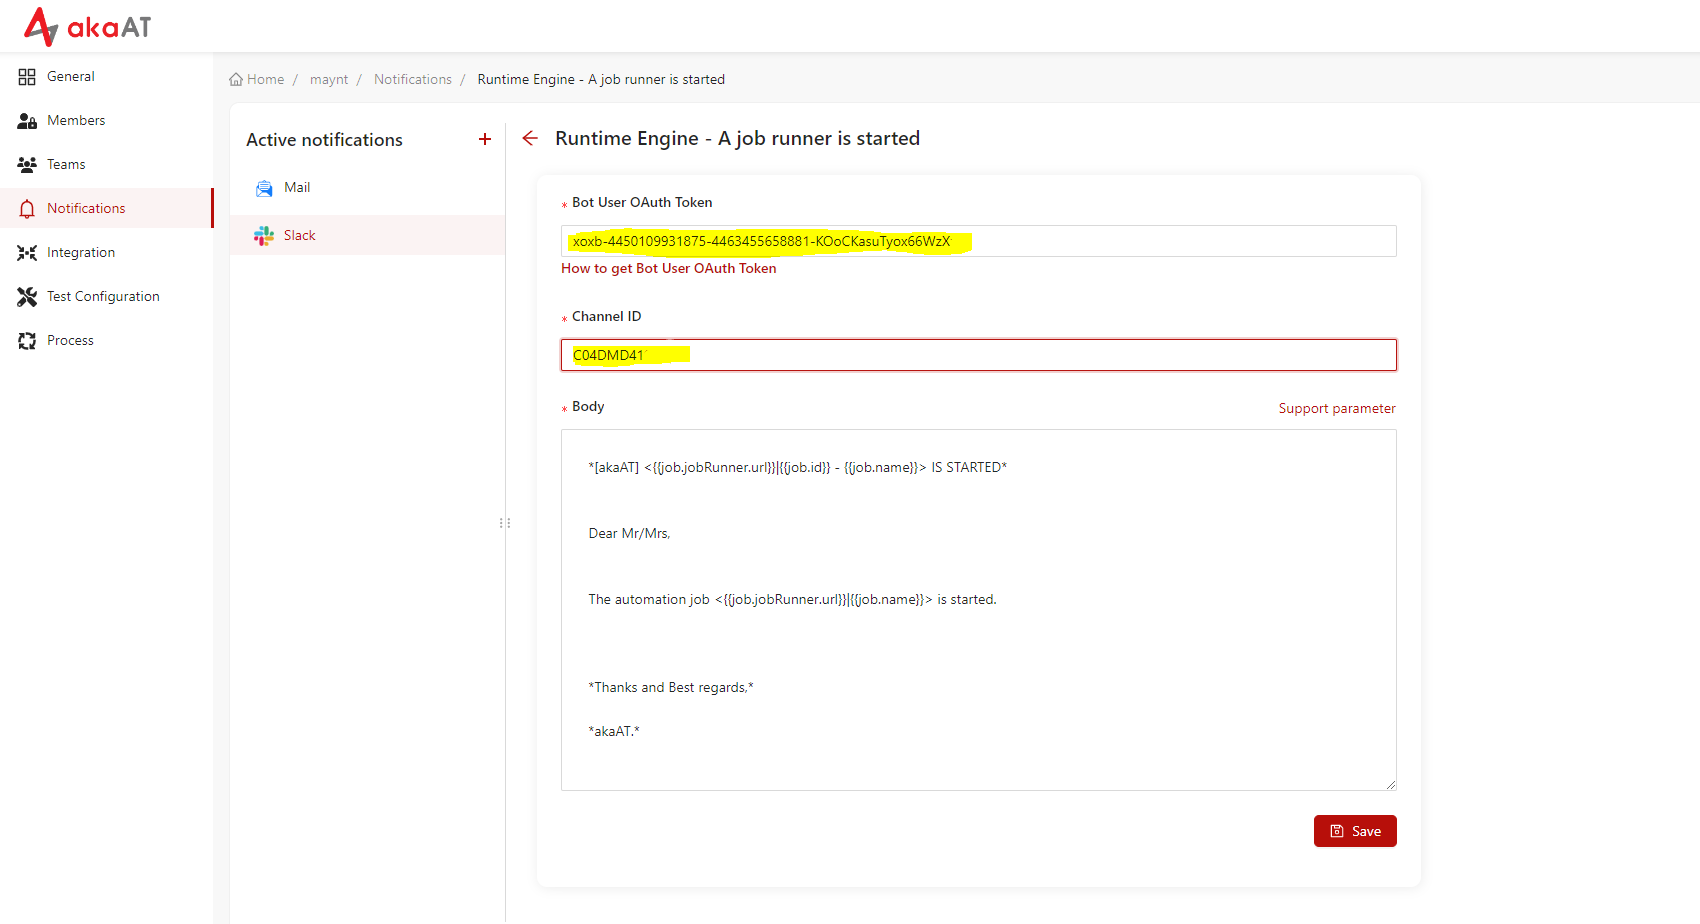
Step 9: Paste the Bot User OAuth Token and the channel ID then click Save button
3. Remove a notification channel
- Go to Project setting > Notifications
- Select an Event
- On the Active notification sidebar, locate the channel that you want to remove then click on Delete icon button.