Working With Test Case
Clone test case
-
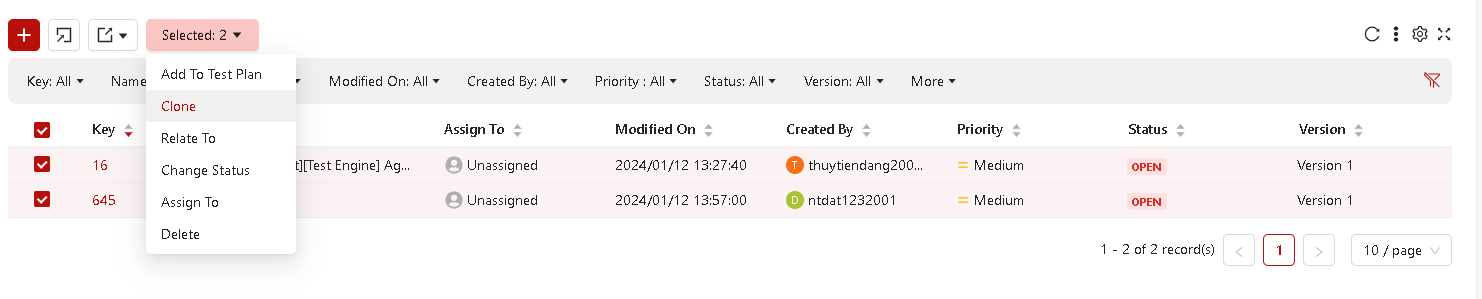
Selecting the test case(s) that wanting to clone
-
After selecting, [Selected] button is active for users clicking on, then select option "Clone" to clone test case(s)
- Newly cloned test case(s) added to the above/bottom of the table (base on configured gridview) with the exact fields from the selected test case(s).
Delete test case
-
Go to table list of test case screen
-
Select test case to delete by clicking on check box of each test case

-
After selecting, [Selected] button is active for users clicking on, then select option "Delete" to delete test case(s)
- A pop-up message will appear and ask “Are you sure you want to Delete?”
-
Click on [Delete] button to confirm deleting test case(s).
Test cases that were added to Test Planning before, when delete in Test Repository, will not be deleted in Test Planning
Export test case
-
Selecting test cases that wanting to export on the left hand side of the table, then select the file type that you want to export > In case you want to export all folder of test case, you just need to select folder, then select [export] icon, system will default get all test cases in folder to export.
-
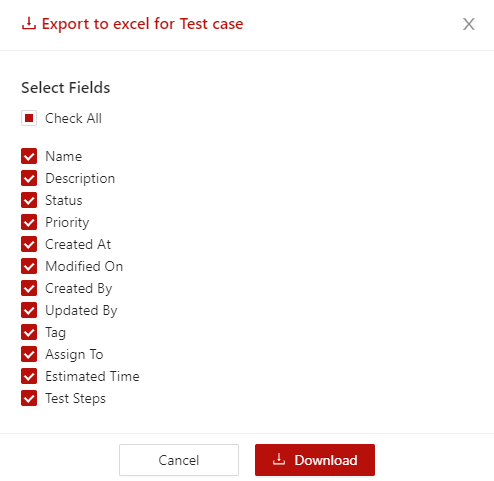
A pop-up select exporting field for users choosing
-
-
Choose field(s) of test case that wanting to export
-
Simply clicking to [Download] button and then the export file of your test cases will be downloaded to your computer.
Add test cases to Test Planning
There are 2 ways to add test case(s) to Test Planning
Note:
- Users can just add selected test case to Combining Test Suite
- Users can just add folder of test case to Binding Test Suite
Add a folder of test case to a Test Suite
-
Clicking on the [Vertical ellipsis] in each folder that wanting to add to Test Suite then choose “Add to Test Planning”
-
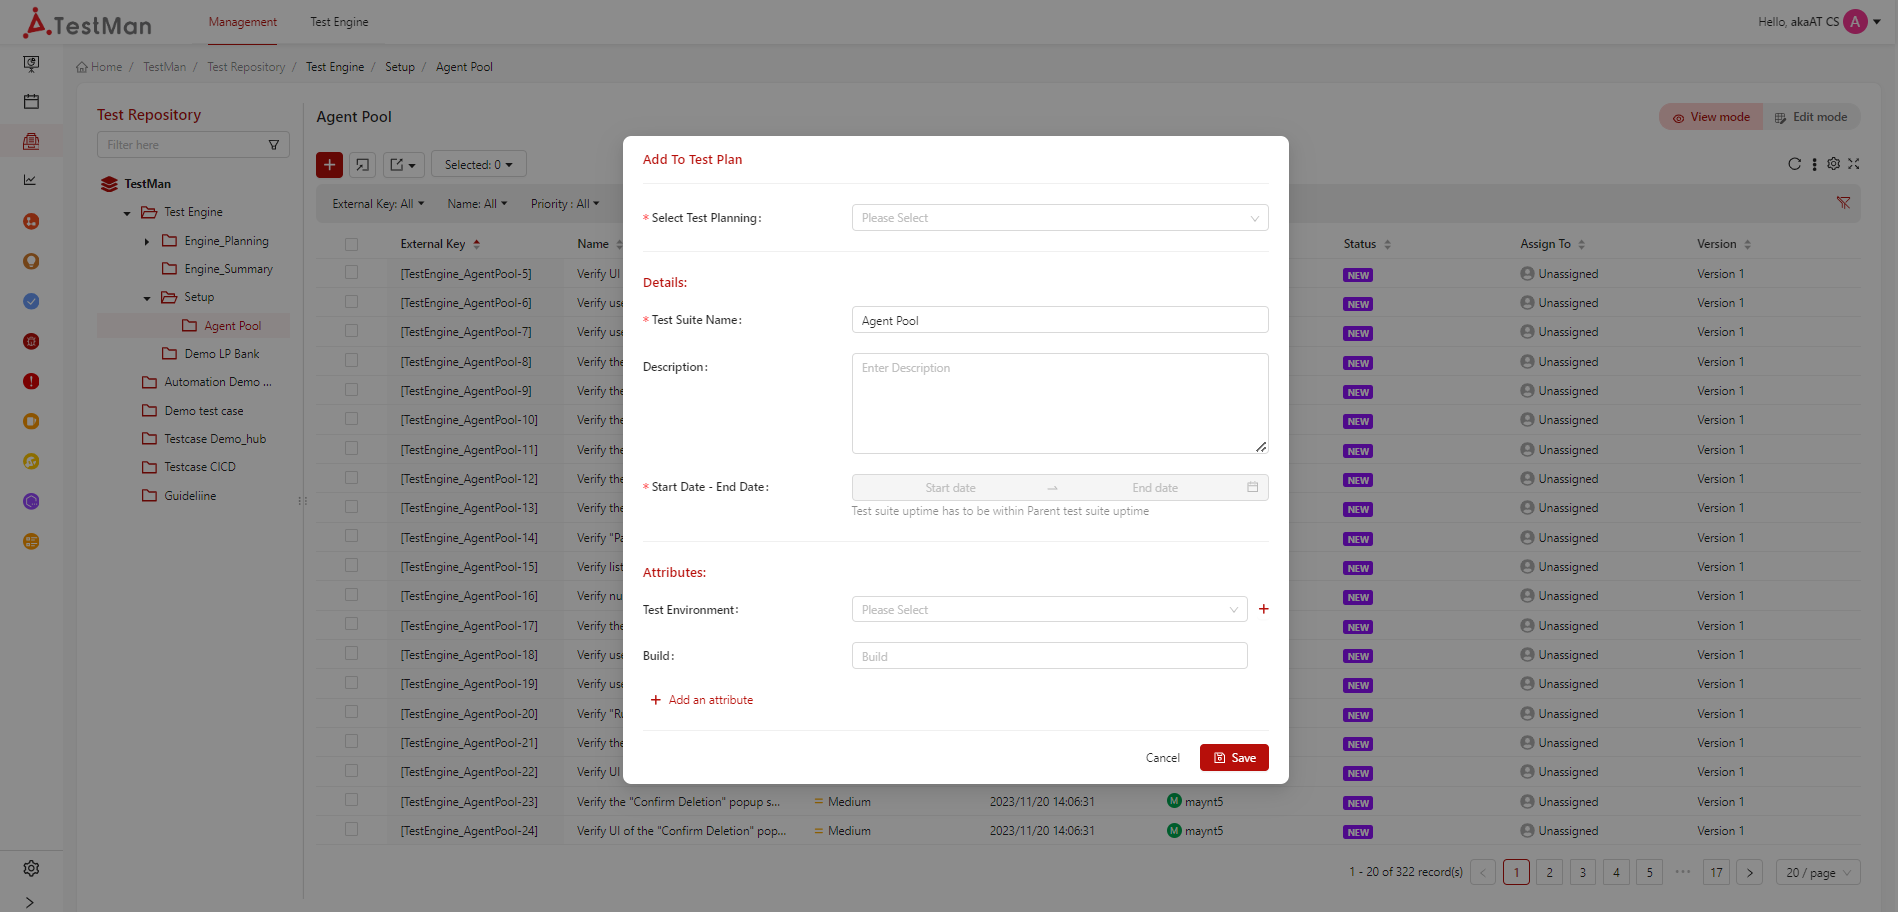
A pop-up Add folder of test case to Test Planning will appear with additional fields to fill out
-
-
Fill in the fields for adding a new test case
- Test Planning: Select an existed Cycle or Test Suite for adding new Test suite into.
- Test Suite Name: Default is name of the folder, users can rename for the Test Suite.
- Description: Description for the new test suite you want to create, this is optional field.
- Start Date - End Date: Start date and end date of the Test Suite
- Test Environment: Selecting the existed Test Environment. If your project still not has test environment, clicking on [+] icon for starting add new ones. View more Test Environment
- Build: Version of build for Test Suite
You can add more attributes for your new Test suite such as "Assign To", "Tag", "Estimated Time", "Script Path", "Run Type", "Priority", "Job Type".
-
After filling in the fields, clicking on the [Save] Button.
- A pop-up message will appear “Add folder of test case to Test planning successfully!”
You can click on [Add to test planning] for navigating to new test suite in Test Planning that you have just created.
Add selected test case(s) to a Test Suite
-
Choose folder that having test case(s) wanting to add to Test planning
-
Select test case that wanting to add to Test Planning on the left hand side of the table
-
Clicking on the [Selected] button, then choose “Add to Test Suite”
- A pop-up Add test case to Test Planning will appear with additional fields to fill out
All next steps are same as when you add folder of test cases to Test Planning.
Change status of test cases in Bulk
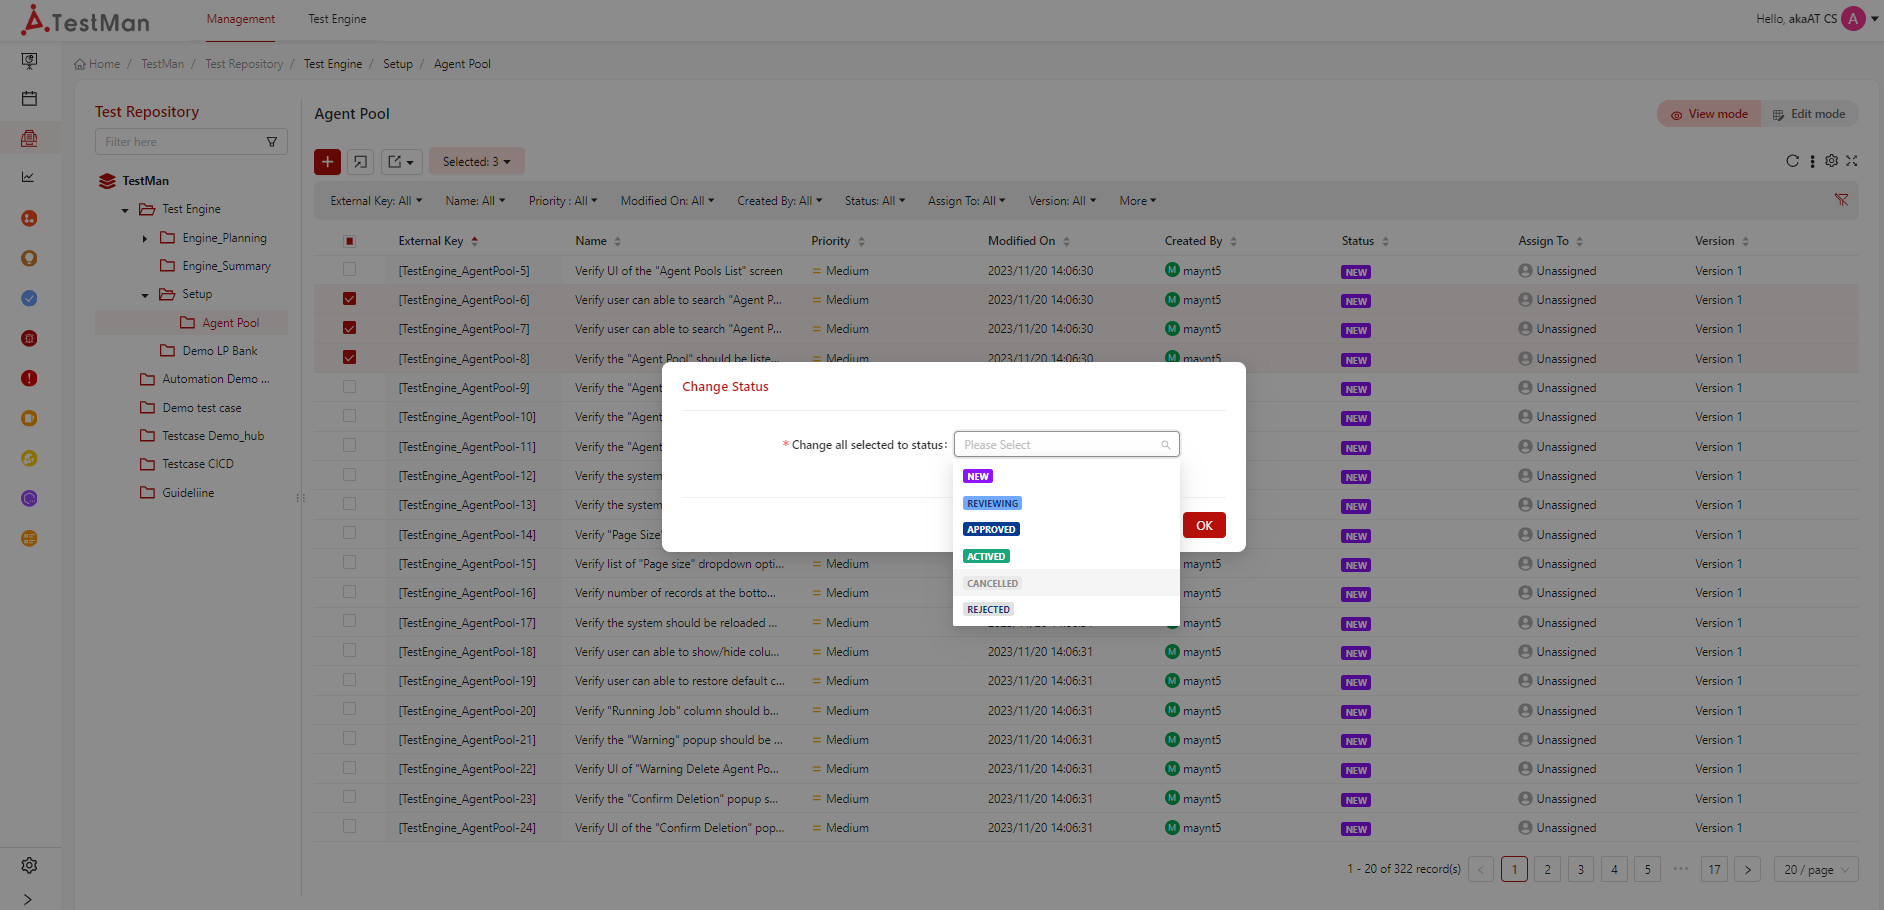
- From list of test cases screen, select test cases that wanting to change status
-
Clicking on [Selected] button, then choose option "Change Status"
-
System will show popup for selecting status that you want to change to
-
-
Select the status you want change test case to
- Clicking on [OK] button to complete the bulk-change status
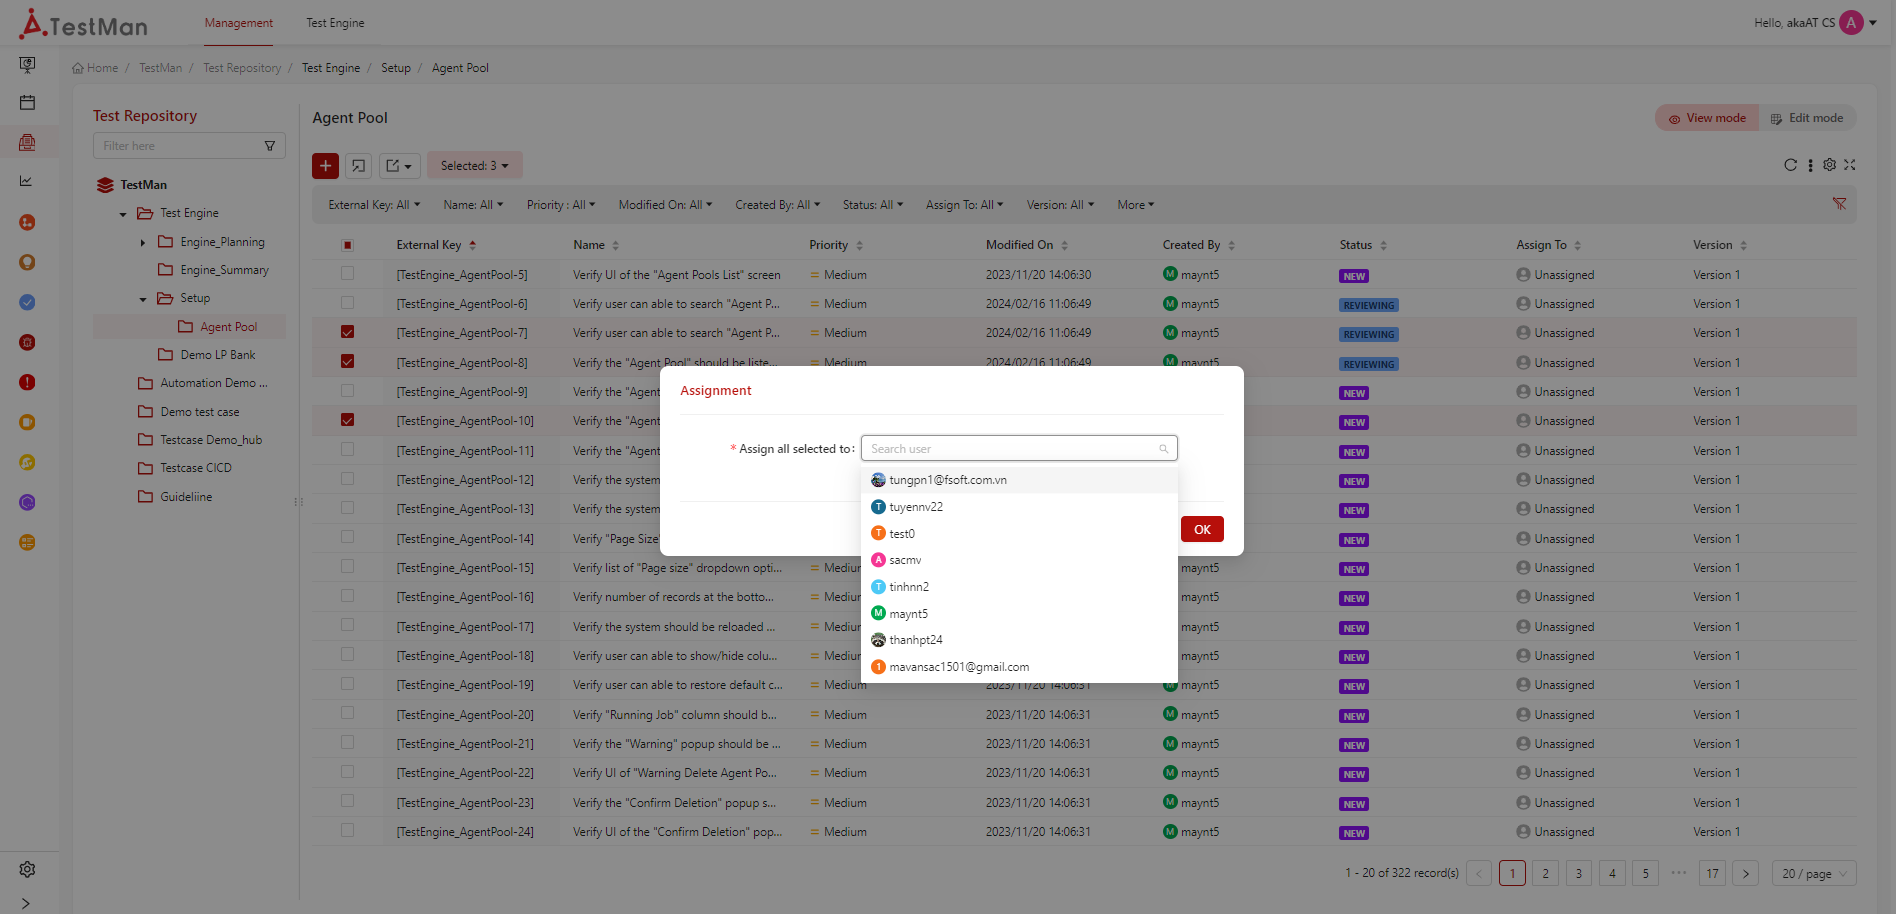
Assign test cases to member in Bulk
- From list of test cases screen, select test cases that wanting to assign to member in project
-
Clicking on [Selected] button, then choose option "Assign To"
-
System will show popup for selecting member that you want to assign to
-
-
Select the member that you want assign test case to
- Clicking on [OK] button to complete the bulk-change Assign To