Manage test case
Add test case
-
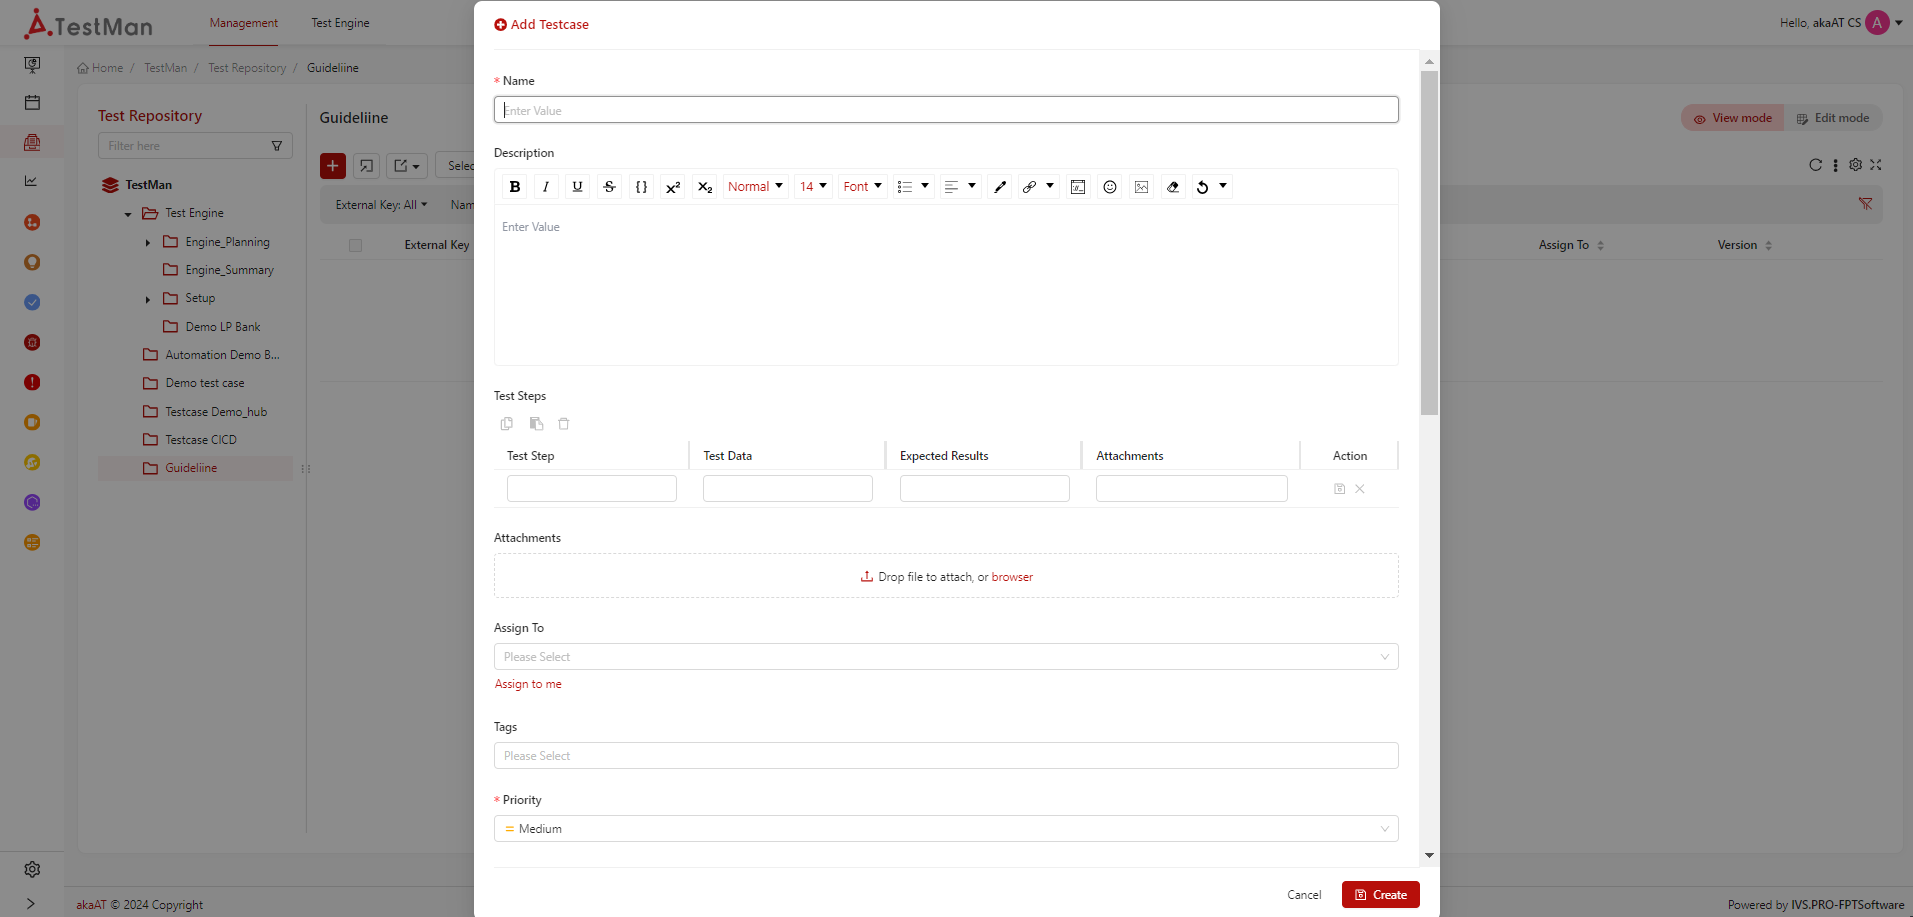
Clicking on [Add] button at the top of table list of test case
- A pop-up Add test case will appear to add test case with additional fields to fill out
- A pop-up Add test case will appear to add test case with additional fields to fill out
-
Fill in the fields for adding a new test case
TestMan is flexible for adding multiple fields to test cases. So that when adding a new test case, all the fields of the test case will be displayed for you to fill in.
You need to fill in all mandatory fields for submit adding new test case.
-
After filling all required information, clicking on [Create] button
- System will add new test case and show message “Created test case successfully!”
Note:
-
Default to view all test case is click on “Name of project” in folder left tree
-
Clicking on each folder to view all test cases in that folder (Include test cases in sub-folder)
Edit test case
- Select an existed test case that you want to edit, system will navigate on test case detail screen
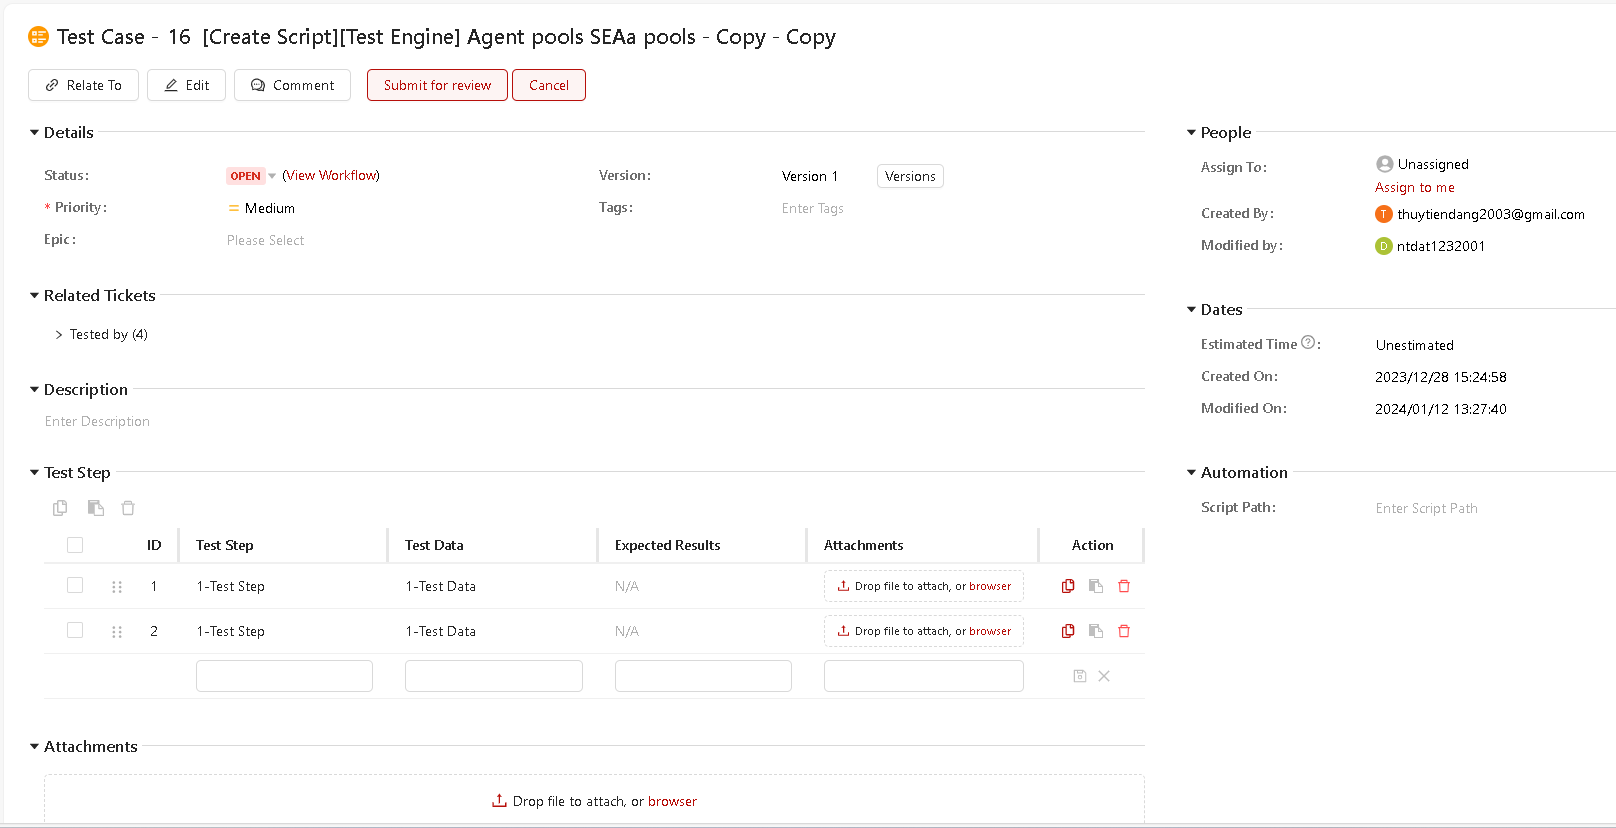 From here, you can edit fields in space Detail, Description, Test Step, People for "Assign To", Dates for "Estimated Time", "Start Date" & Automation
Manage test steps of test case
Add new Test step
System will automatically create blank space creating test step
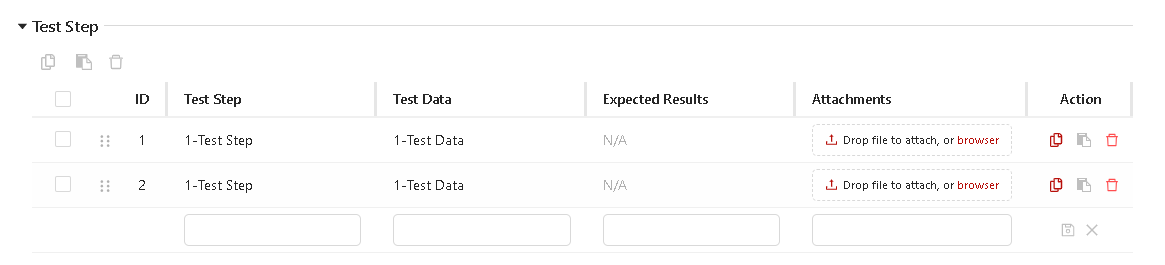 1. Fill in the fields for adding a new test step
- ID: ID automatically generated as soon as each test step is created
- Test Steps: Describe the test case steps
- Test Data: The input given to a software program during test execution. It represents data that affects or affected by software execution while testing.
- Expected Result: Describe the expected result after testing.
- Attachments: User can attach many types of file for each test step.
1. Fill in the fields for adding a new test step
- ID: ID automatically generated as soon as each test step is created
- Test Steps: Describe the test case steps
- Test Data: The input given to a software program during test execution. It represents data that affects or affected by software execution while testing.
- Expected Result: Describe the expected result after testing.
- Attachments: User can attach many types of file for each test step.
An empty row with three columns will always appear at the bottom of the test case steps.
Edit test step
- Clicking on any field of any step will enter edit mode for that step field
- Editing
- Clicking on [Save] icon for submit updating new changes of test step.
Delete test step
- Choose test cases to delete by clicking on check box in front of test case
- Click on the [Bin] icon above the table of test step
- A message pop-up will appear and ask “Are you sure you want to Delete?”
- Click on the [Delete] button to remove test steps
You can delete each test step by clicking on the [Bin] icon in each test step
Manage Comment of test case
- Click on the [Comment] button on header or footer
- System will navigate to location of blank space to fill comment
- After filling comment, move to another space then clicking on [Add] button for add new one
- System will save new comment
You can just edit your own comment by clicking on existed comment. Editing then saving new changes by clicking on [Save] icon.
Users can delete comment by clicking on [Bin] icon of each comment to remove it
- Just can edit and delete comment that created by owner
- In case not the owner, just can view
Manage attachment of test case
- Click on the [Browser] button
- A Open file PC pop-up will appear
- Choose file that wanting to attach
- Click on the [Open] button
- System show message pop-up “Add new attachment successfully”
You can delete attachment by clicking on [Bin] icon of each attachment to remove it
You can preview attachment (with attachment is imagine) or download attachment.
Note 1:
- Just can delete attachment that created by owner
- In case not the owner, just can view (if being set permission) → Clicking on [Save] button in the top right corner
- A message pop-up will appear “Update new change successfully”
Note 2: You can quickly edit by clicking on [Edit] button in detail of test case screen