GUI and Preferences
2.3.1. Toolbars
| Icon | Description |
|---|---|
 |
Save the current opened test artifact |
 |
Run the current open test case with default profile |
 |
Run the current open test case and if one step in test case can not file element, system will display the screen of this tesp with inspection function |
 |
Stop the current execution. |
 |
Debug the current open test case |
 |
Select capability for test case. You can select these options by selecting capability from dropdown list |
 |
Open Web Record dialog for recording WebUI test cases. |
 |
Store Script ID (usually used for mapping test case in management tool) |
 |
Global Variable |
 |
Start Appium Service support for Mobile Testing. |
 |
User can able to create new run profile and select run profile from dropdown list |
 |
Export selected test steps in a test case to new Keyword Group |
 |
To disable selected test steps in a test case |
 |
To enable selected test steps in a test case |
 |
To delete selected test steps in a test case |
 |
To add CONTINUE_ON_FAILURE handling exception for selected test steps in a test case |
 |
To add STOP_ON_FAILURE handling exception for selected test steps in a test case |
 |
Do NOT capture image for selected test steps in a test case |
 |
To capture image for selected test steps in a test case |
2.3.2. akaAT Project Structure
The Project view allows you to browse the structure of your projects and access all test artifacts quickly. Using the context menu on the view, you can create new artifacts, organize the view's items or drag and drop them to the certain editor views if needed.
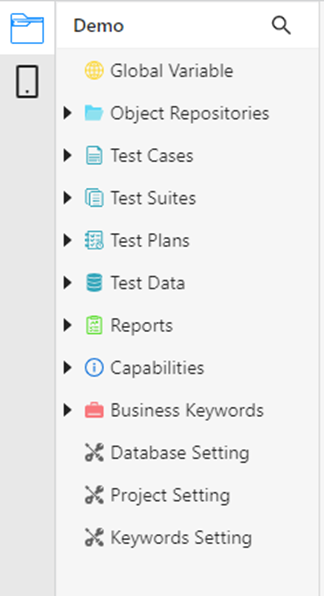
| Package | Description |
|---|---|
| Object Repositories | List all object repositories (locator values) of the current project. |
| Test Cases | List all test cases within the current project. |
| Test Suites | List all test suites of the current project. |
| Test Flex | List all test suites, testcases and control keywords of the current project. |
| Test Data | List all test data of the current project. |
| Reports | List all generated reports of the current project. |
| Capabilities | List all capabilities of all platforms are used in the current project. |
| Business Keywords | List all group keywords and custom keywords of the current project. |
| Global Variable | List all global variables of the current project. |
| Database Setting | Set up database which you want to connect. |
| Project Setting | To map test script(s) in akaAT Studio with test case(s) in akaAT Manager project. |
| Maven Setting | Config proxies, server, mirror to download dependencies from maven (optional). |
2.3.3. akaAT Update Driver
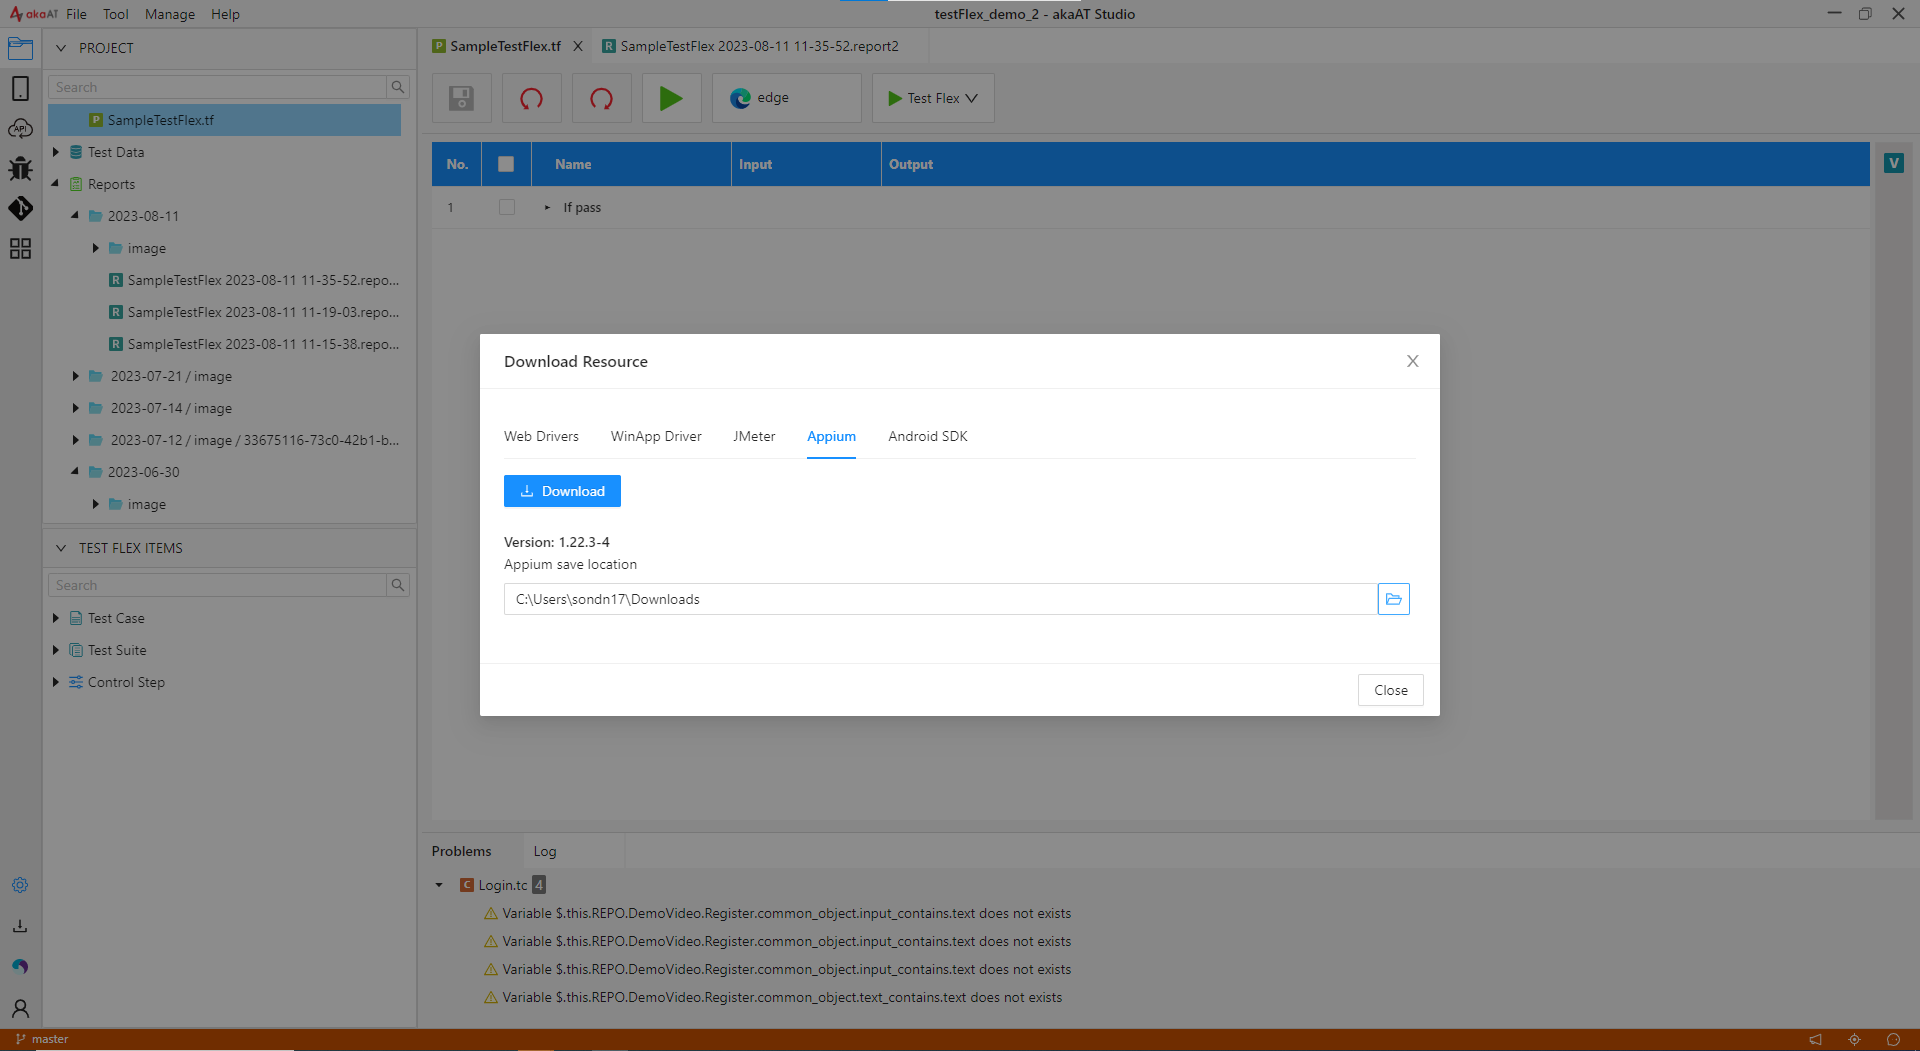
akaAT Studio is supporting 2 types of driver and 3 types of resource: Web Driver, WinApp Driver, Jmeter, Appium and Android SDK
2.3.3.1 Web Driver
WebDriver is a programming interface that can be used to create and execute test cases. It allows you to test across all major programming languages, browsers, and operating systems
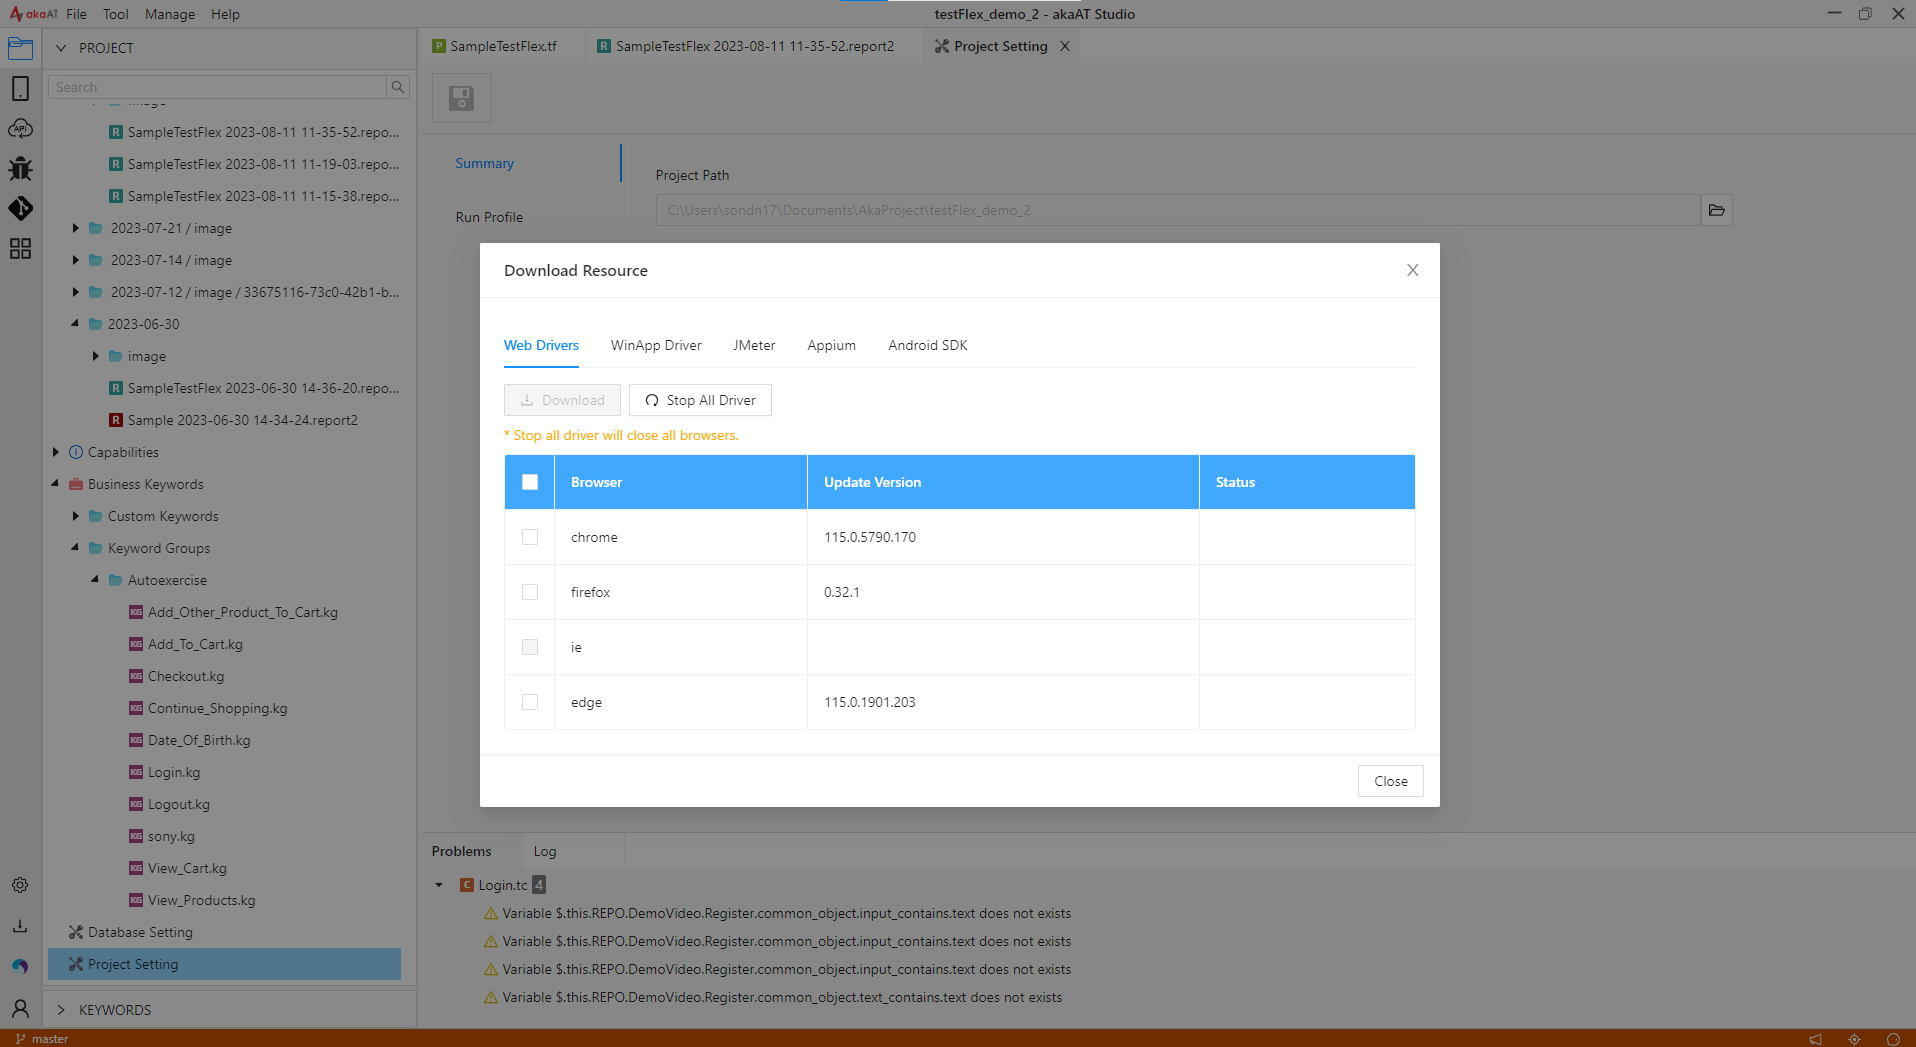
Note: akaAT Studio just download drivers when your machine has available supported browsers
Choose 1 or more WebDrivers to download by ticking 1 or more checkboxes, then click on "Download" button
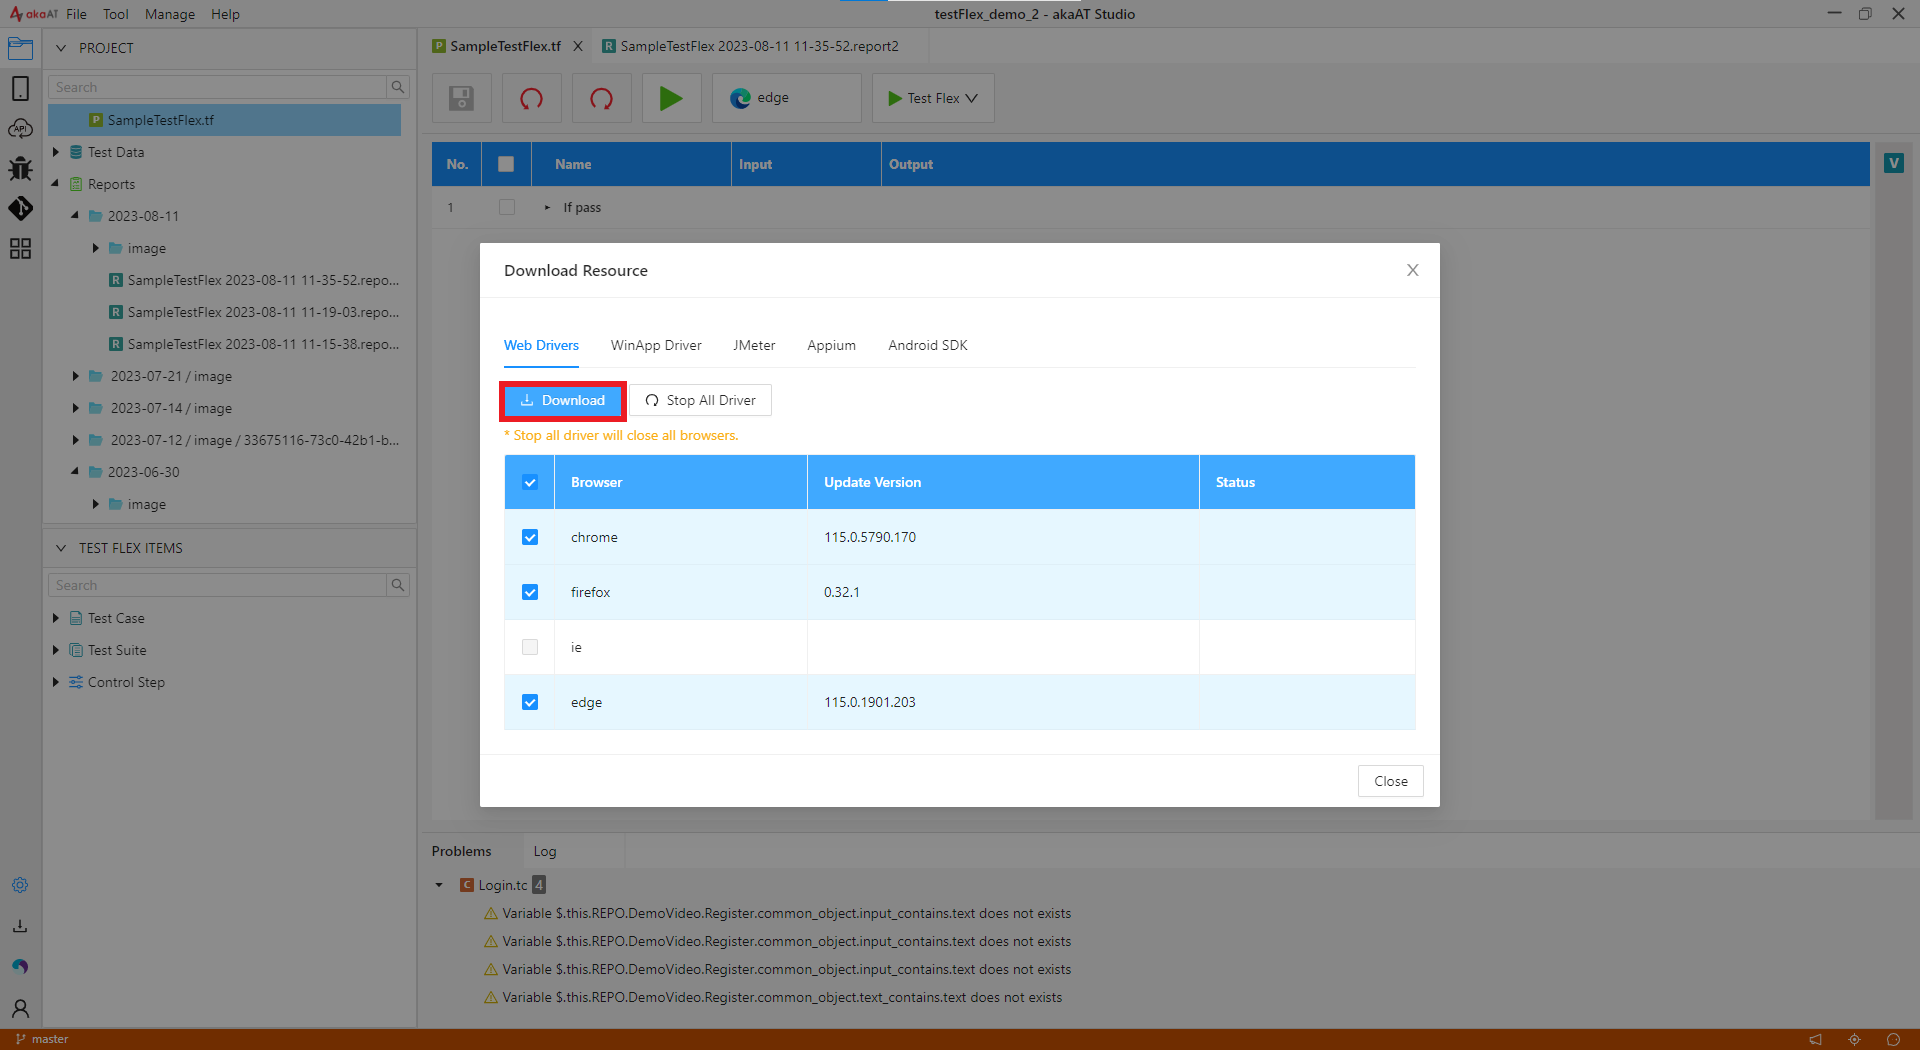
Note: akaAT Studio just download drivers when your machine has available supported browsers. If you don't have, it will not allow to download unavailable browser
2.3.3.2 WinDriver
WinDriver is a driver to support testing on Windows Application (UWP, WinForms, WPF, Win32 App). This driver was designed to follow W3C WebDriver protocol as much as it can.
This driver using UI Automation as its core. Some of the ideas are from FlaUI, Selenium IEDriver
This driver is divided into 2 application WindowsDriver and UIADriver. WindowsDriver will manage session, routing request to corresponding UIADriver session. UIADriver is the automation core. The reason for this is to support both UIA2 and UIA3.
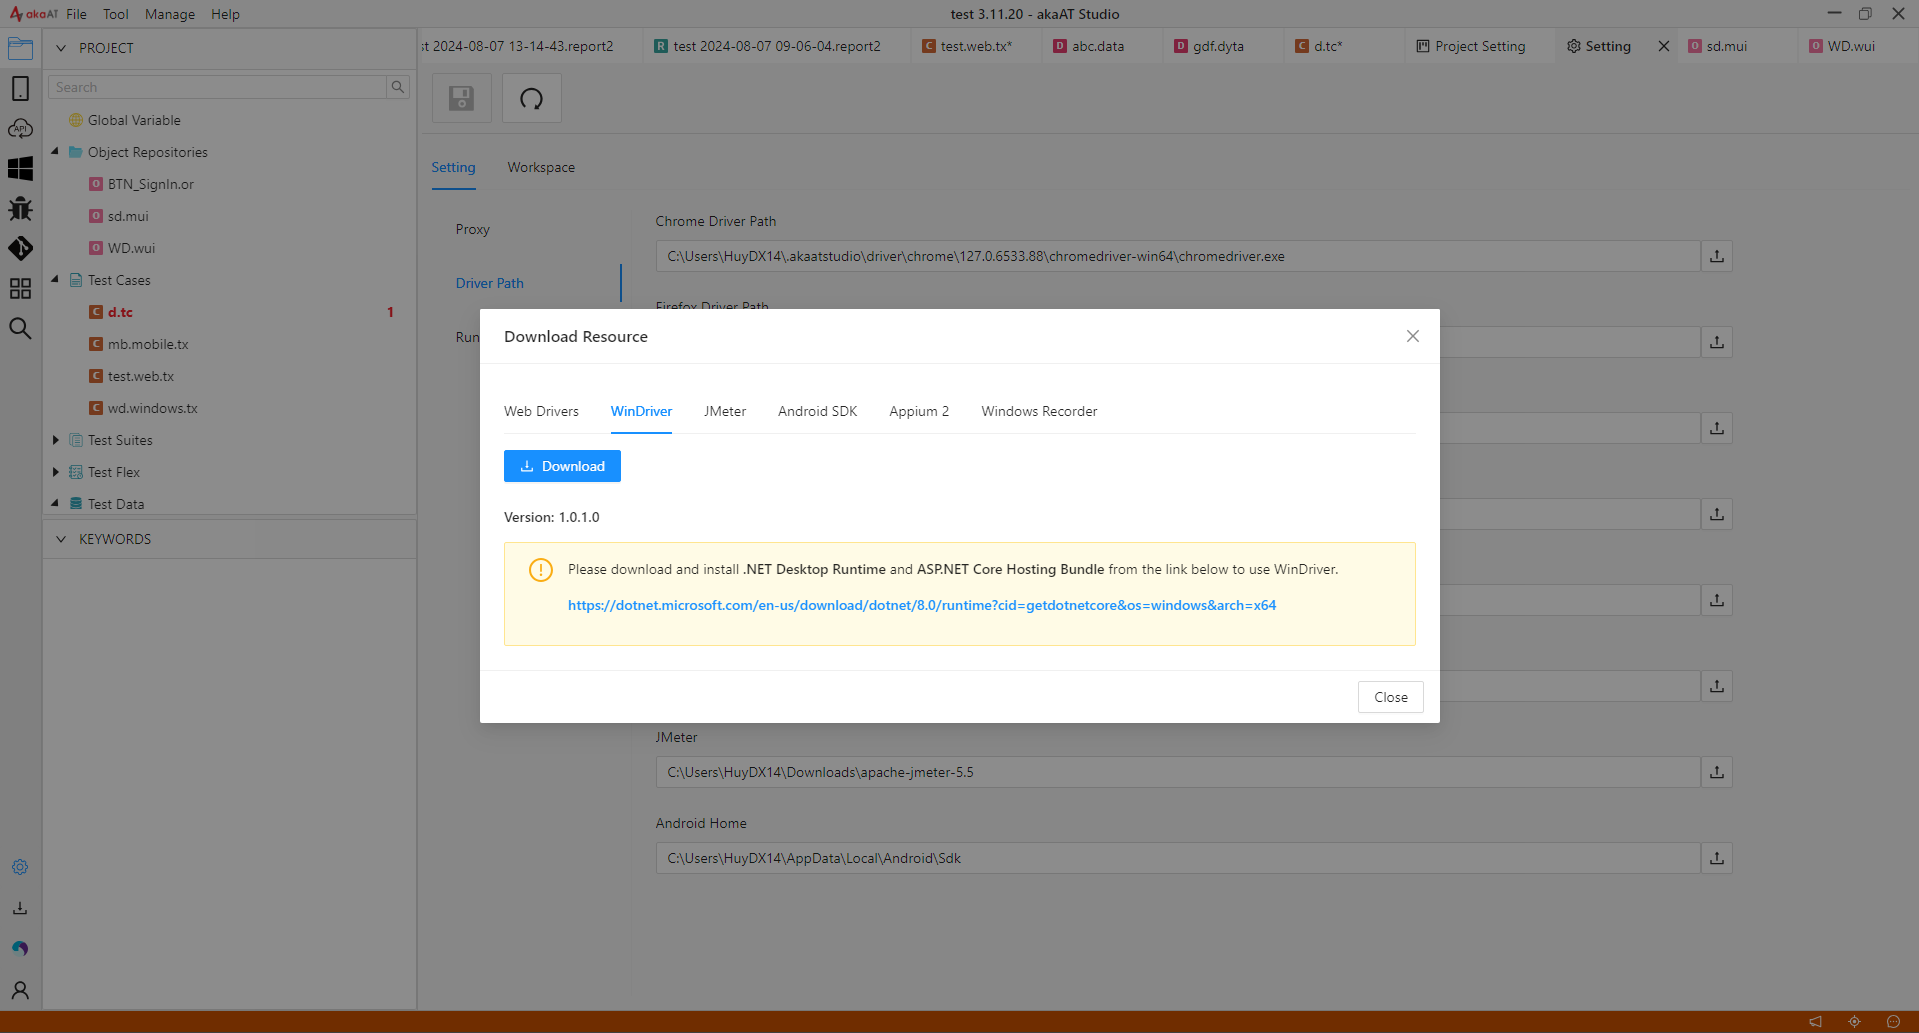
Note: To use Migration, you must download and install the .NET Desktop Runtime and the ASP.NET Core Hosting Bundle.
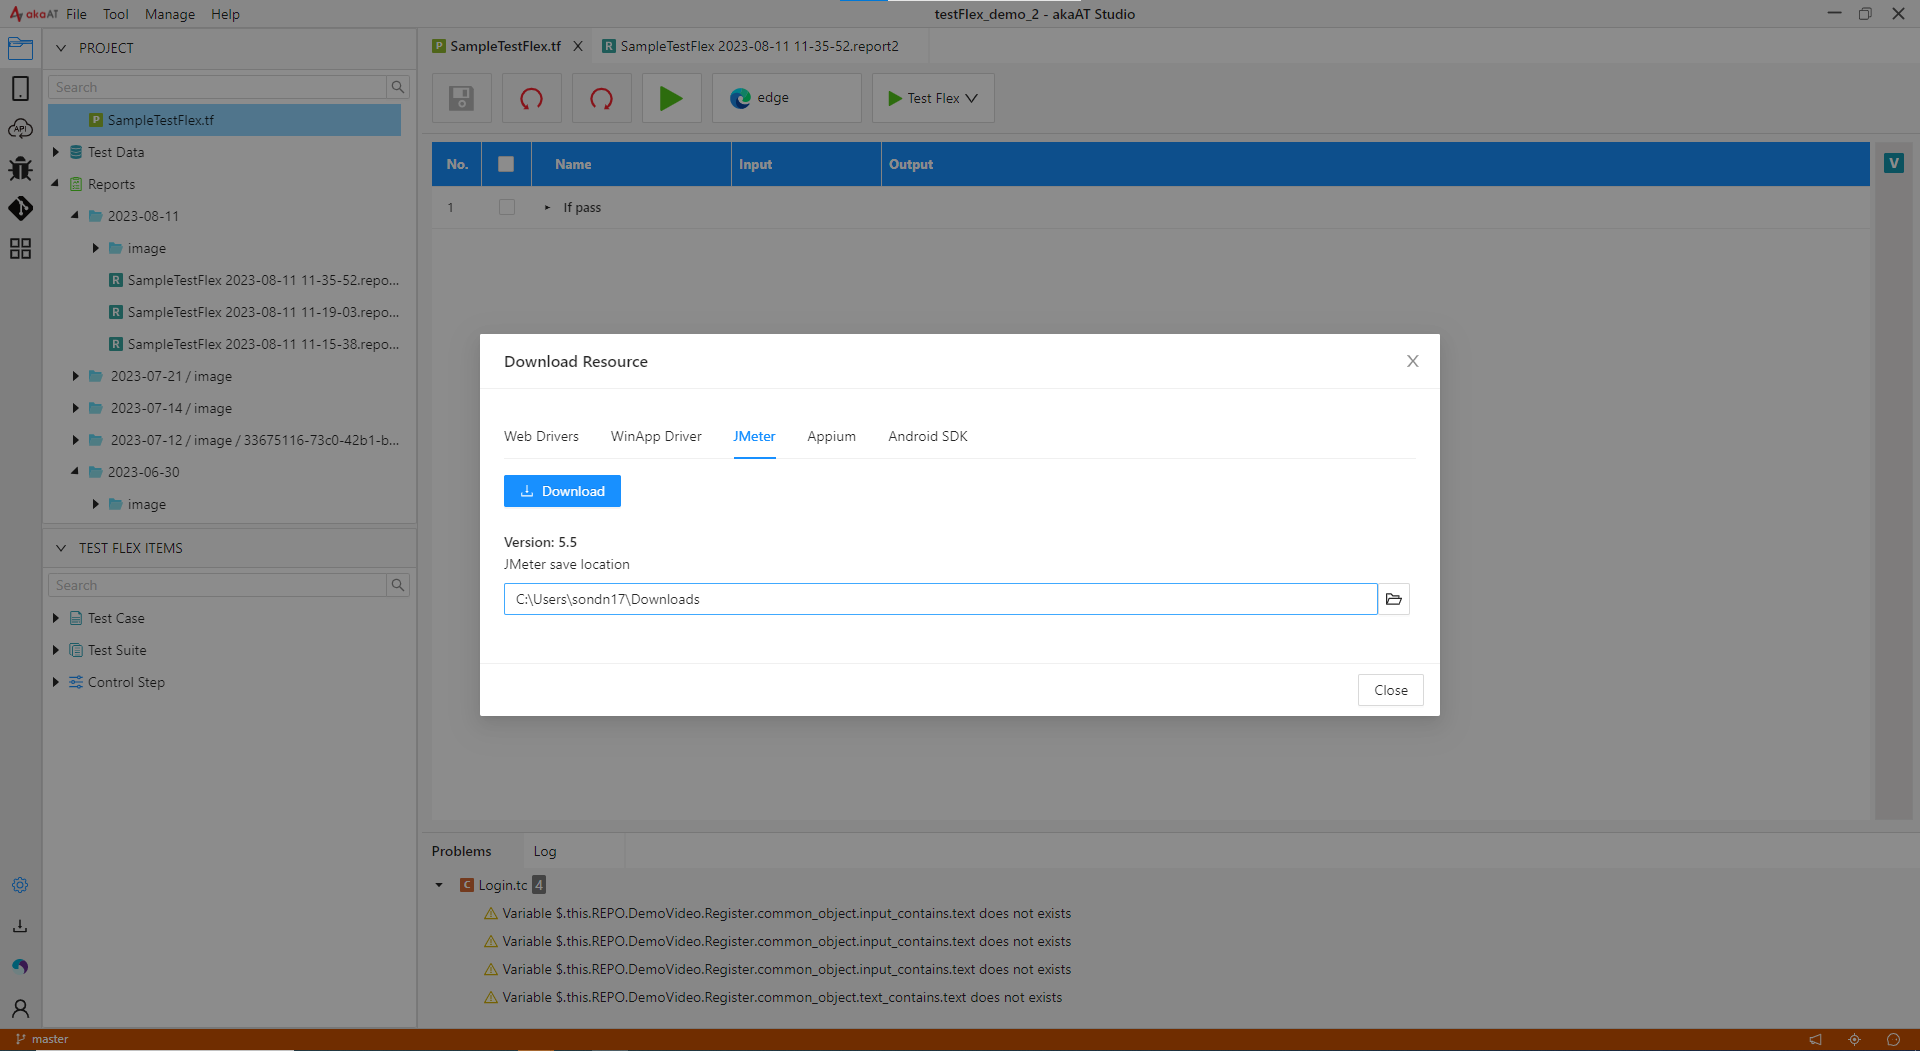
2.3.3.3 Jmeter
JMeter may be used to test performance both on static and dynamic resources, Web dynamic applications. It can be used to simulate a heavy load on a server, group of servers, network or object to test its strength or to analyze overall performance under different load types.
2.3.3.4 Appium
Appium is used mostly in the field of software test automation, to help determine whether the functionality of a given app is working as expected. In contrast to other types of software testing, UI automation allows testers to write code that walks through user scenarios in the actual UI of an application, mimicking as closely as possible what happens in the real world while enabling the various benefits of automation, including speed, scale, and consistency.
2.3.3.5 Android SDK
The Android SDK is a software development kit that includes a comprehensive set of development tools. These include a debugger, libraries, a handset emulator based on QEMU, documentation, sample code, and tutorials. Currently supported development platforms include computers running Linux (any modern desktop Linux distribution), Mac OS X 10.5.8 or later, and Windows 7 or later.

2.3.4. akaAT Studio Setting
akaAT Studio Setting defines default behaviors of akaAT Studio across projects. Firstly, select “Setting” from the menu.
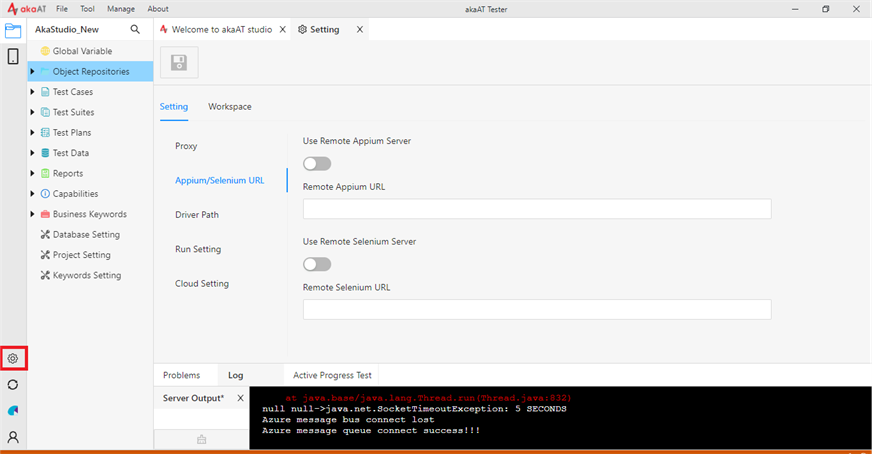
2.3.4.1. “Setting” tab
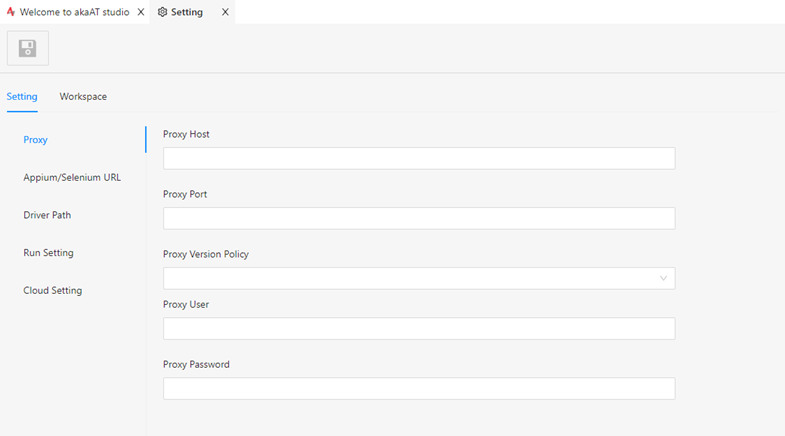
2.3.4.1.1. Proxy Setting
The proxy is divided into two categories: Authentication** and System proxies**. You can apply different proxy configurations for connecting to the akaAT server and your servers during testing. System proxy configurations are applied to all network connections generated when using akaAT Studio.
You can manually set up your proxy
- Proxy Host: an HTTP Proxy host.
- Proxy Port: an HTTP Proxy port.
- Proxy User & Password: user credentials.
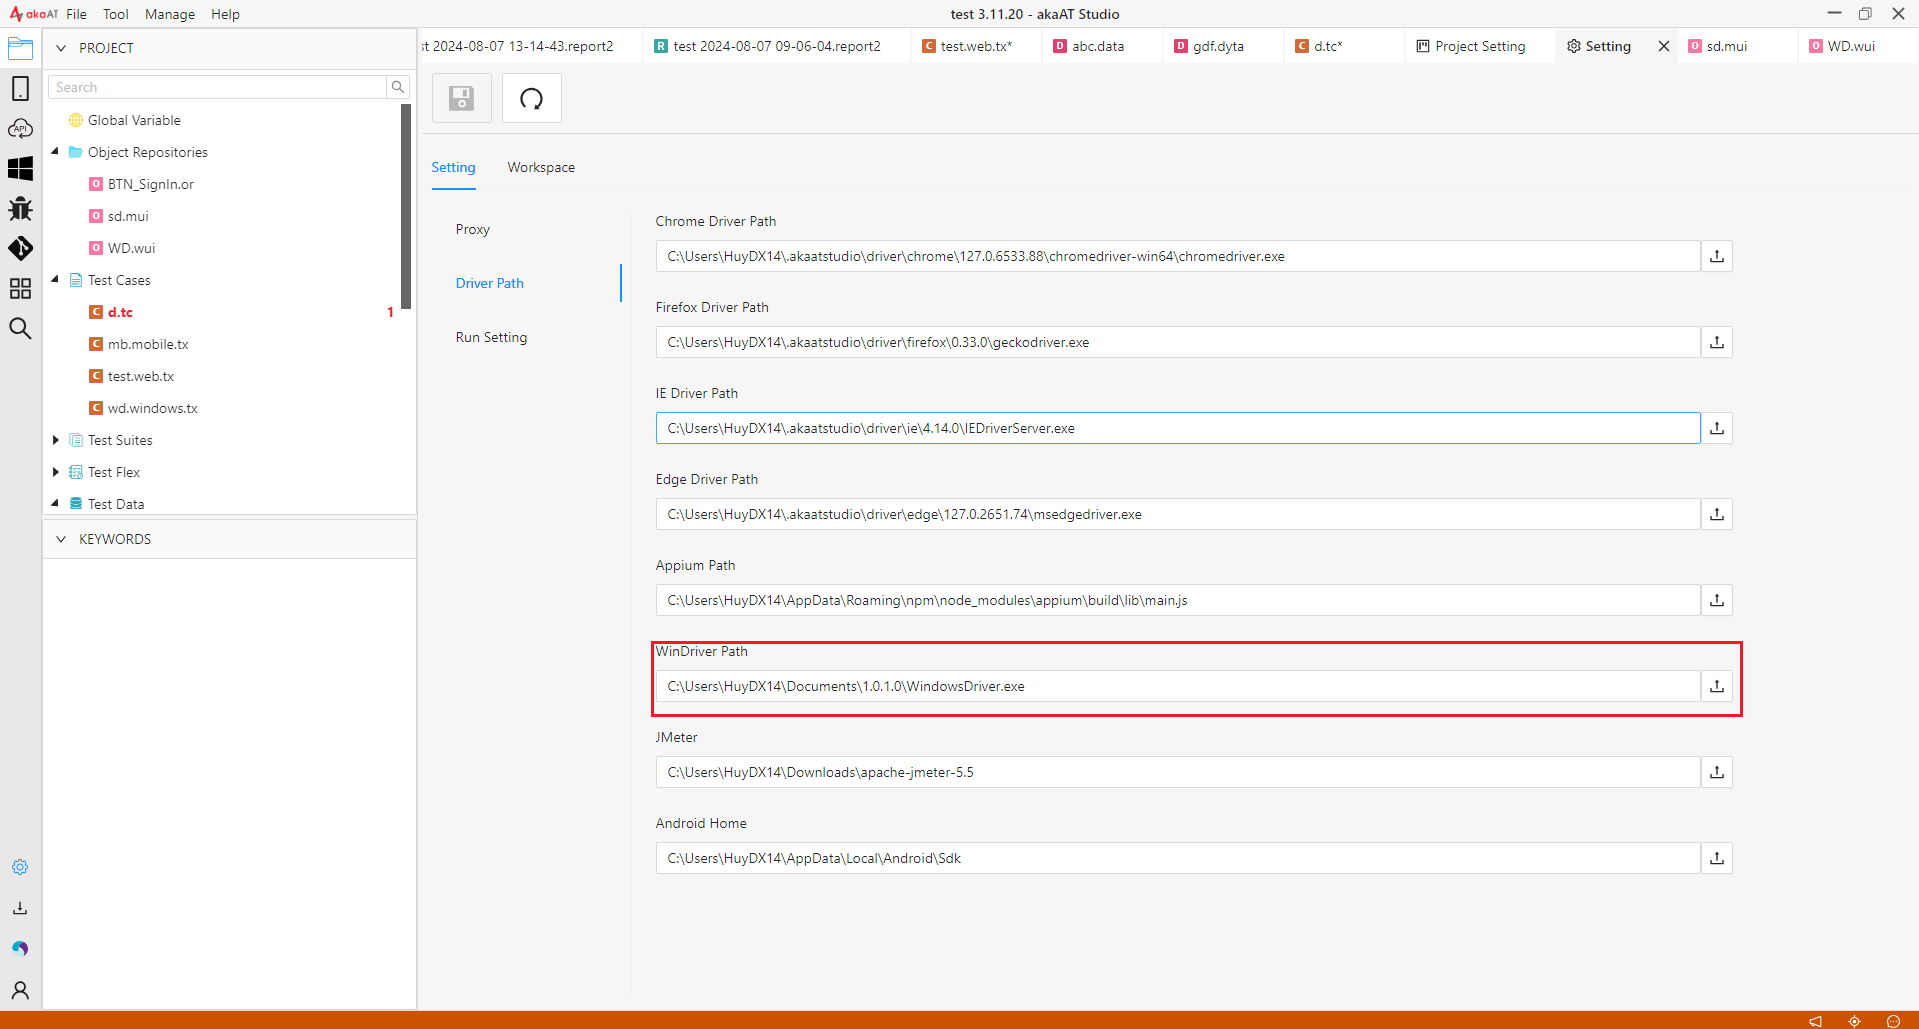
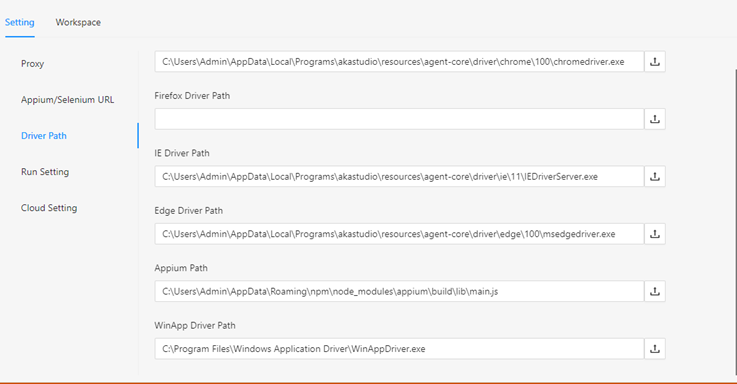
2.3.4.1.2. Driver Path Setting
This section includes information about the paths for the resources used to test.
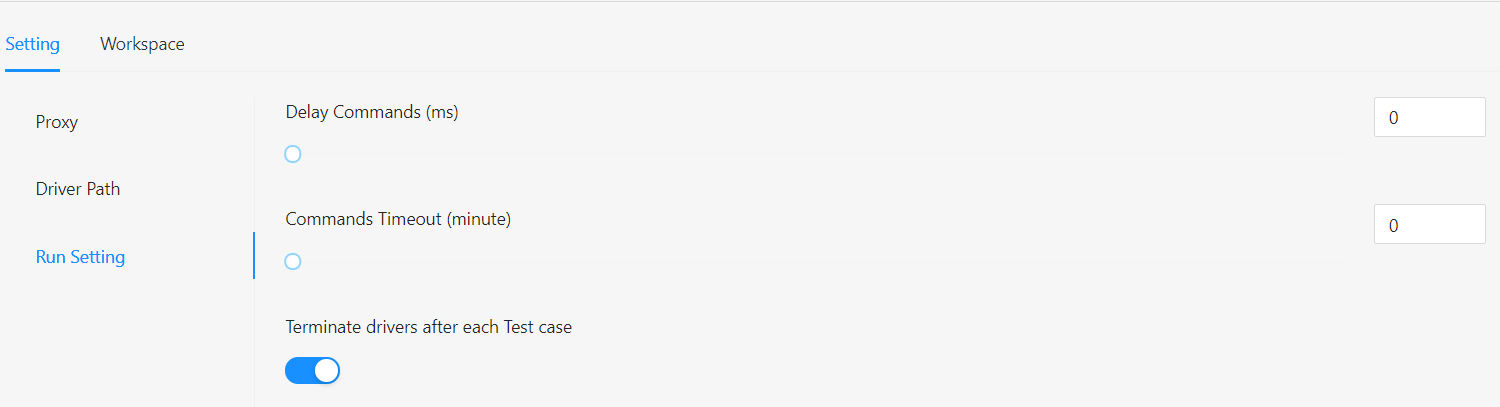
2.3.4.1.3. Run Setting
Run settings help define the desired behaviors of akaAT Studio during test execution
- Delay command(s): The time for akaAT Studio to wait between test steps when executing test cases.
- Commands Timeout (minute): This is the maximum time that akaAT Studio set for a step can run in it. If the step is not finished by that time, the step will fail, and the test case will stop immediately.
- Terminate drivers after each Test Case: Terminate all drivers after each test Case.
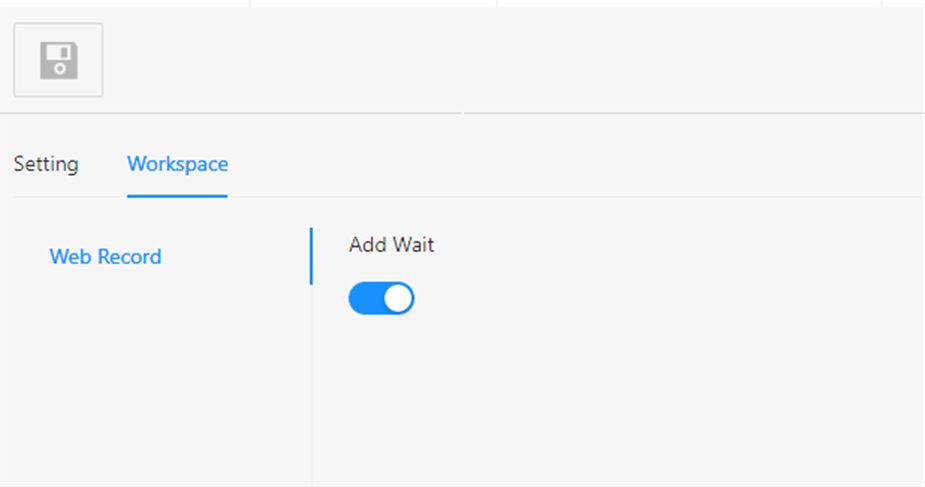
2.3.4.2 “Workspace” tab
Turn on the toggle switch button if you want when recording, the system automatically adds a "Wait" step.
2.3.5. akaAT Web Recorder
- Start Recording
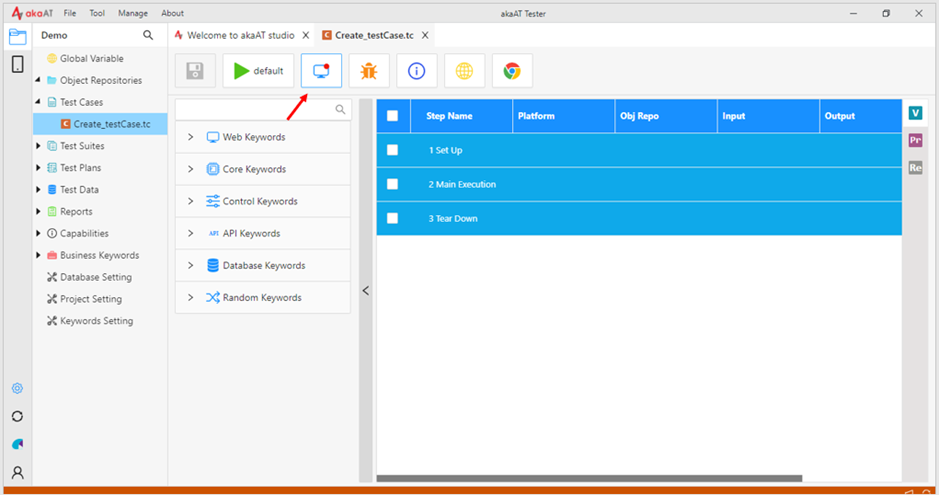
Click on  icon to start Web Recorder.
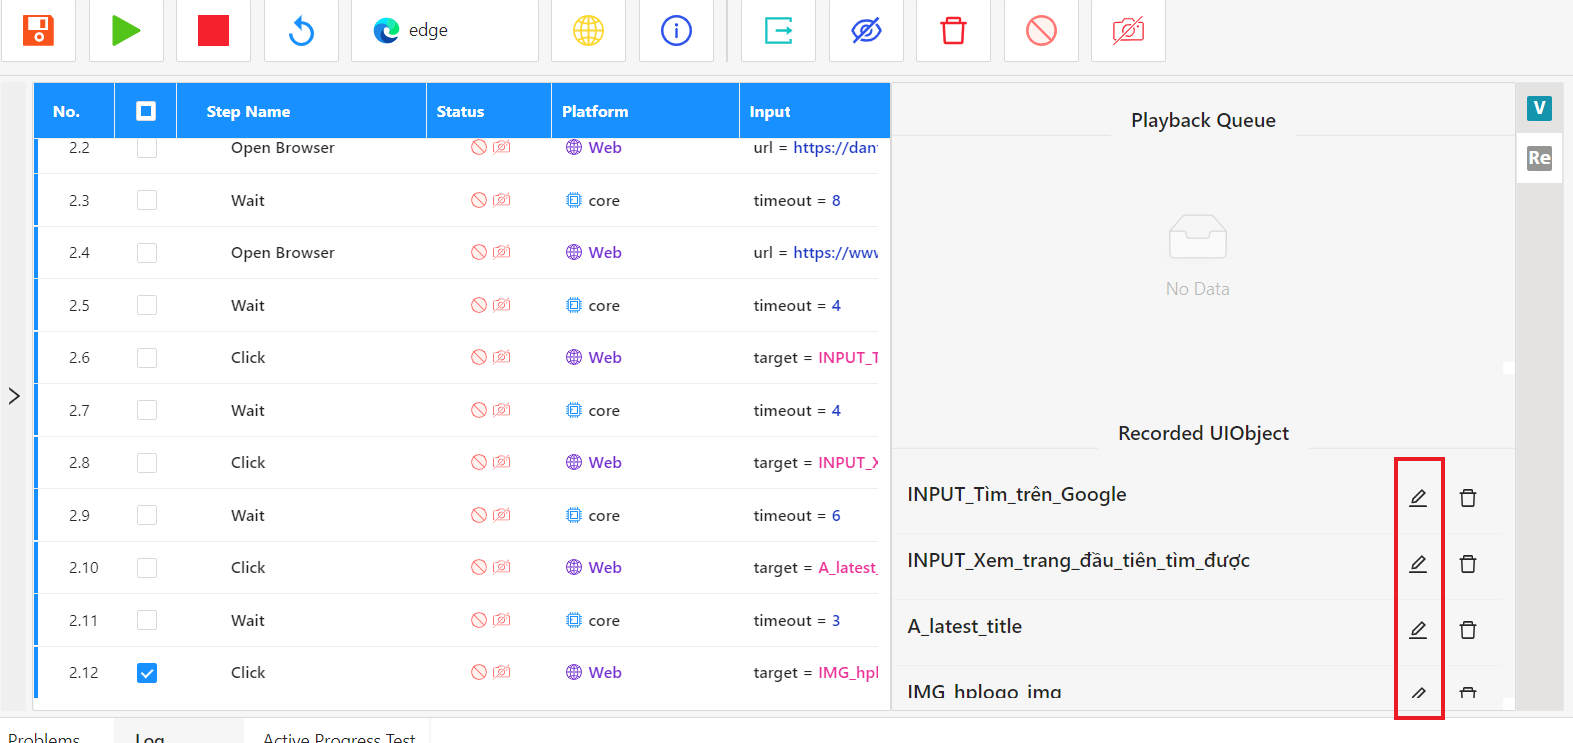
- Getting Recorded UI Object
Each time you interact with any element on app screen, all of these Objects are captured and stored in the Object Repository
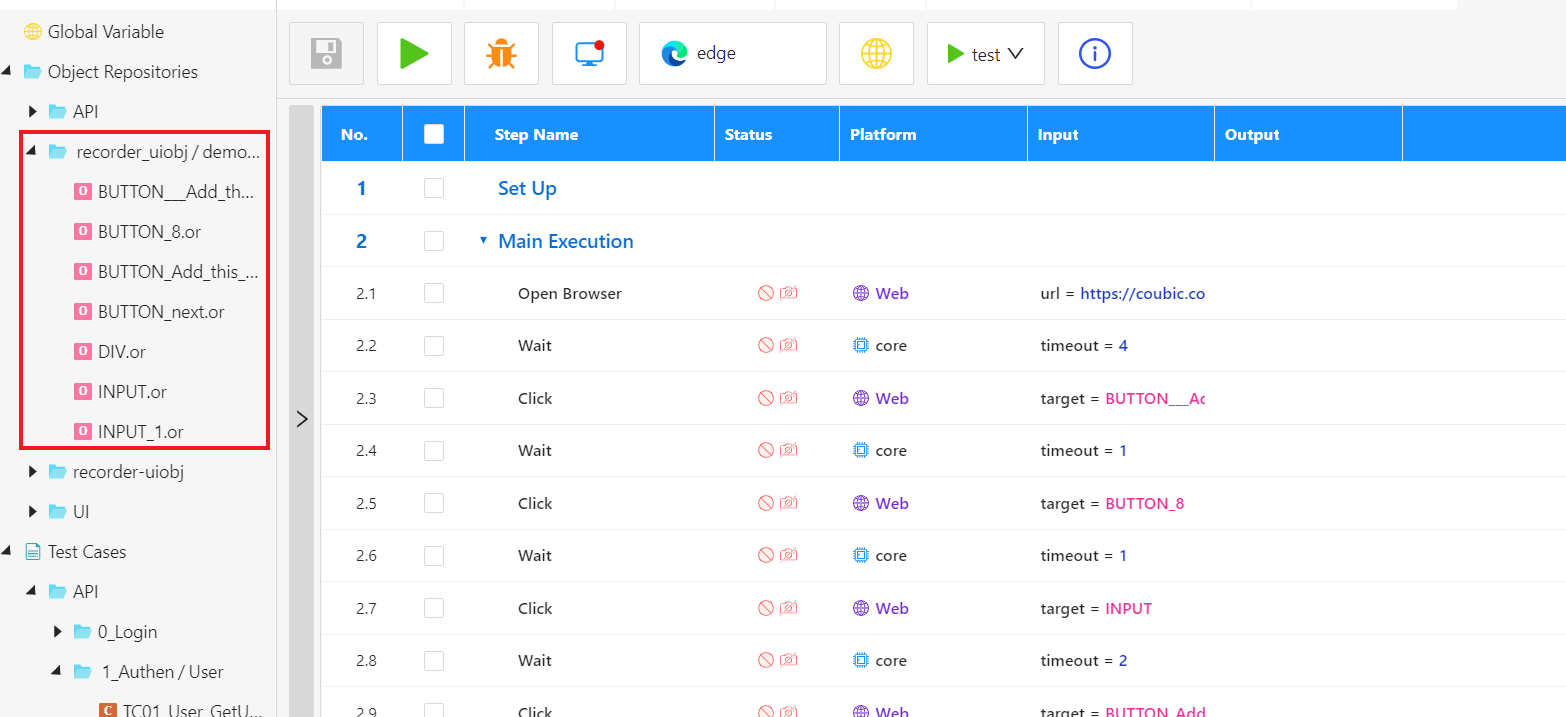
In the Test case screen, you can view Captured Objects in Tab “Recorded UI Object”, you can also change the name of Object.
- akaAT plugin
This feature helps to:
a. Adding "Verify..." steps to test case while recording:
Step 1: Right click on the element want to inspect
Step 2: Select "akaAT Plugin" and select option "Verify Element"
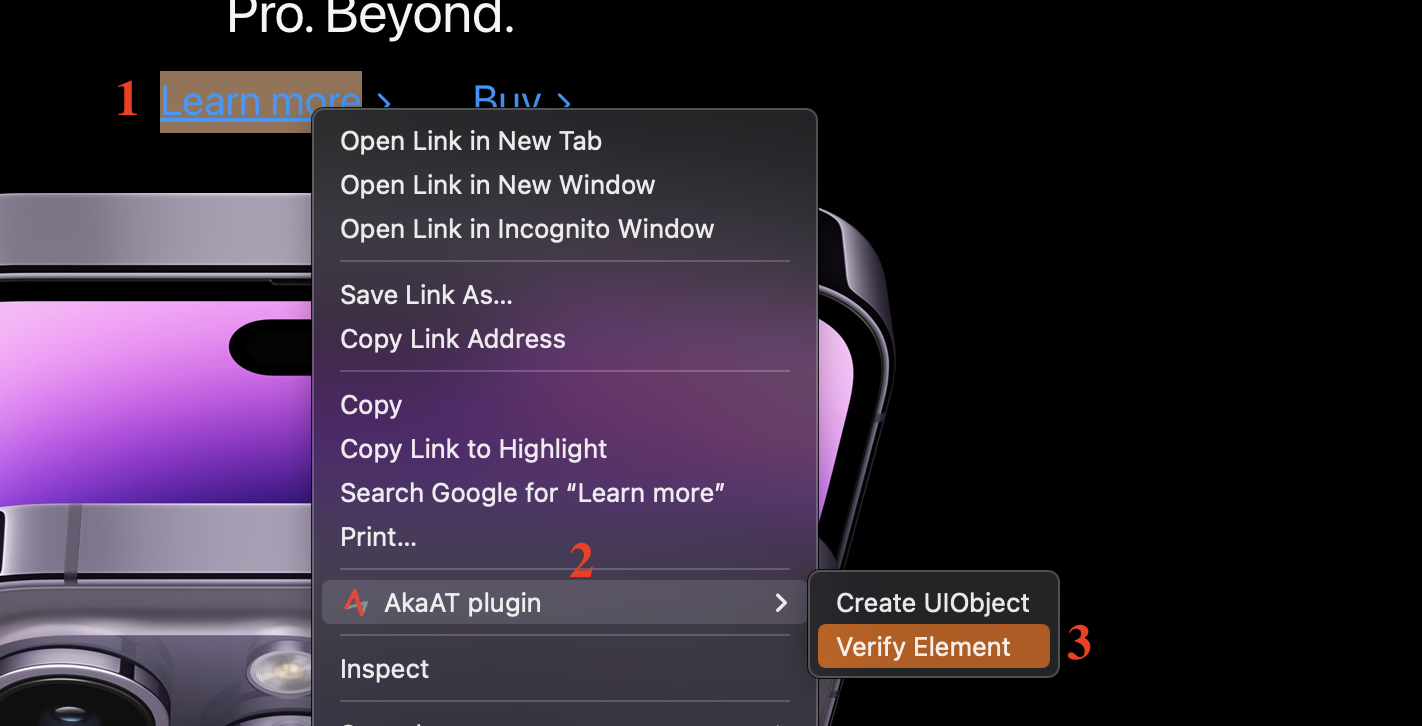
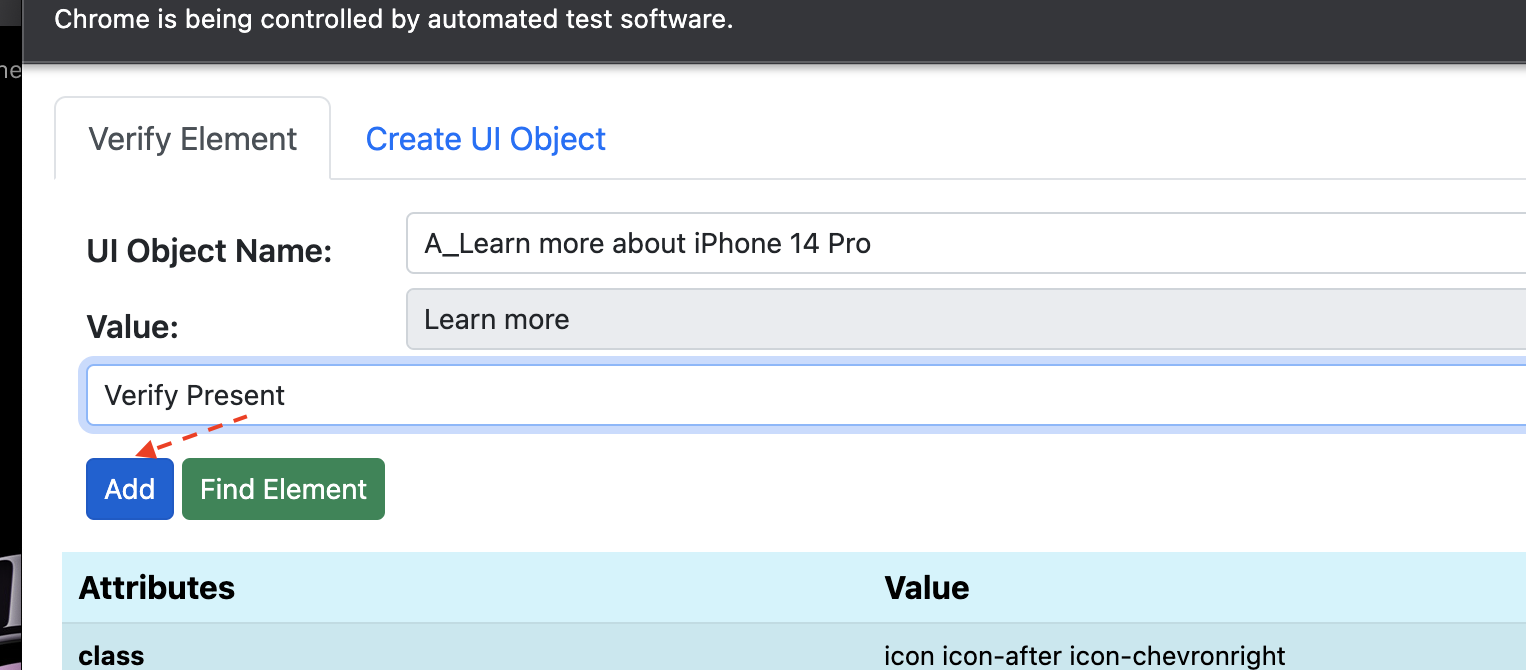
Step 3: When the Extension has been prompted up, select Verify type that you want
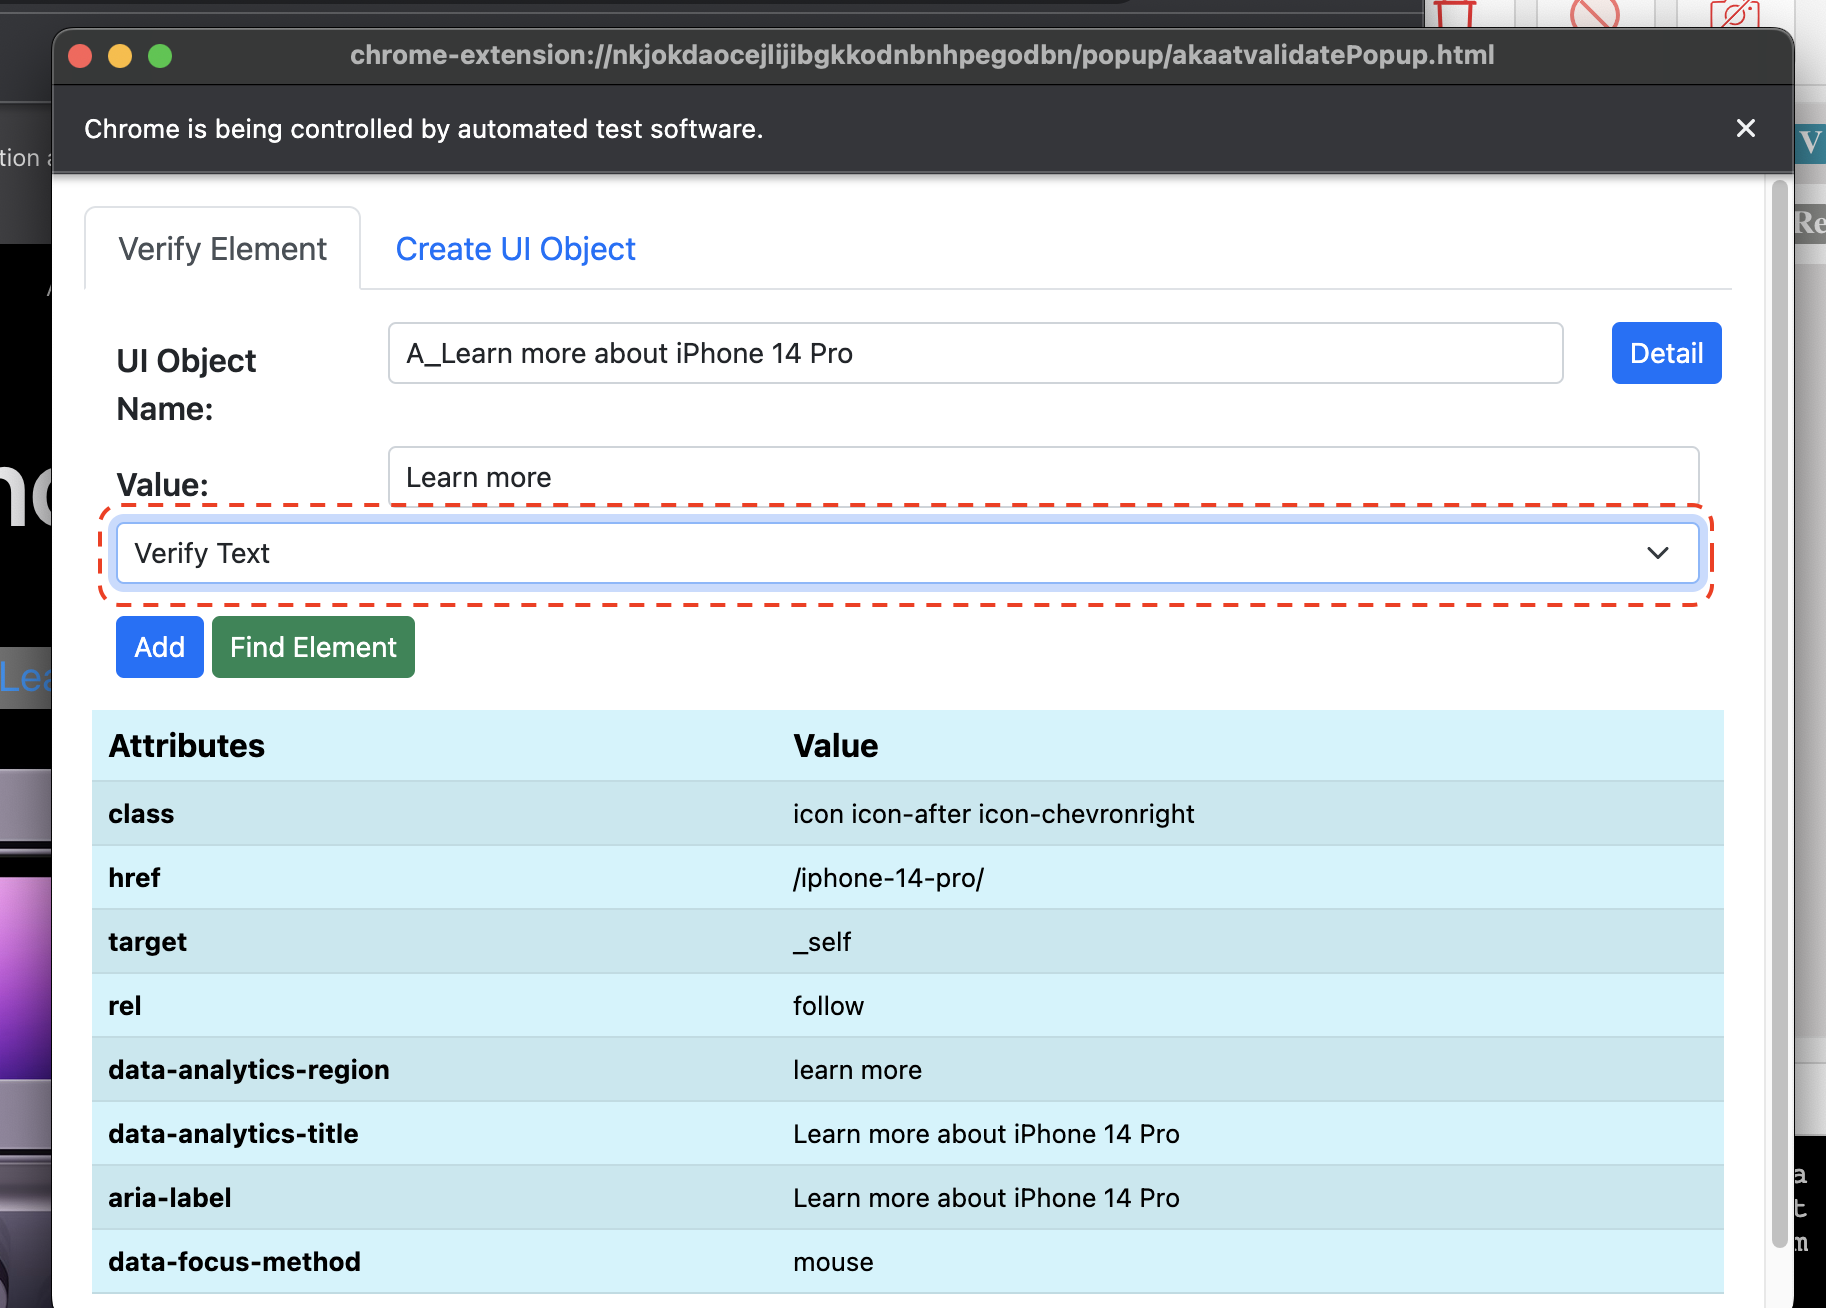
Step 4: Click Add button
After that you will see this step is added the testcase
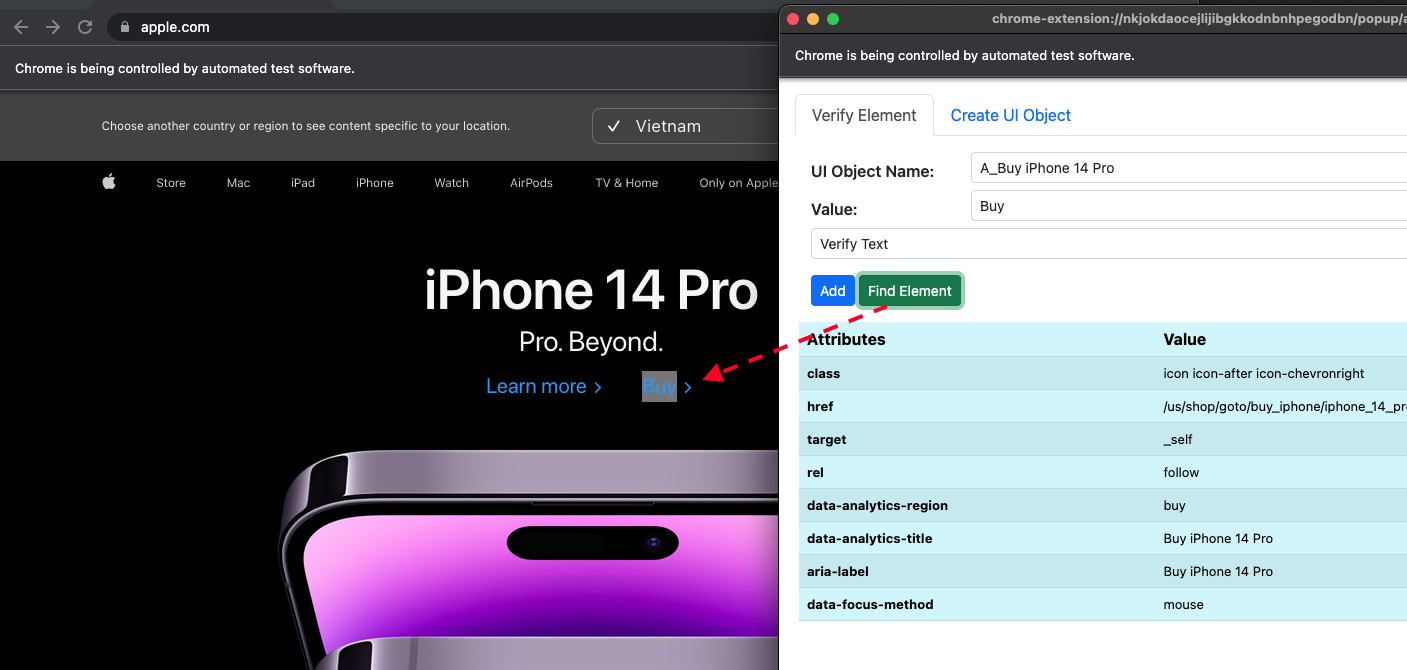
b. Inpsecting an element:
After selecting akaAT Plugin-Verify Element, You can see corresping information for element will display in the table below
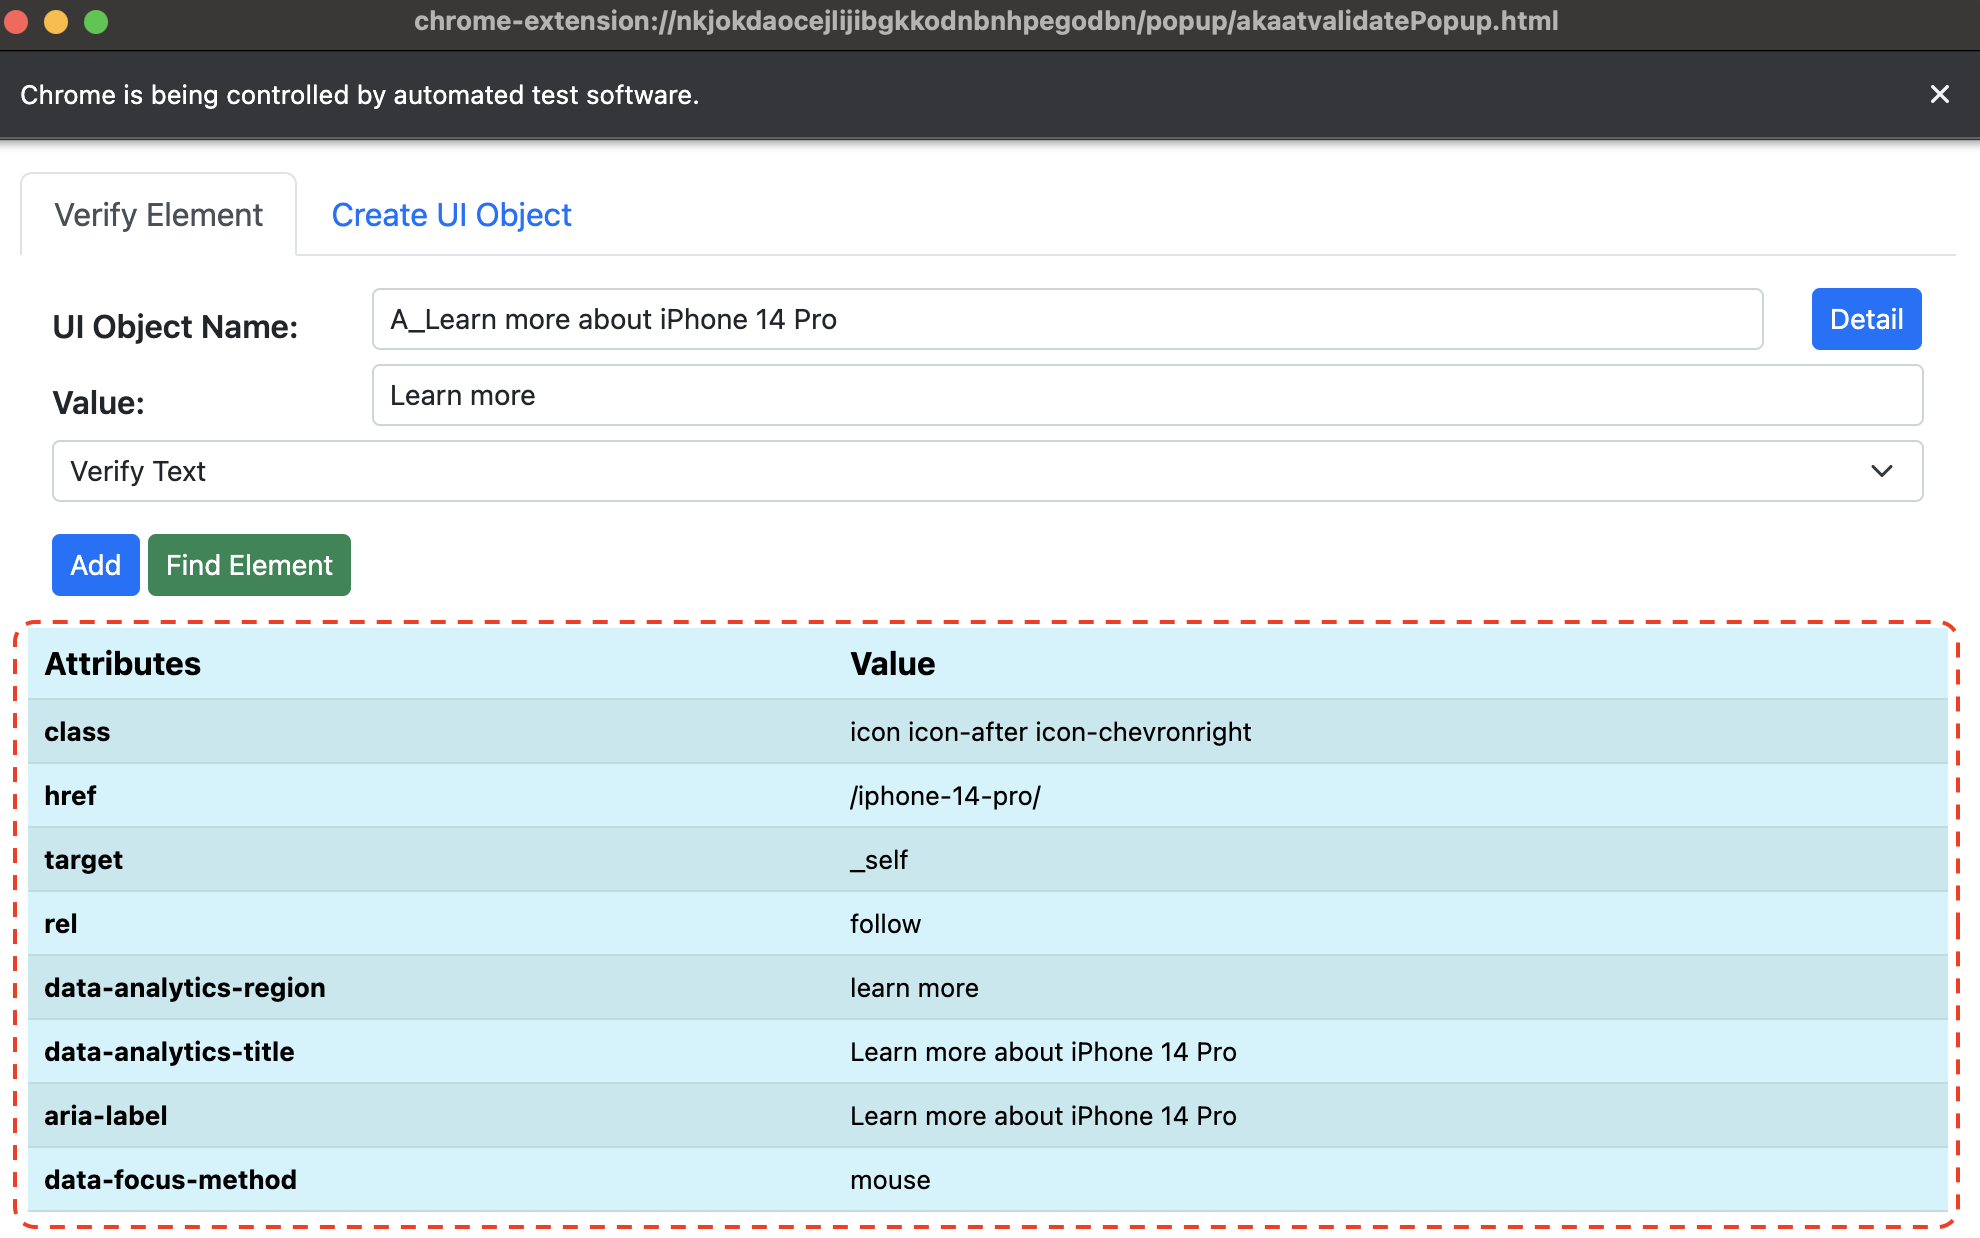
On the other hand, you can Find element which you are inspecting, that element will be hightlighted
c. Creating expected UIObjects while recording:
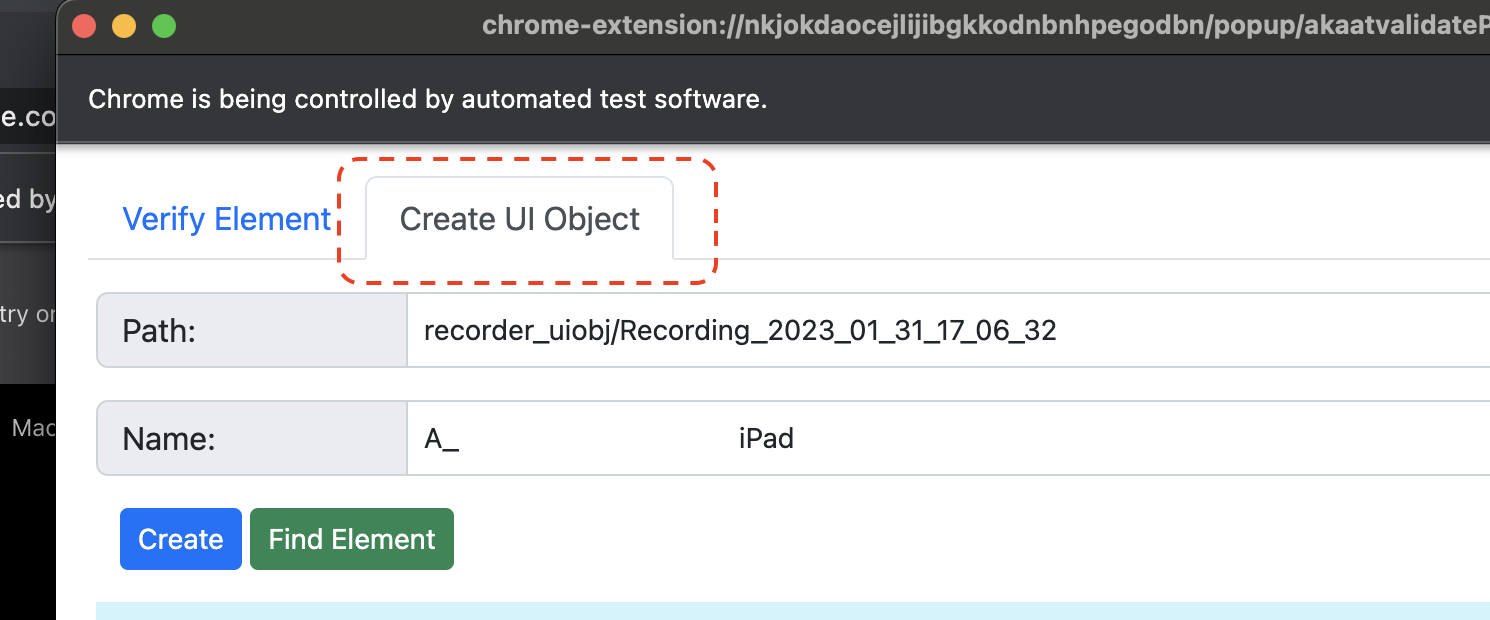
From existing extension opening after selecting akaAT Plugin-Verify Element, you can click tab [Create UI Object]
Or you can select element and choose akaAT Plugin-Create UIObject
Or
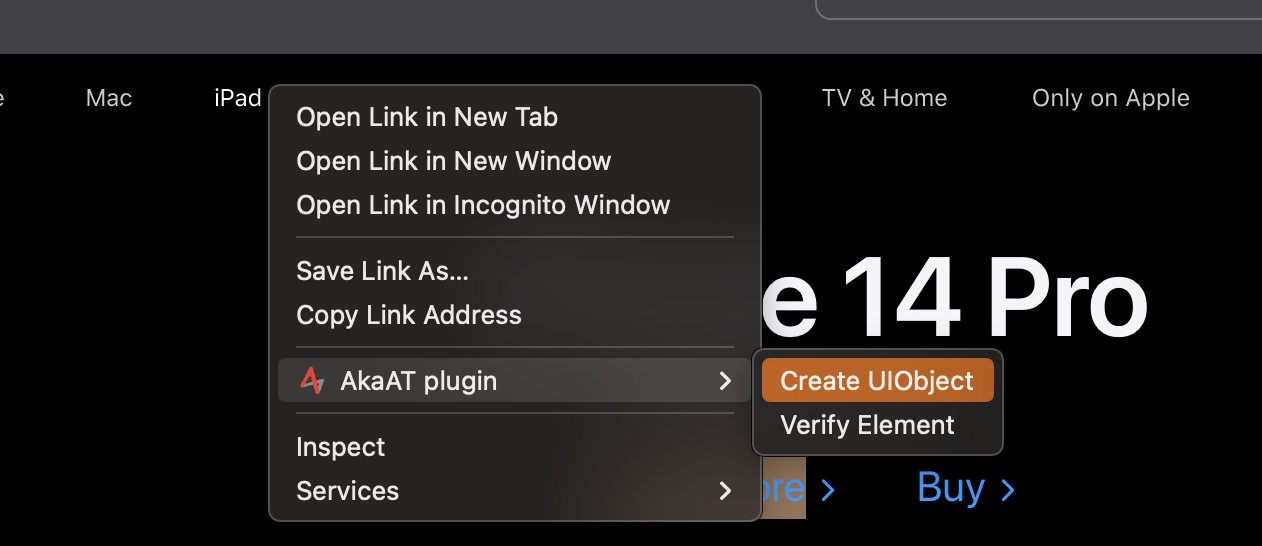
Step 1: Open Popup Create UIObject by 2 ways as above
Step 2: On the screen of Create UIObject:
- akaAT Extension auto-completes Path storing this UIObject in akaStudio
- akaAt Extension auto-completes Name of this UIObject by on it's Label/text (Note: you can name it differently)
- Select any locatore that you want to add to tool (you select all or just one you found the most effective)
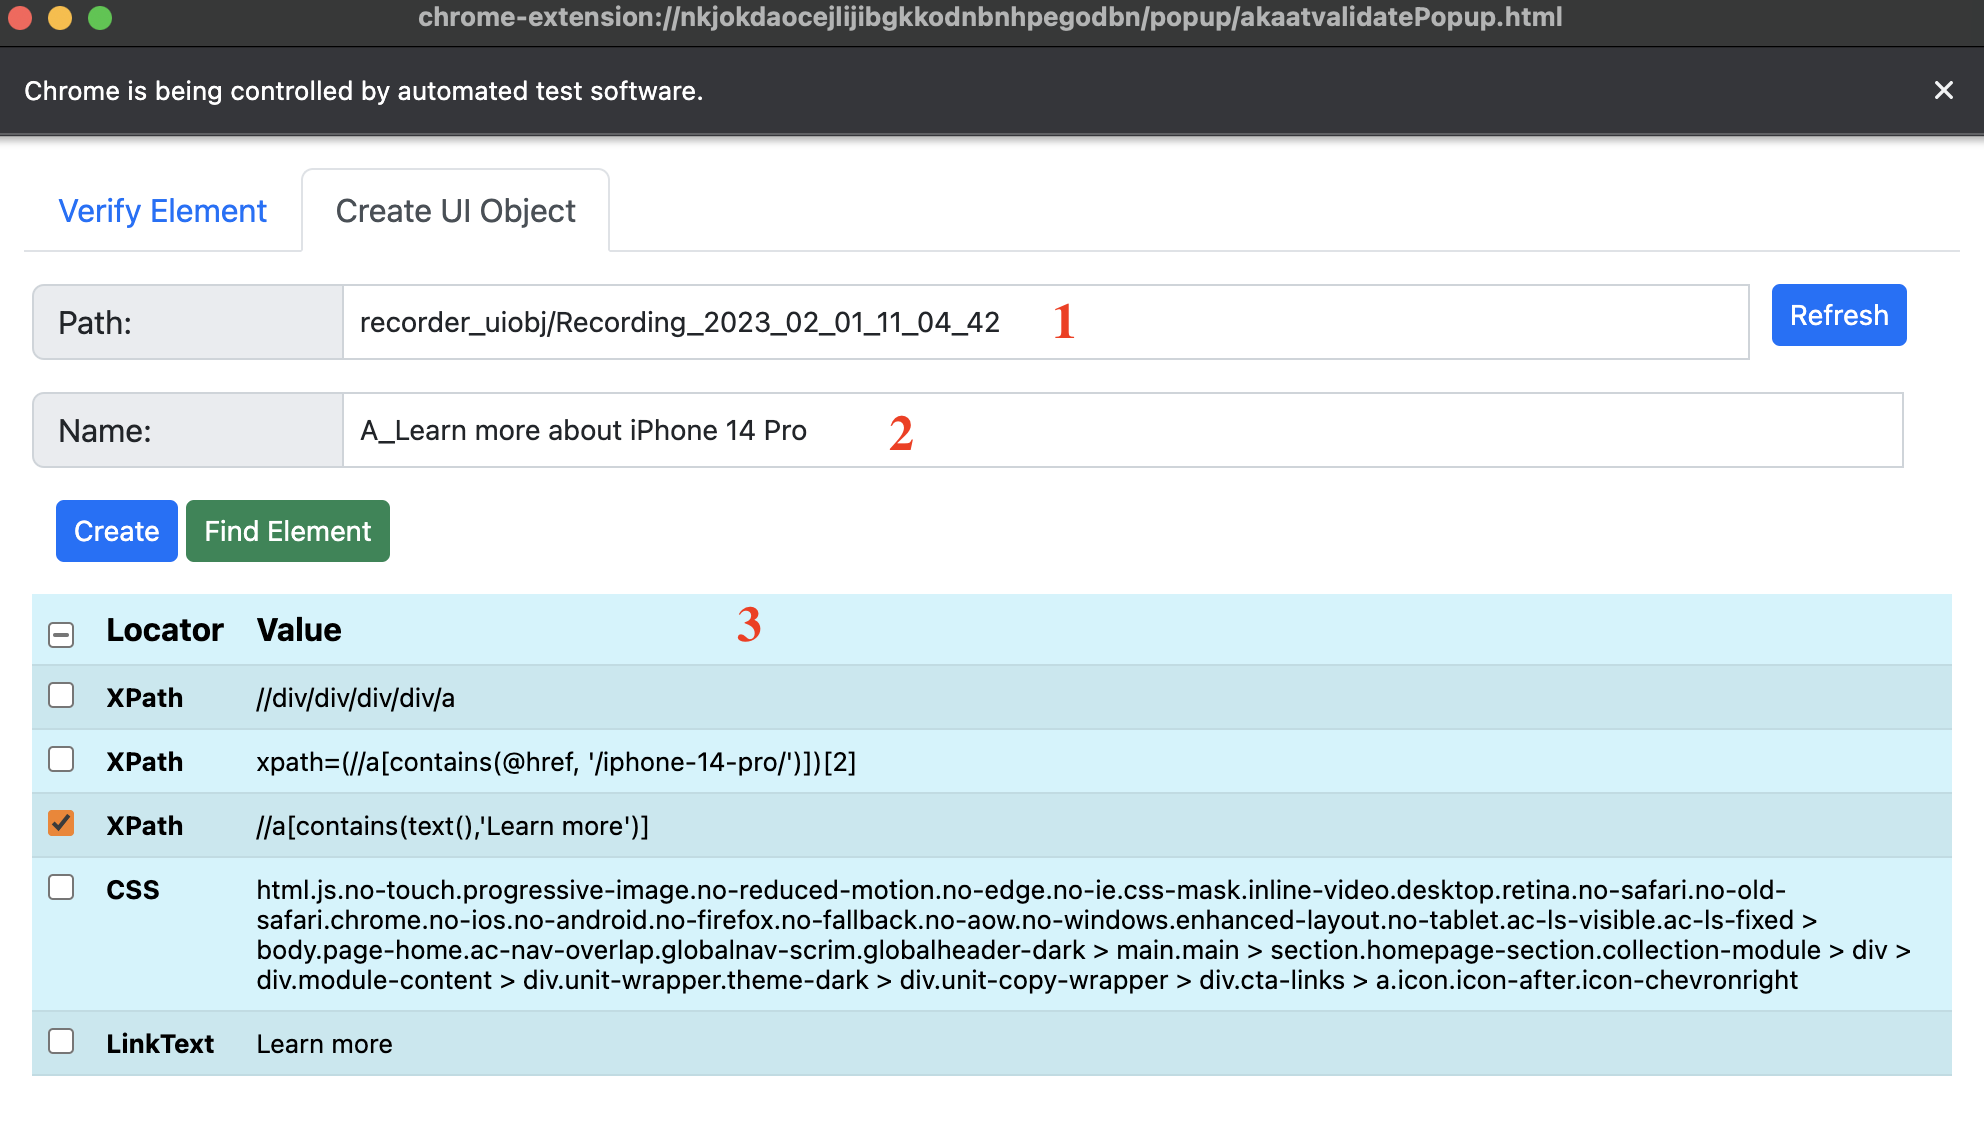
Step 3: Click Create button to add this UIObject to akaAT Studio - Object Repository
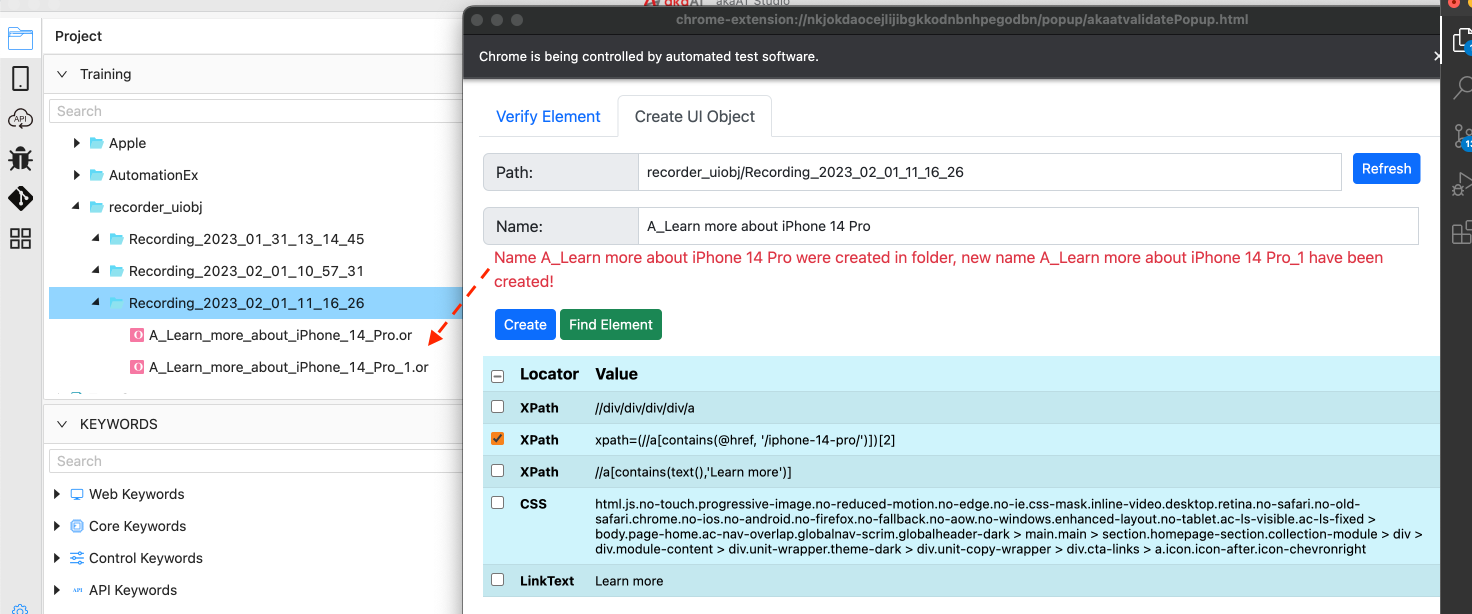
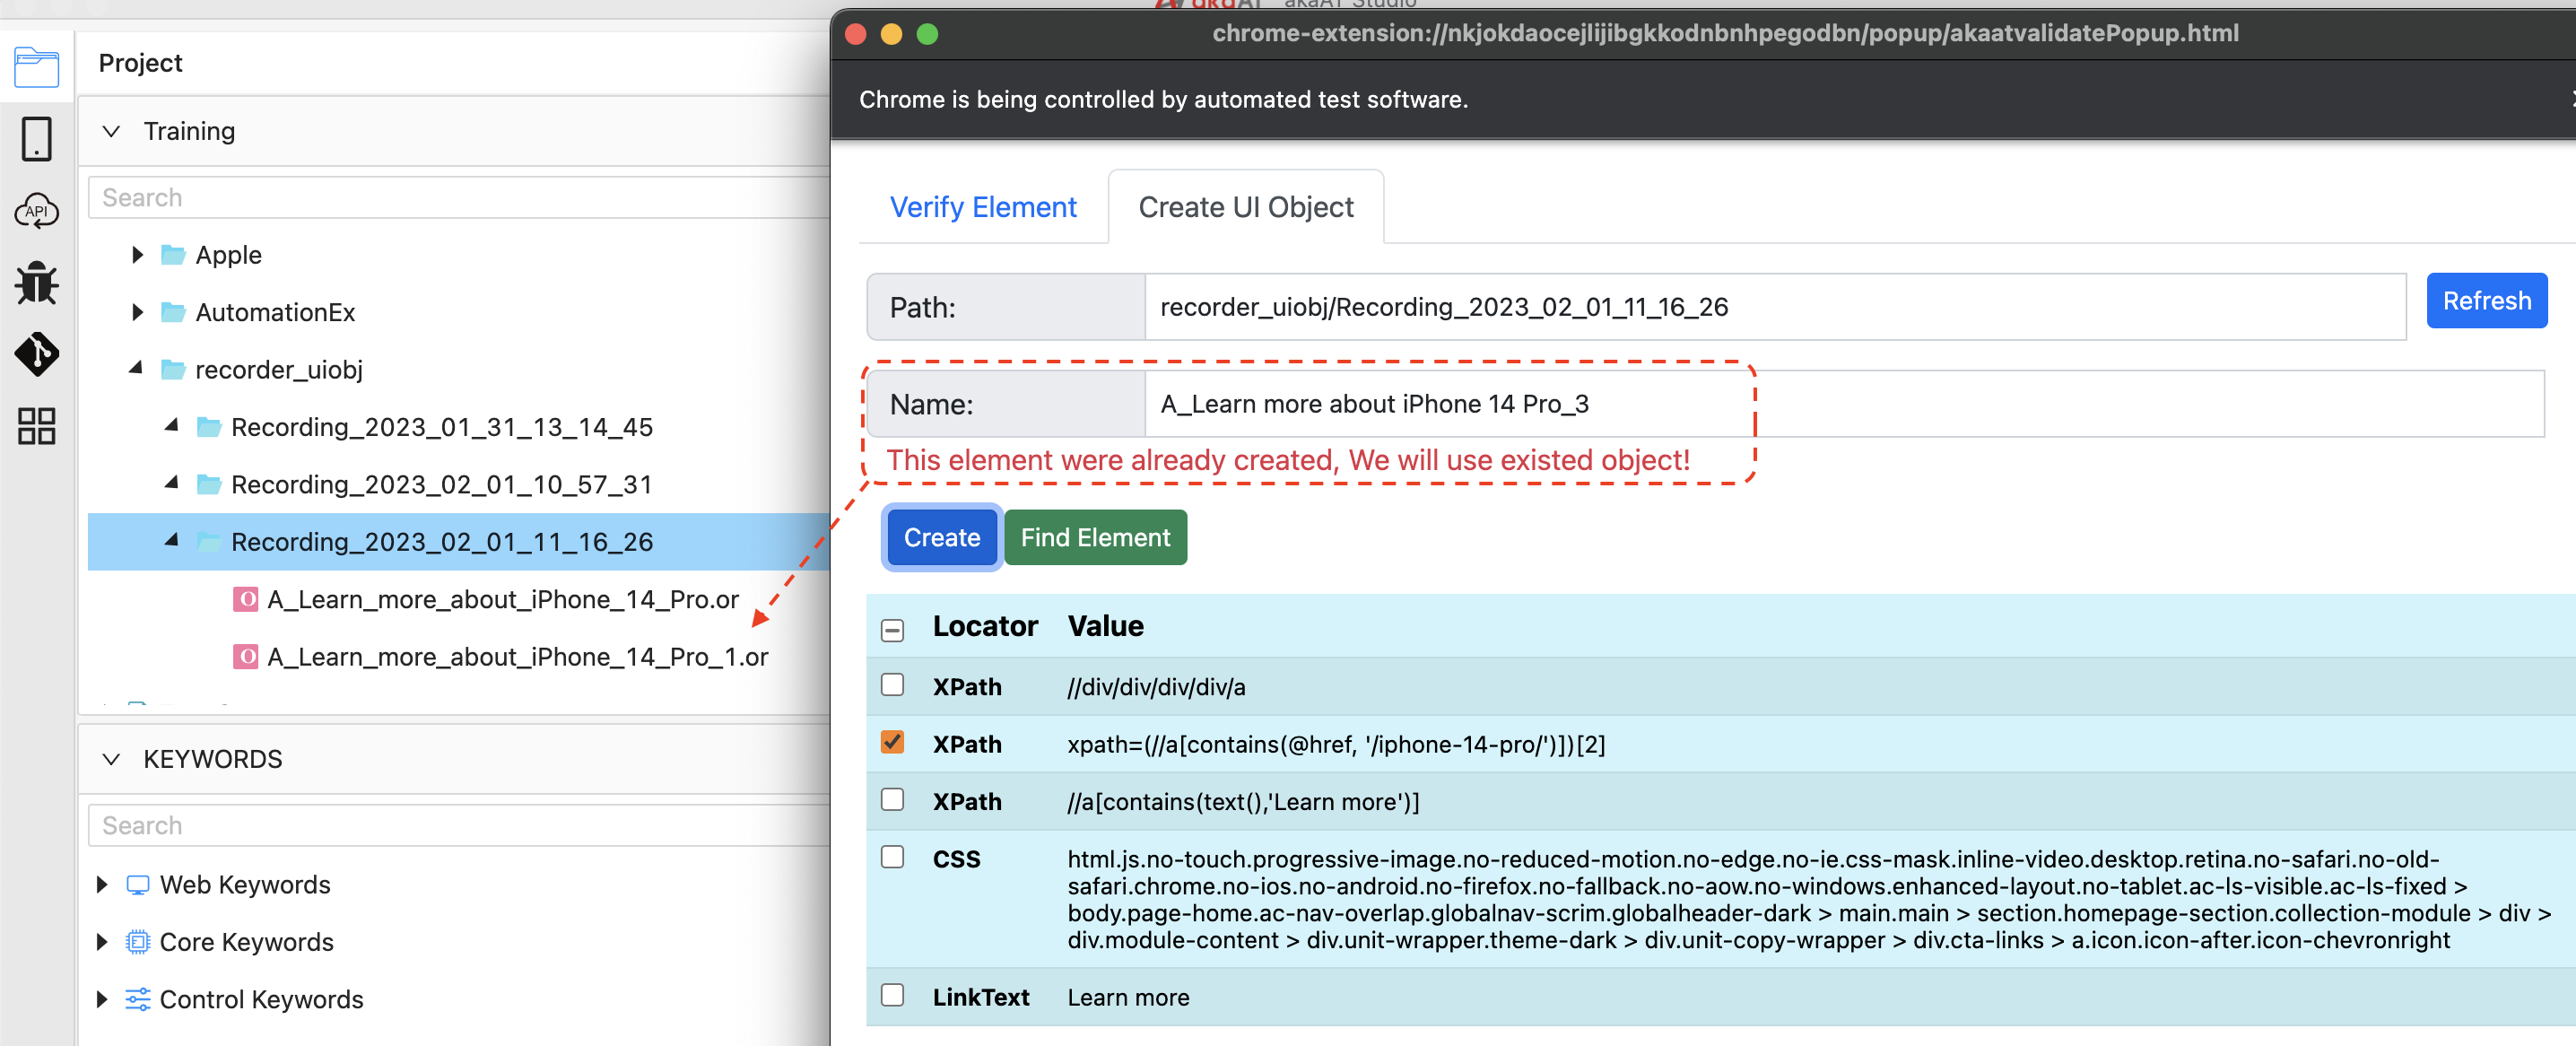
Note: If this UIObject has been add to akaAT Studio (Duplicate Name/Locator in the same path), there are warning messages will display
- Same Name:
- Same Locator:
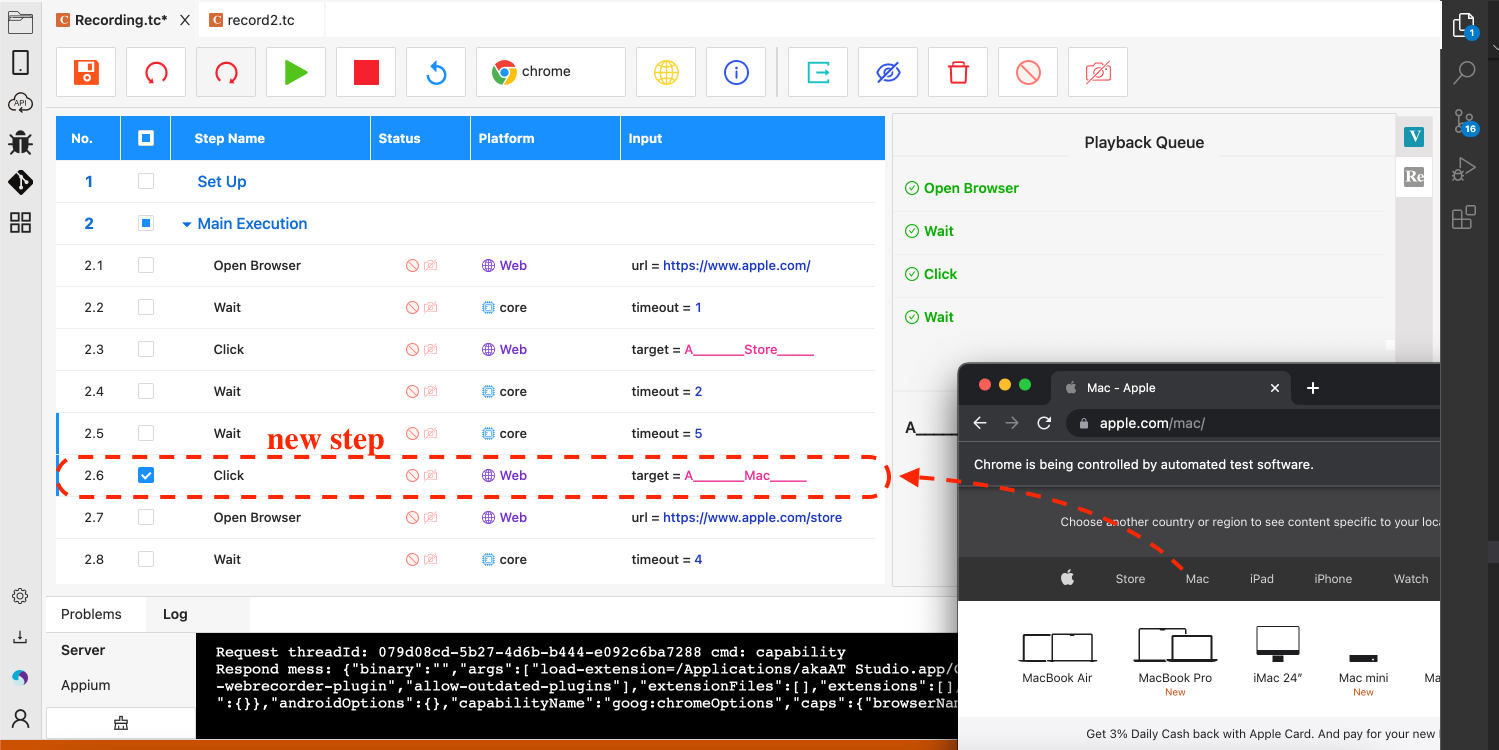
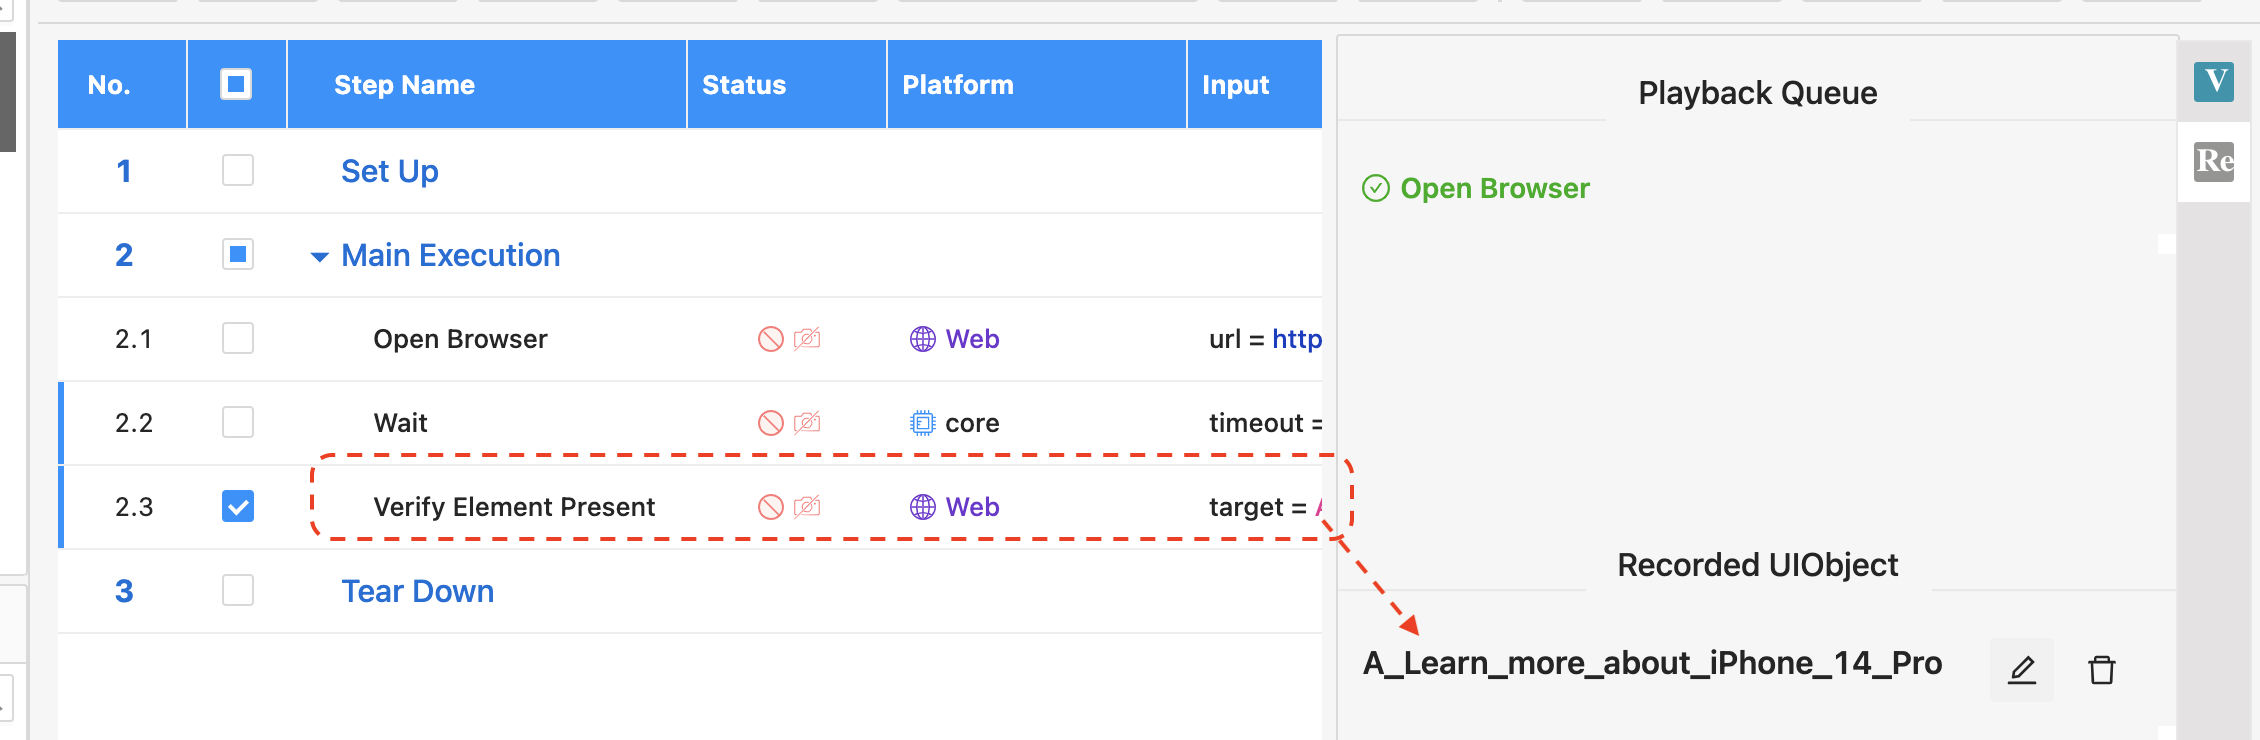
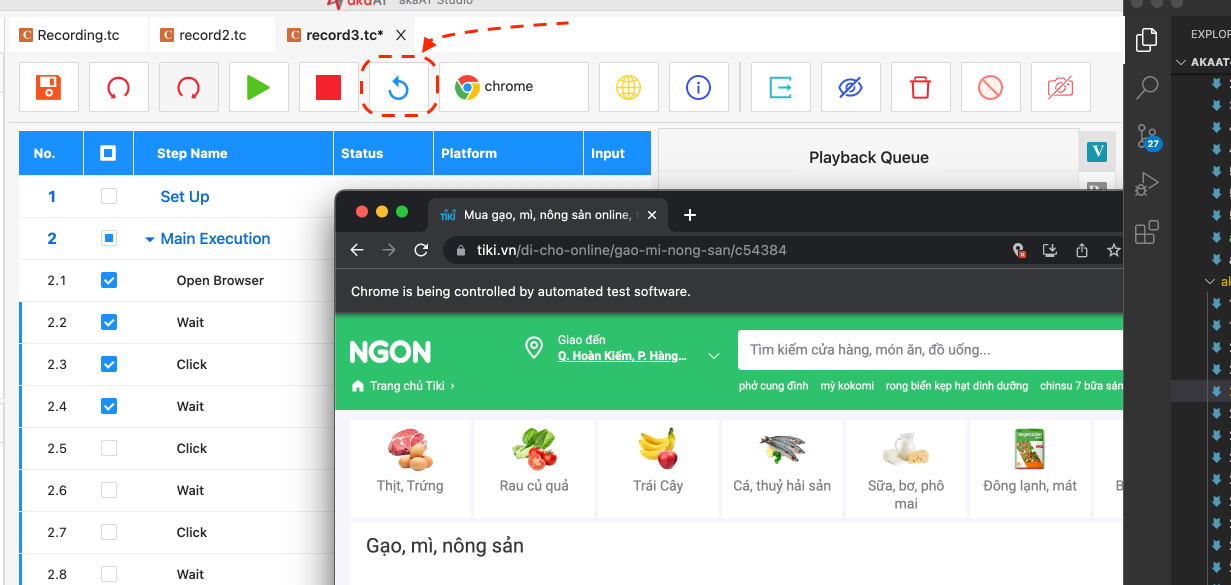
- Playback after recording
a. Playback while recording
In some cases, there is a demand for playbacking some steps to look back previous steps or go back previous screen, we can use this funtion
Note: Playback steps while recording would not generate new steps
c. Continue recording
Step 1: Select any step in the testcase, then click [Record] button. Playback Queue before continuing record more step
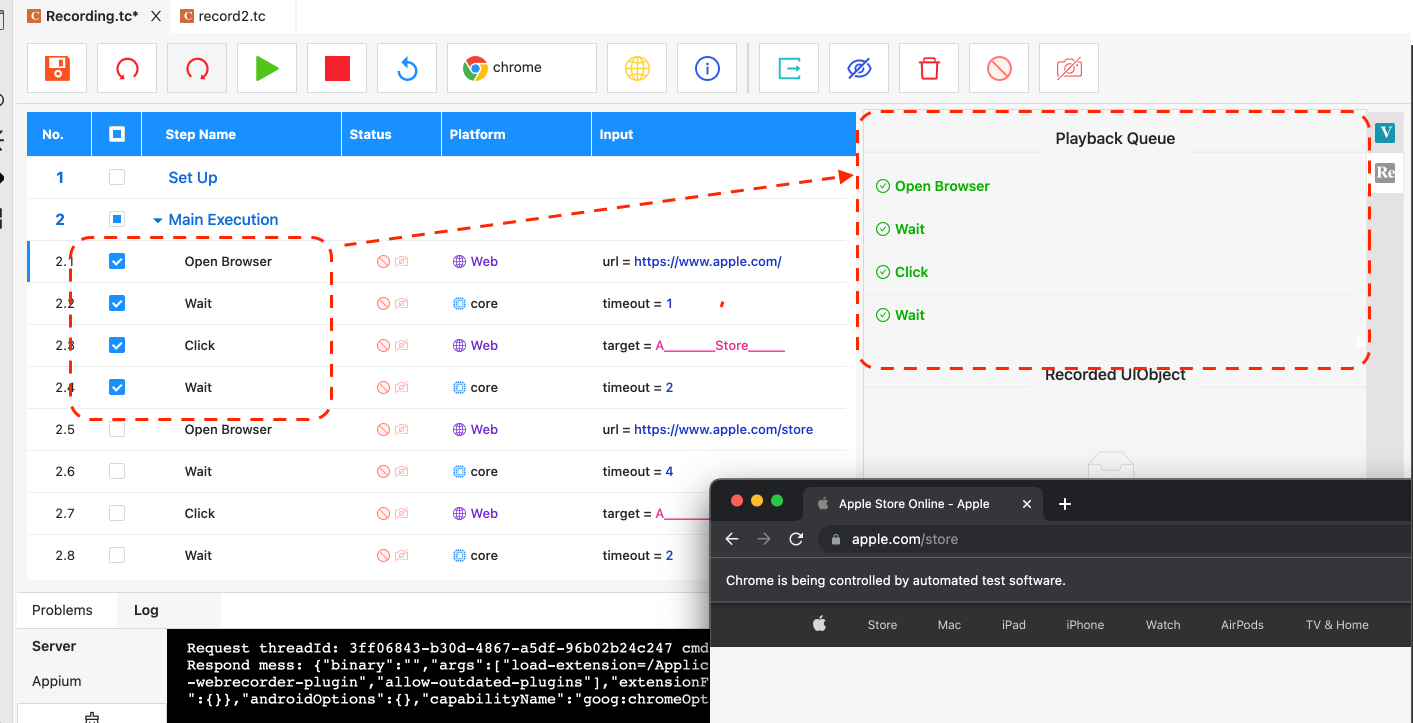
Step 2: After all steps finnished in queue, do any others action on the web, new steps would be added next to last steps selected