Database Setting
The database settings folder will contain database configurations used to connect to the database through database management systems such as mySQL, SQL Server...
Config Database setting is precondition for:
Create first Database Query (by DB Query Objec) (Refer: 2.6 Database Query Object) These objects then will be added into Steps in testcase (using Database keywords)
Create a Test data file by querying from database (Refer: 3.3 Data-driven Testing )
2.14.1 Overview
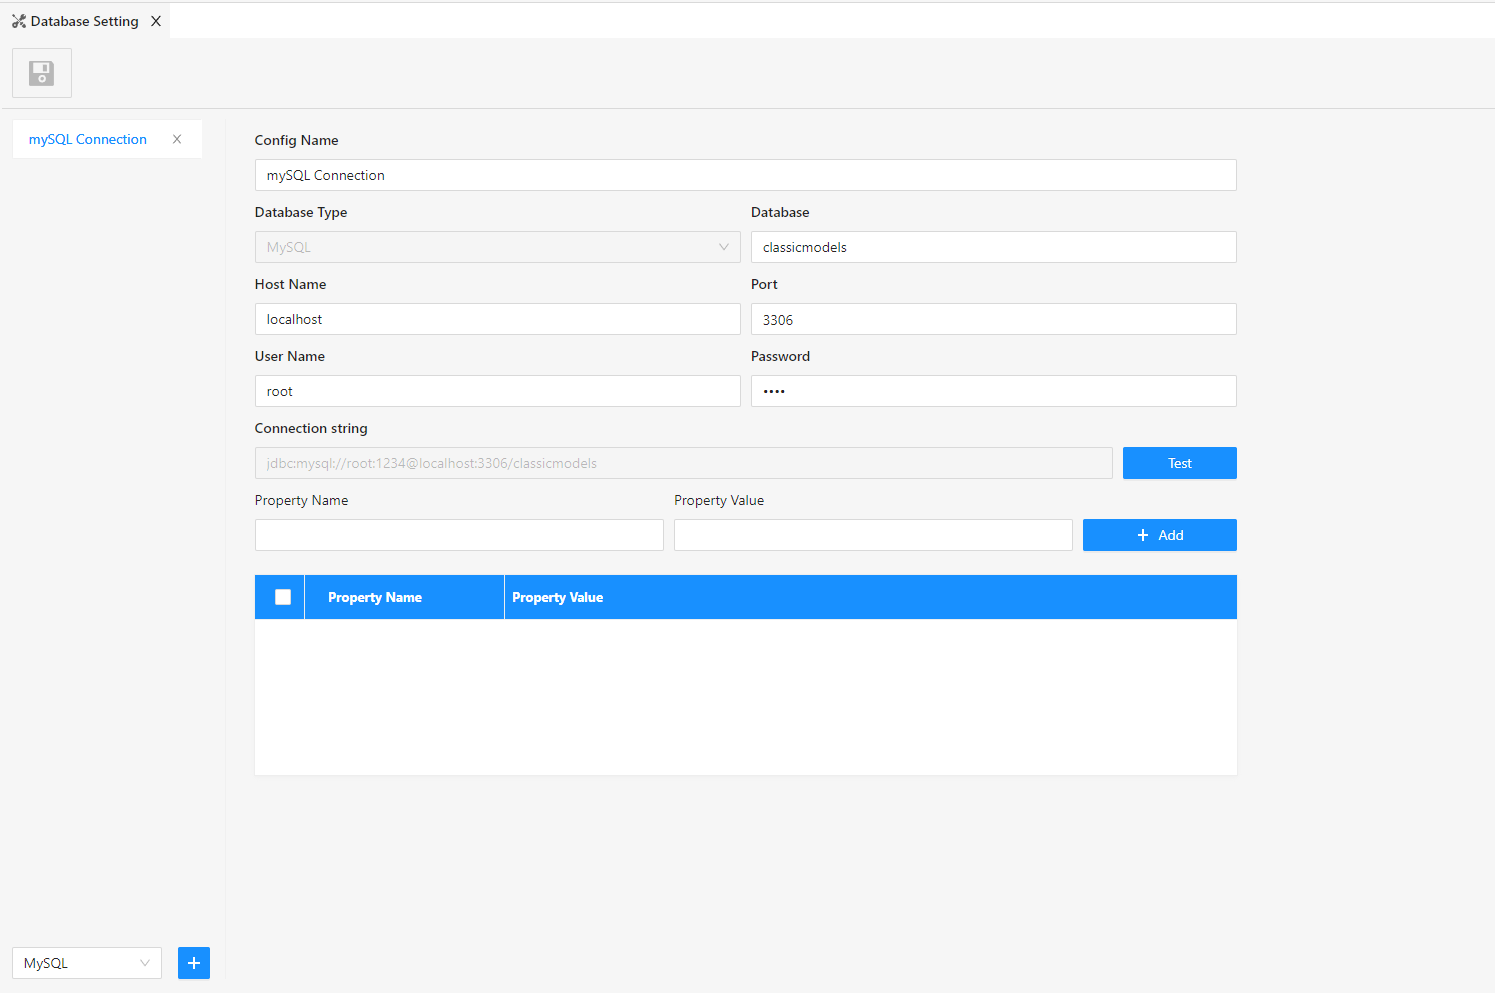
The screen of the database settings

Data description
| No | Name | Description |
|---|---|---|
| 1 | Config Name | (Editable) Name for the database config (free text) |
| 2 | Database Type | (Readonly) Type of Database |
| 3 | Database | (Editable) Name of database (refer your DB) |
| 4 | Host Name | (Editable) Host Name of database (refer your DB) |
| 5 | Port | (Editable) Port connect (refer your DB) |
| 6 | User Name | (Editable) Username's account login into database (if any) |
| 7 | Password | (Editable) Password's account login into database (if any) |
| 8 | Connection string | (Readonly) Connection string auto genarated after you input fields |
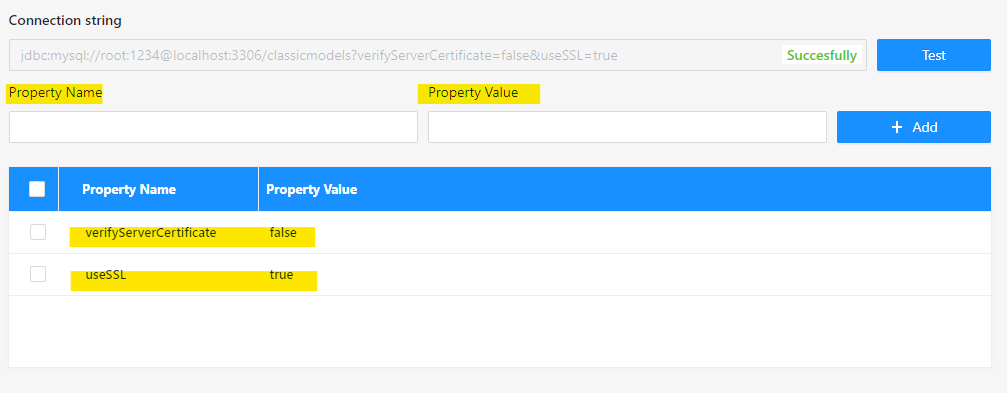
| 9 | Property Name | (Editable) Name of property (if any) (refer your DB) |
| 10 | Property Value | (Editable) Value of property (if any) (refer your DB) |
| 11 | Test | (Clickable) Click to check database connection |
2.14.2 Setup Database Connection
Note that each database have different configuration libraries. This setup just do it once for each database.
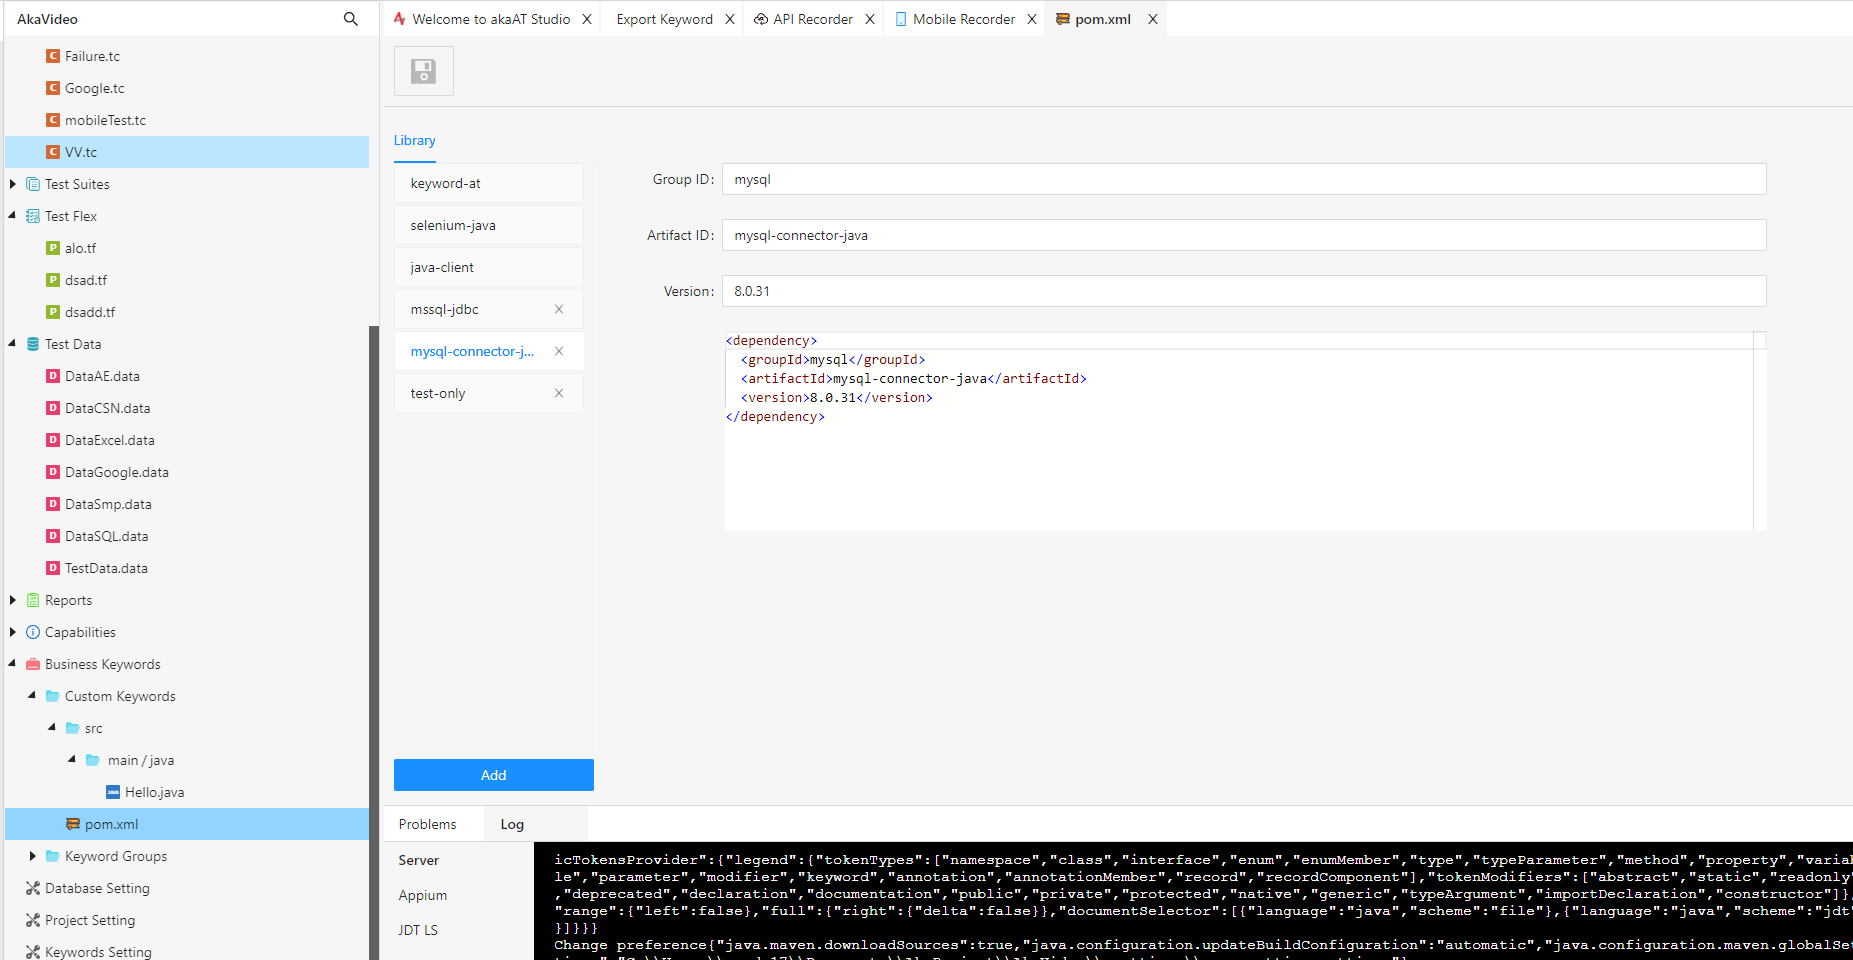
First you need add corresponding connection with database that you are using (mssql jdbc for sql server or my-sql connector for my sql,...) through pom file (Refer: 2.17. Import library using maven pom.xml)
1. Example of jdbc for My SQL Connector
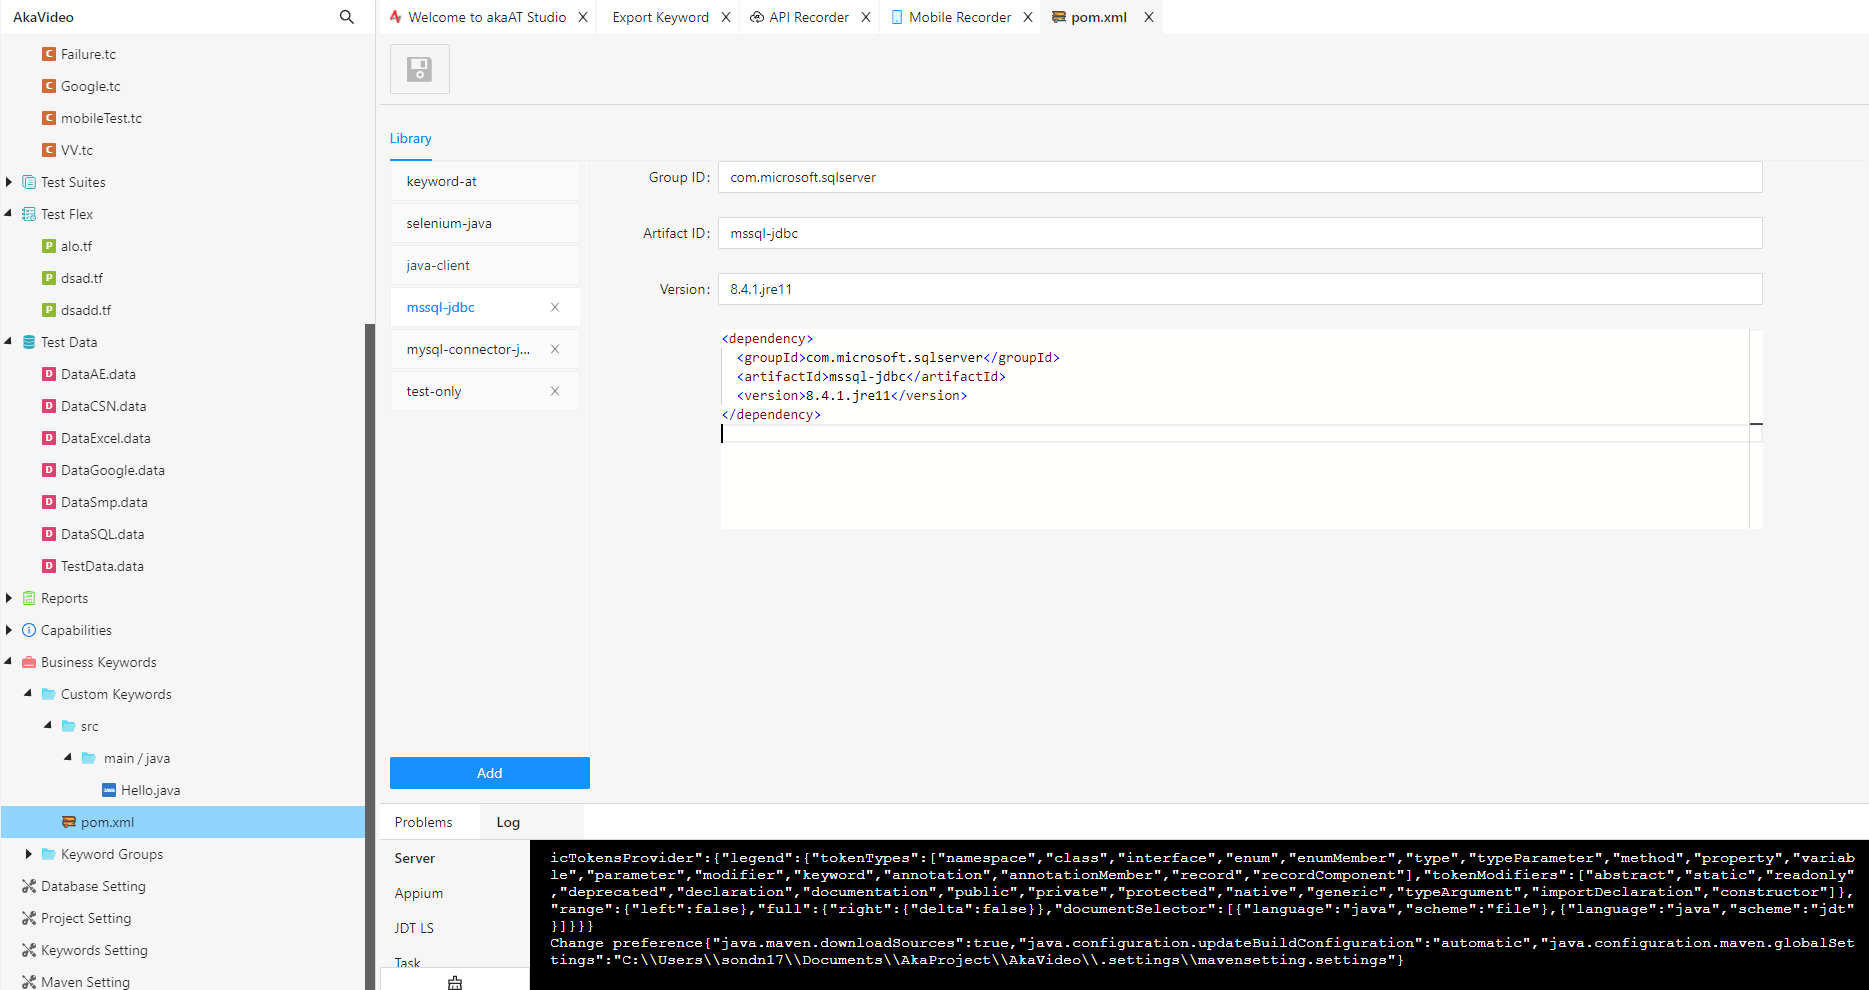
2. Example SQL Server JDBC
Then you will need to configure the connection to the database you are using then configure the fields to create the database connection Test button is used to check whether the connection is successful or not then press save button.
2.14.3 Example:
With MySQL Database:
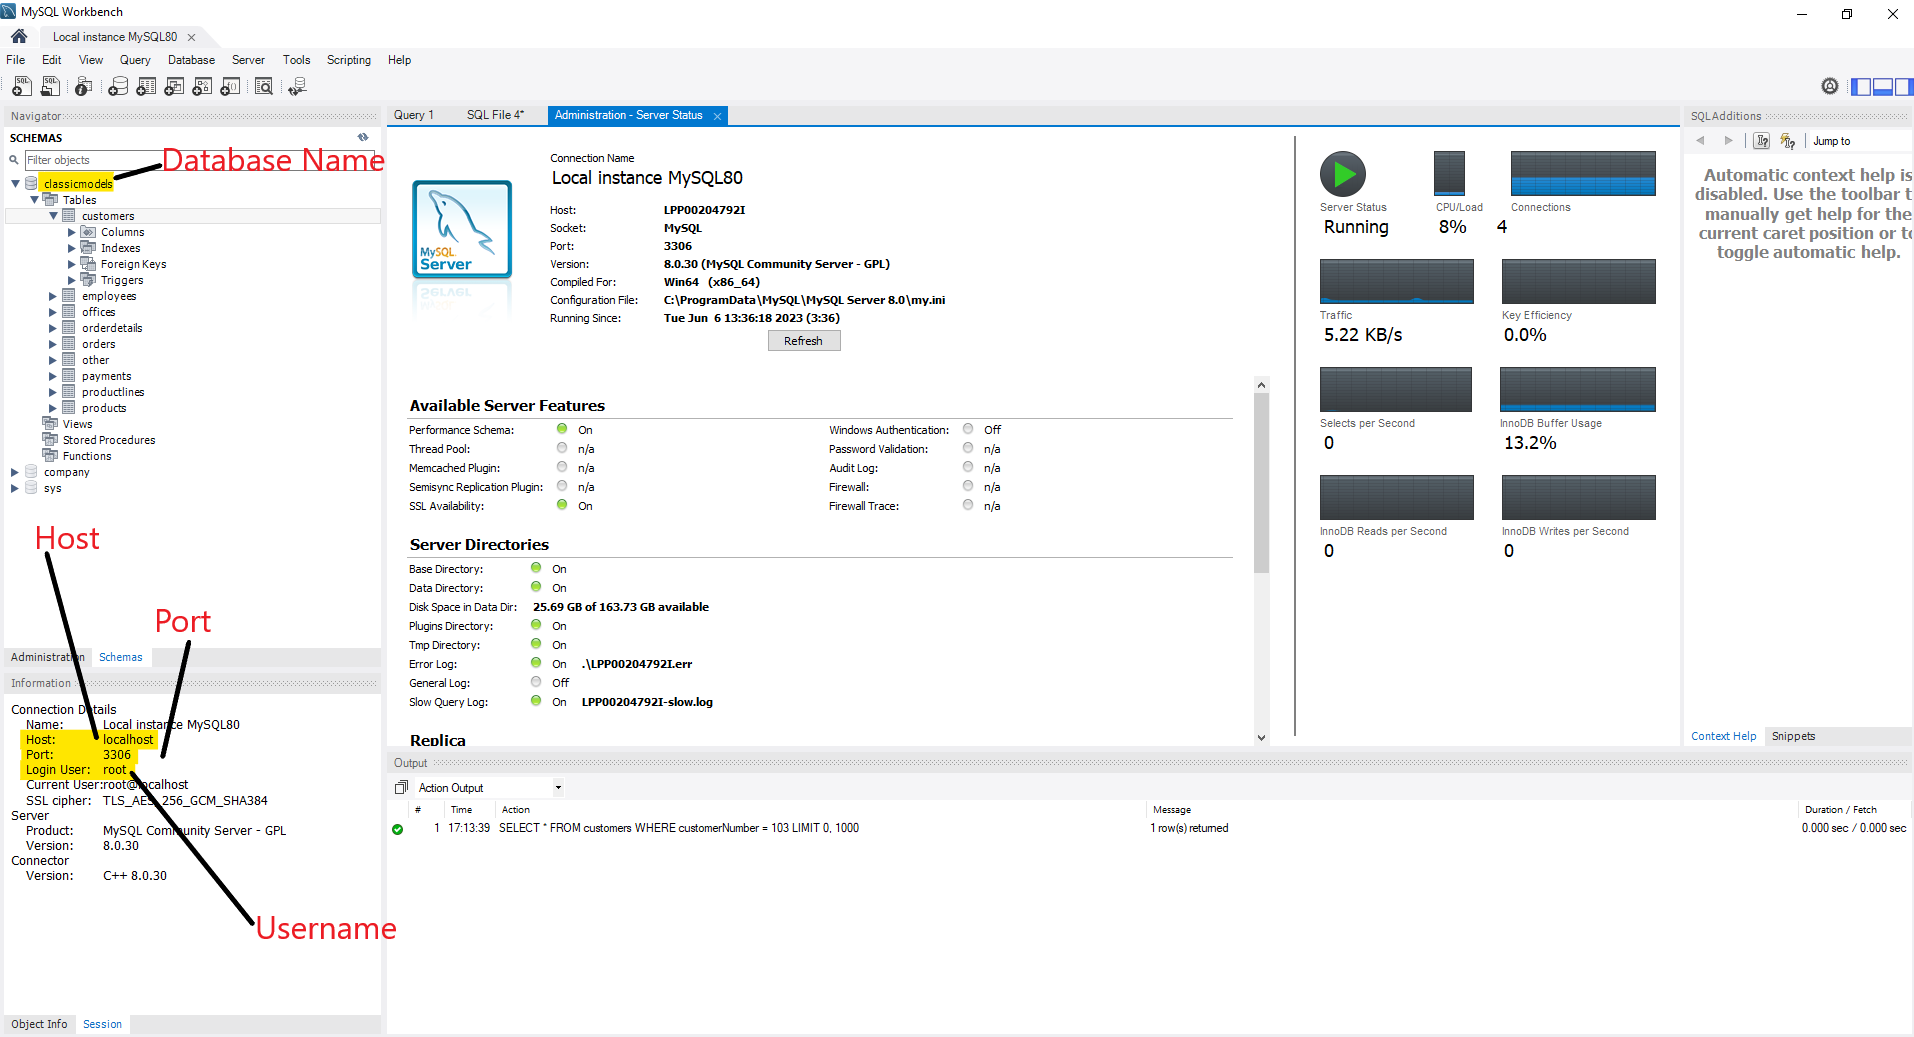
Step 1: Open MySQL Workbench
Step 2: Config into akaAT Studio Tool
Step 3: Click Test button to check connection
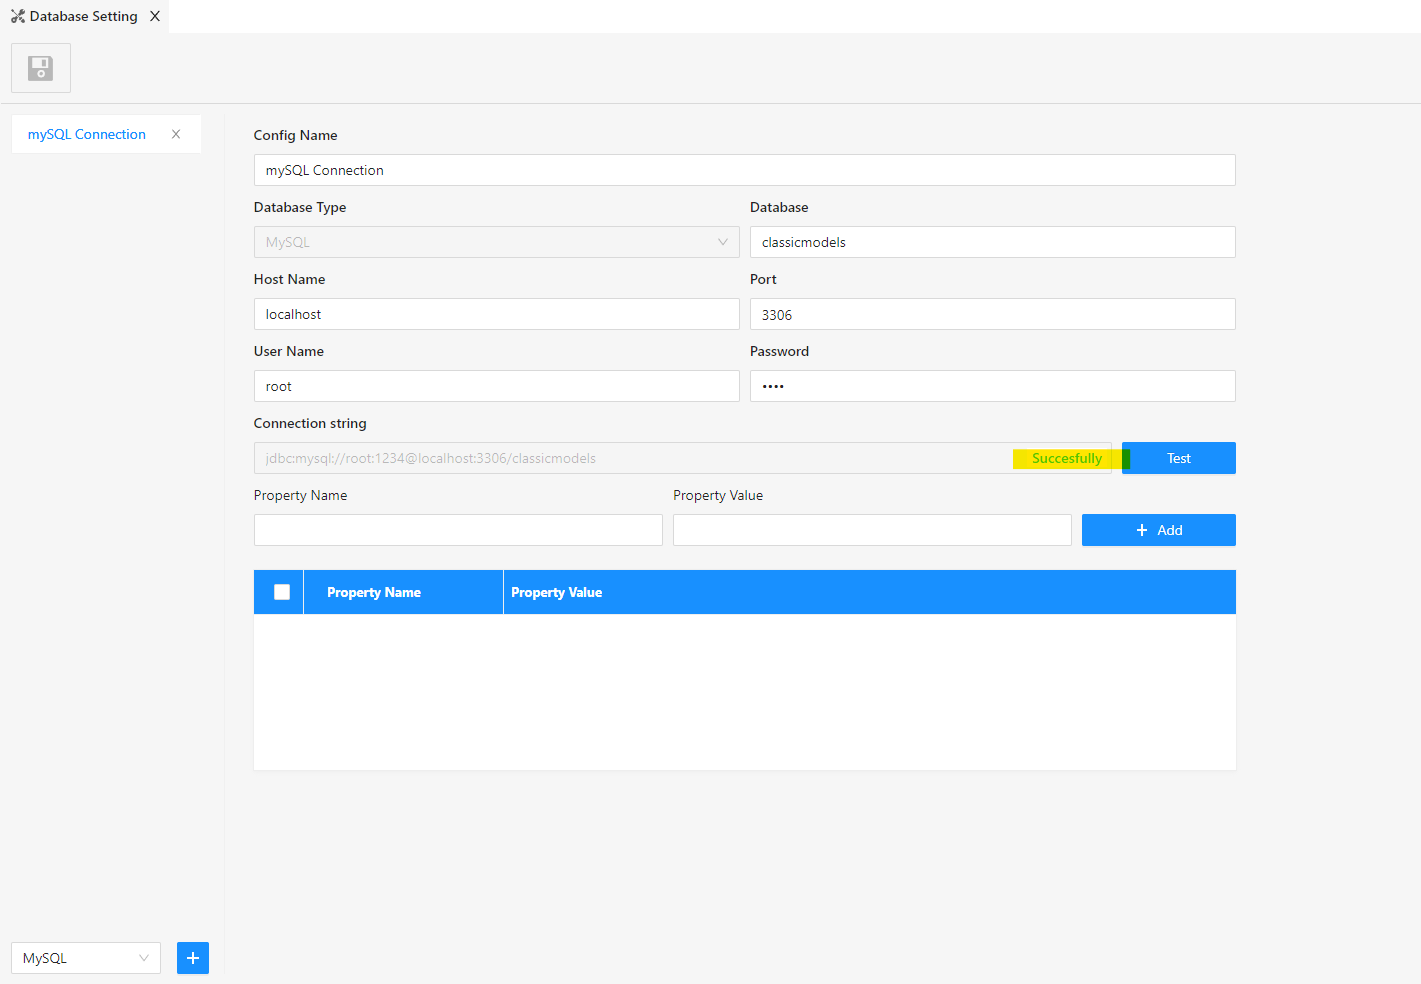
- If connection is successful then you will see the notice that "Successfully" and if connection is failed then you will see the notice that "Failed".
- In some cases, the connection string will be need more fields or properties to connect to database. You should be adding more properties in here:
- You can follow up to the Database Testing section to Create a test case for Database testing.